MQTTX Copilot (Beta)
MQTTX Copilot is an AI assistant designed to assist with MQTT-related queries, provide solutions for common issues, and offer insights into best practices.
It plays a crucial role in testing MQTT connections, publishing, subscribing to topics, debugging, and developing MQTT applications and brokers, simplifying these processes and enhancing the overall MQTT experience.
Note: MQTTX Copilot is currently in beta and has been available since version 1.9.7. The accuracy and quality of its responses depend on the capabilities of the LLM used.
Configure AI Provider
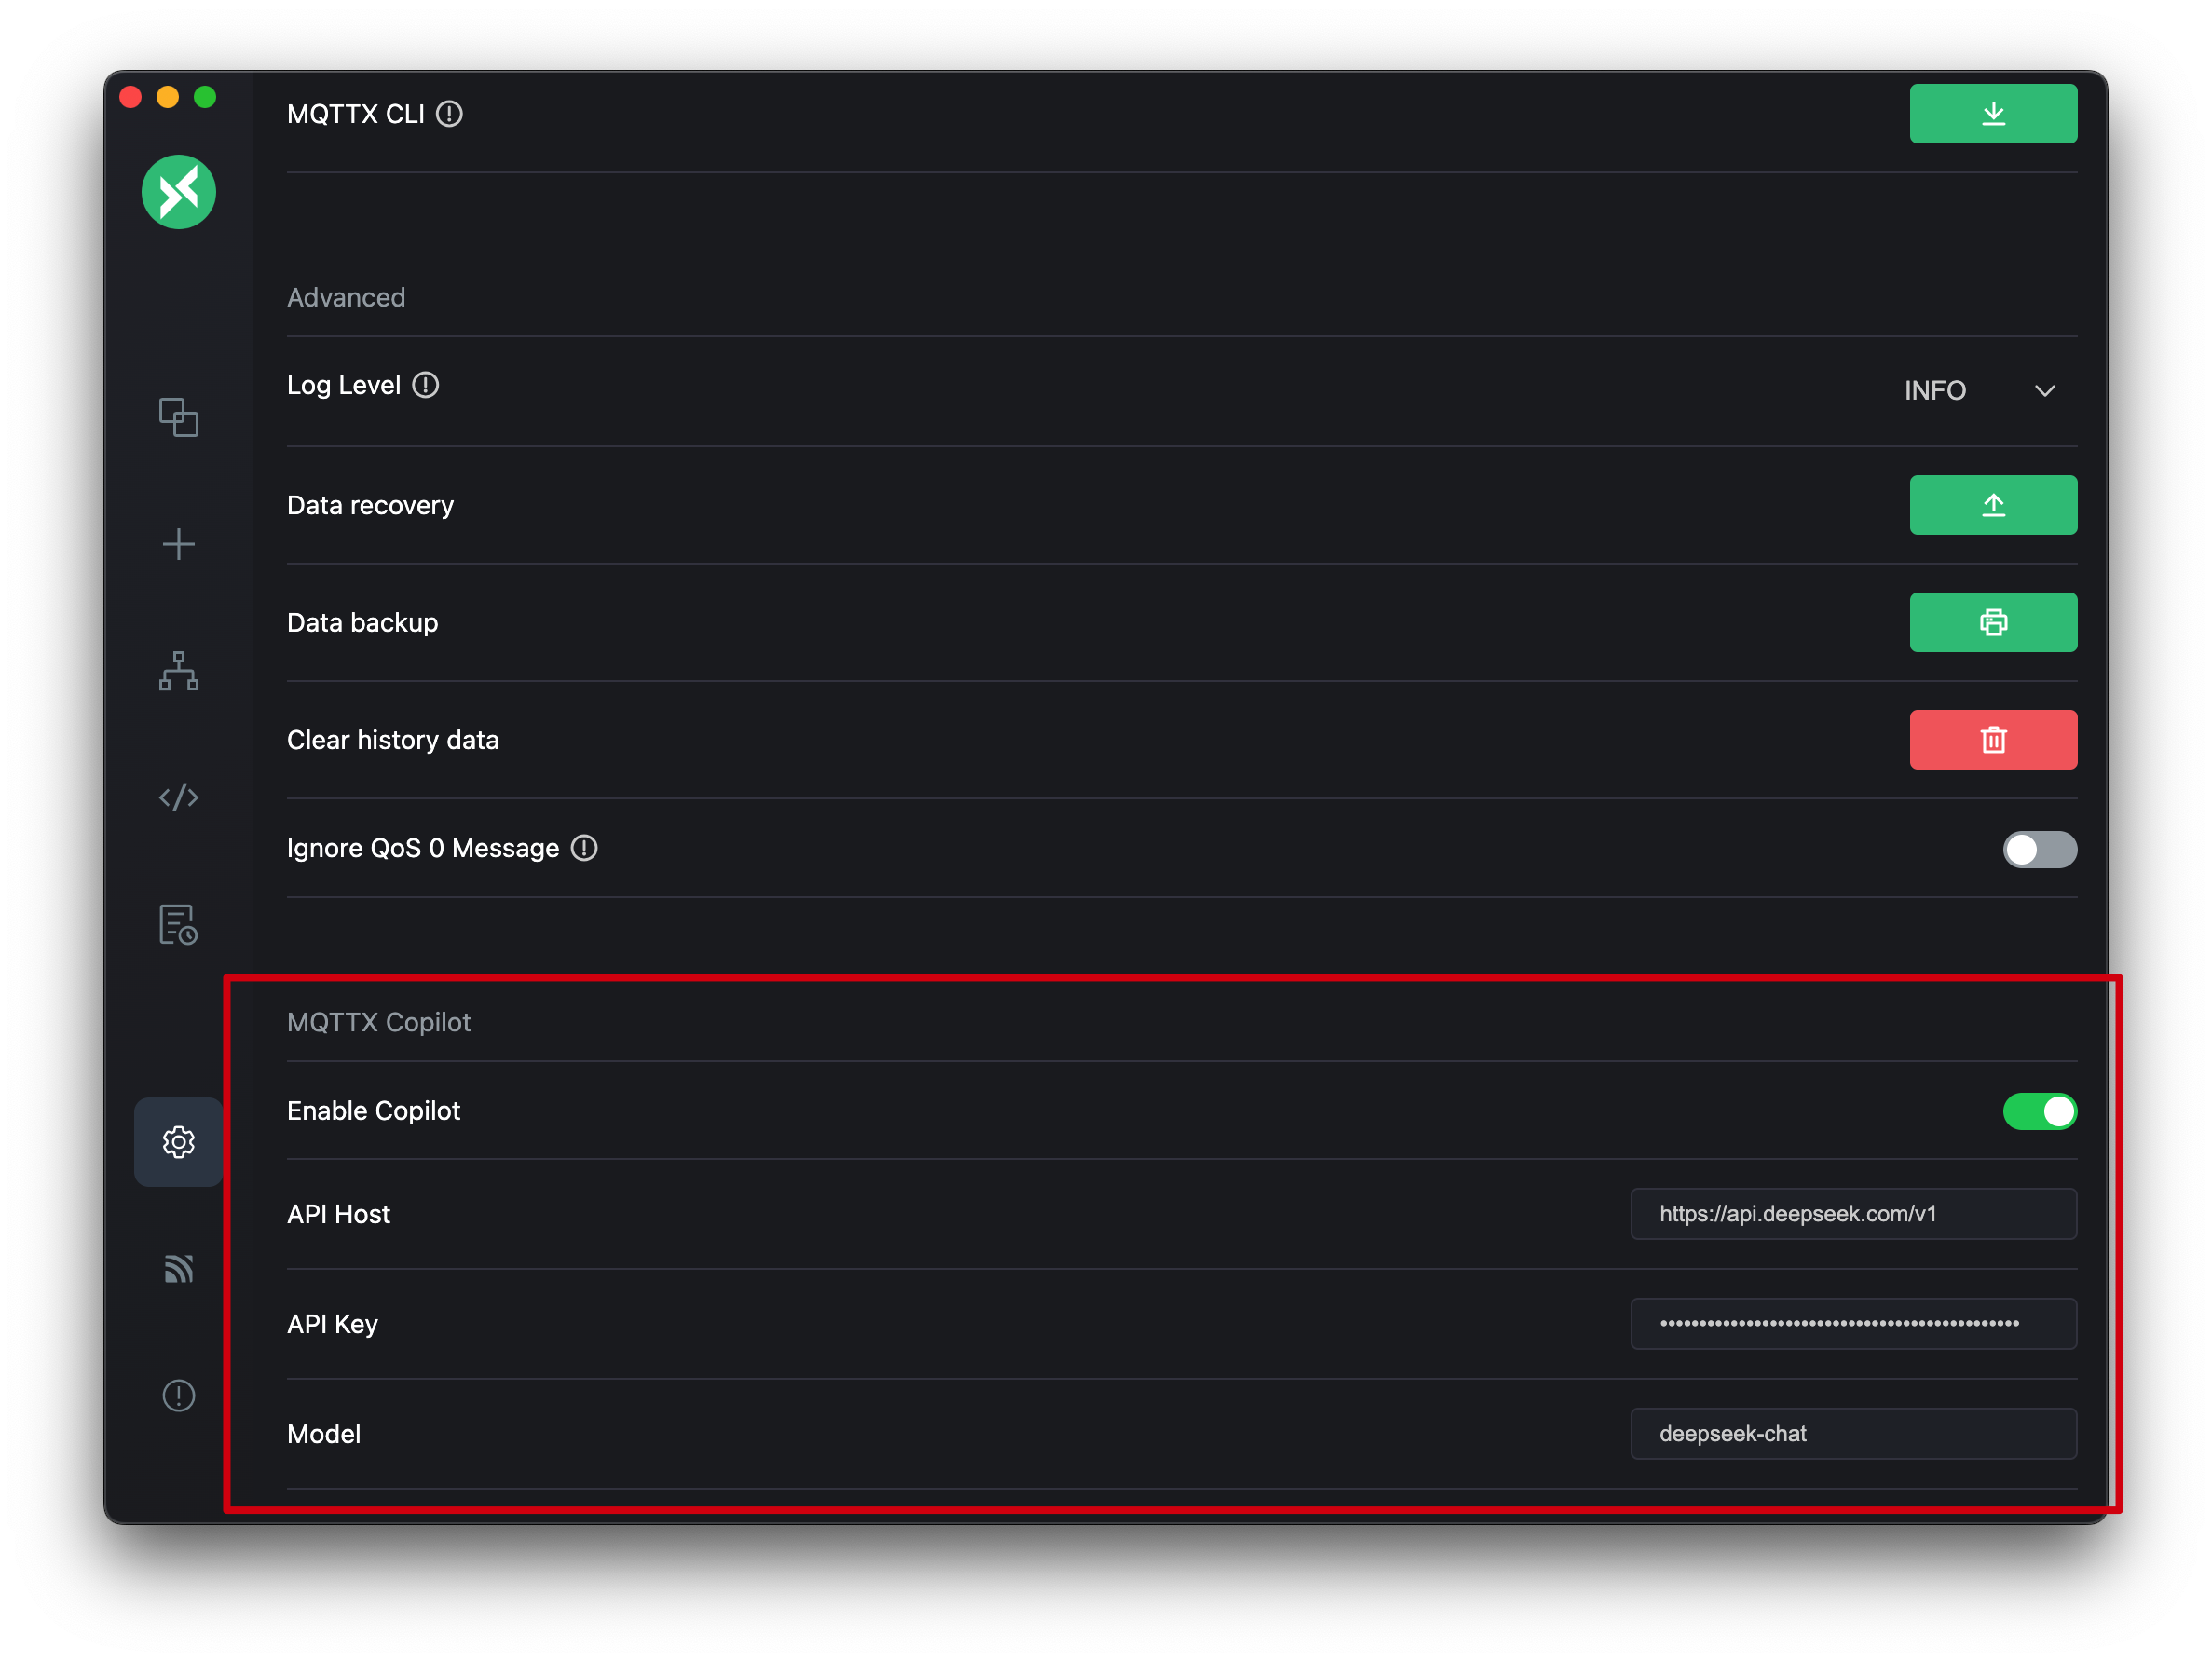
To use MQTTX Copilot, you need to configure a supported AI provider. This typically involves the following steps:
- Obtain the API Key from your chosen AI provider.
- Navigate to the Settings page in MQTTX and find the Copilot configuration area.
- Select or enter the API Host (API endpoint address). You can use the provider's official endpoint (some are built into the dropdown list, as shown below) or enter your custom API address (e.g., pointing to a self-hosted service).
- Enter your API Key.
- Select or enter the Model (model name).
MQTTX has built-in support for several AI providers. Click on a provider name below for specific configuration details:
DeepSeek
- Get API Key: Visit DeepSeek API Keys.
- API Host:
https://api.deepseek.com/v1 - Example Models:
deepseek-chat,deepseek-reasoner
OpenAI
- Get API Key: Visit OpenAI API Keys.
- API Host:
https://api.openai.com/v1 - Example Models:
gpt-4o,gpt-4o-mini,gpt-4.1,o1,o3-mini, etc.
Anthropic (Claude)
- Get API Key: Visit Anthropic Console.
- API Host:
https://api.anthropic.com/v1 - Example Models:
claude-opus-4-20250514,claude-opus-4-20250514-thinking,claude-sonnet-4-20250514,claude-sonnet-4-20250514-thinking,claude-3-7-sonnet-20250219,claude-3-7-sonnet-20250219-thinking,claude-3-7-sonnet-latest, etc.
xAI (Grok)
- Get API Key: Visit xAI Console (path may vary).
- API Host:
https://api.x.ai/v1 - Example Models:
grok-3-beta,grok-3-fast-beta,grok-2-1212, etc.
Google (Gemini)
- Get API Key: Visit Google AI Studio.
- API Host:
https://generativelanguage.googleapis.com/v1beta - Example Models:
gemini-2.5-pro,gemini-2.5-pro-thinking,gemini-2.5-flash,gemini-2.5-flash-thinking, etc.
Azure OpenAI
Please pay special attention when configuring Azure OpenAI, as its configuration differs from other providers due to current MQTTX limitations to accommodate Azure's specifics:
- Get API Key: Obtain the key for your deployed OpenAI service from your Azure Portal.
- API Host:
- You can enter either the Resource Name (e.g.,
your-resource-name) or the full Endpoint URL (which might include a path like/openai/deployments) of your Azure OpenAI service in this field. - Regarding API Version: MQTTX uses a default
api-version(2025-01-01-preview). If you need to use a specific API version different from the default, you must manually append the?api-version=YOUR_API_VERSIONparameter to the end of theAPI Hostfield. ReplaceYOUR_API_VERSIONwith the version you need (e.g.,2024-02-01). - Example (using default version, with Resource Name):
your-resource-name - Example (using default version, with full URL):
https://your-resource-name.openai.azure.com - Example (using default version, with full URL including path):
https://your-resource-name.openai.azure.com/openai/deployments - Example (specifying version, with Resource Name):
your-resource-name?api-version=2024-02-01 - Example (specifying version, with full URL):
https://your-resource-name.openai.azure.com?api-version=2024-02-01
- You can enter either the Resource Name (e.g.,
- Model (Deployment Name):
- This field requires the specific Deployment Name you set up in your Azure OpenAI service. Choose based on your setup:
- Using MQTTX built-in Azure options: Select or enter one of the common Azure deployment options provided in the dropdown list, which start with
deployment-(e.g.,deployment-gpt-4o,deployment-o1-mini). Thisdeployment-prefix is added by MQTTX for internal distinction from standard OpenAI models and is not required by Azure itself. - Using your custom deployment name: If you created a deployment in Azure with a unique custom name (e.g.,
my-prod-gpt4,test-deploy-001), enter that exact custom name in this field.
- Using MQTTX built-in Azure options: Select or enter one of the common Azure deployment options provided in the dropdown list, which start with
- Important Note:
- Whether you choose a built-in
deployment-prefixed name or enter your own custom deployment name depends on your Azure setup and how you want to reference it here. - Either way, you are providing the name of the specific deployment instance on Azure, not the generic base model name from OpenAI (like
gpt-4o). - This differentiated handling (especially the
deployment-prefix for built-in options) is a necessary approach for MQTTX to support both Azure and other providers and avoid naming conflicts within the current configuration structure, which lacks a dedicated "Provider" field. Future versions of MQTTX plan to optimize the data model for a more native and standard Azure configuration experience.
- Whether you choose a built-in
- This field requires the specific Deployment Name you set up in your Azure OpenAI service. Choose based on your setup:
SiliconFlow
- Get API Key: Visit SiliconFlow Console.
- API Host:
https://api.siliconflow.cn/v1 - Example Models:
deepseek-ai/DeepSeek-V3,deepseek-ai/DeepSeek-R1,Qwen/Qwen2.5-72B-Instruct, etc.
MQTTX provides common options for the providers above in the Model and API Host dropdown lists in the settings for quick selection.
Custom Configuration
In addition to the providers with built-in support, MQTTX Copilot can theoretically support other services that adhere to the OpenAI API format. If you have an API key, API Host endpoint, and model identifier from such a service, you can try manually entering these details in the MQTTX settings.
Please note that compatibility and functionality cannot be fully guaranteed for services without built-in support.
Usage
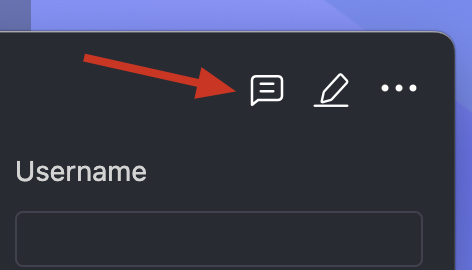
MQTTX Copilot seamlessly integrates into MQTTX Desktop, requiring no additional downloads or installations. To access MQTTX Copilot, click the message icon located in the top right corner of the MQTTX Desktop interface. This feature is currently only accessible from the connection page.
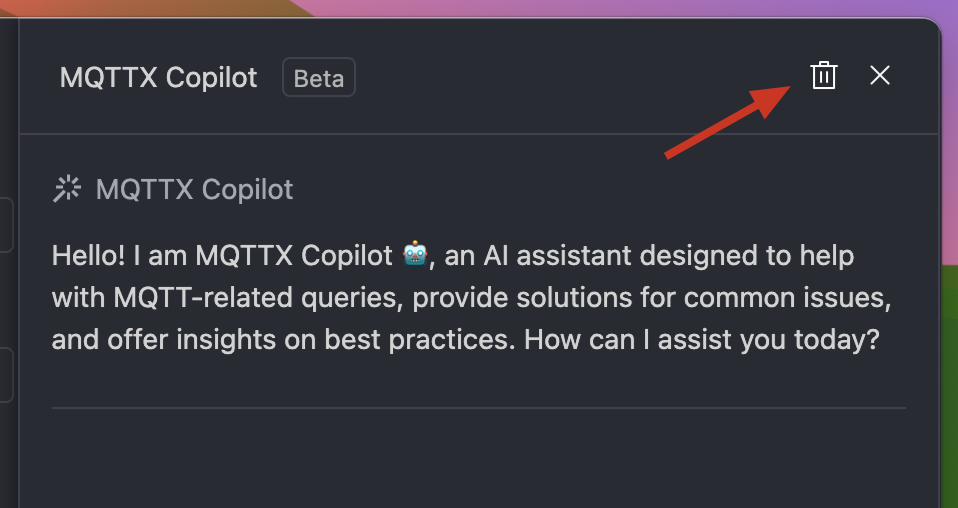
To start a new conversation or clear the existing dialogue history in MQTTX Copilot, click the + next to the close option in the dialogue box. This action resets the conversation, allowing you to begin afresh.
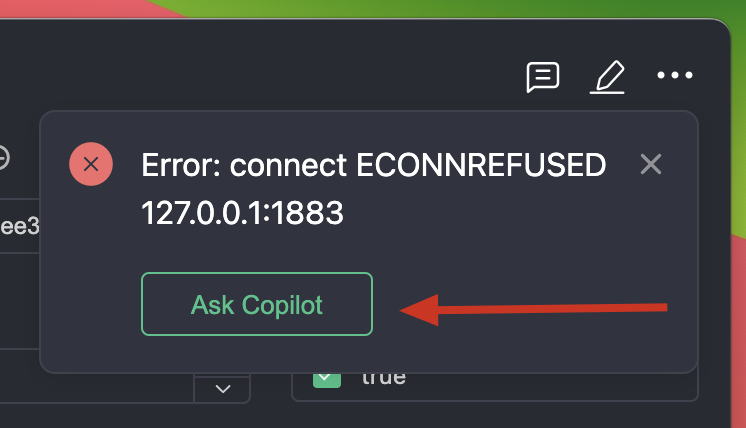
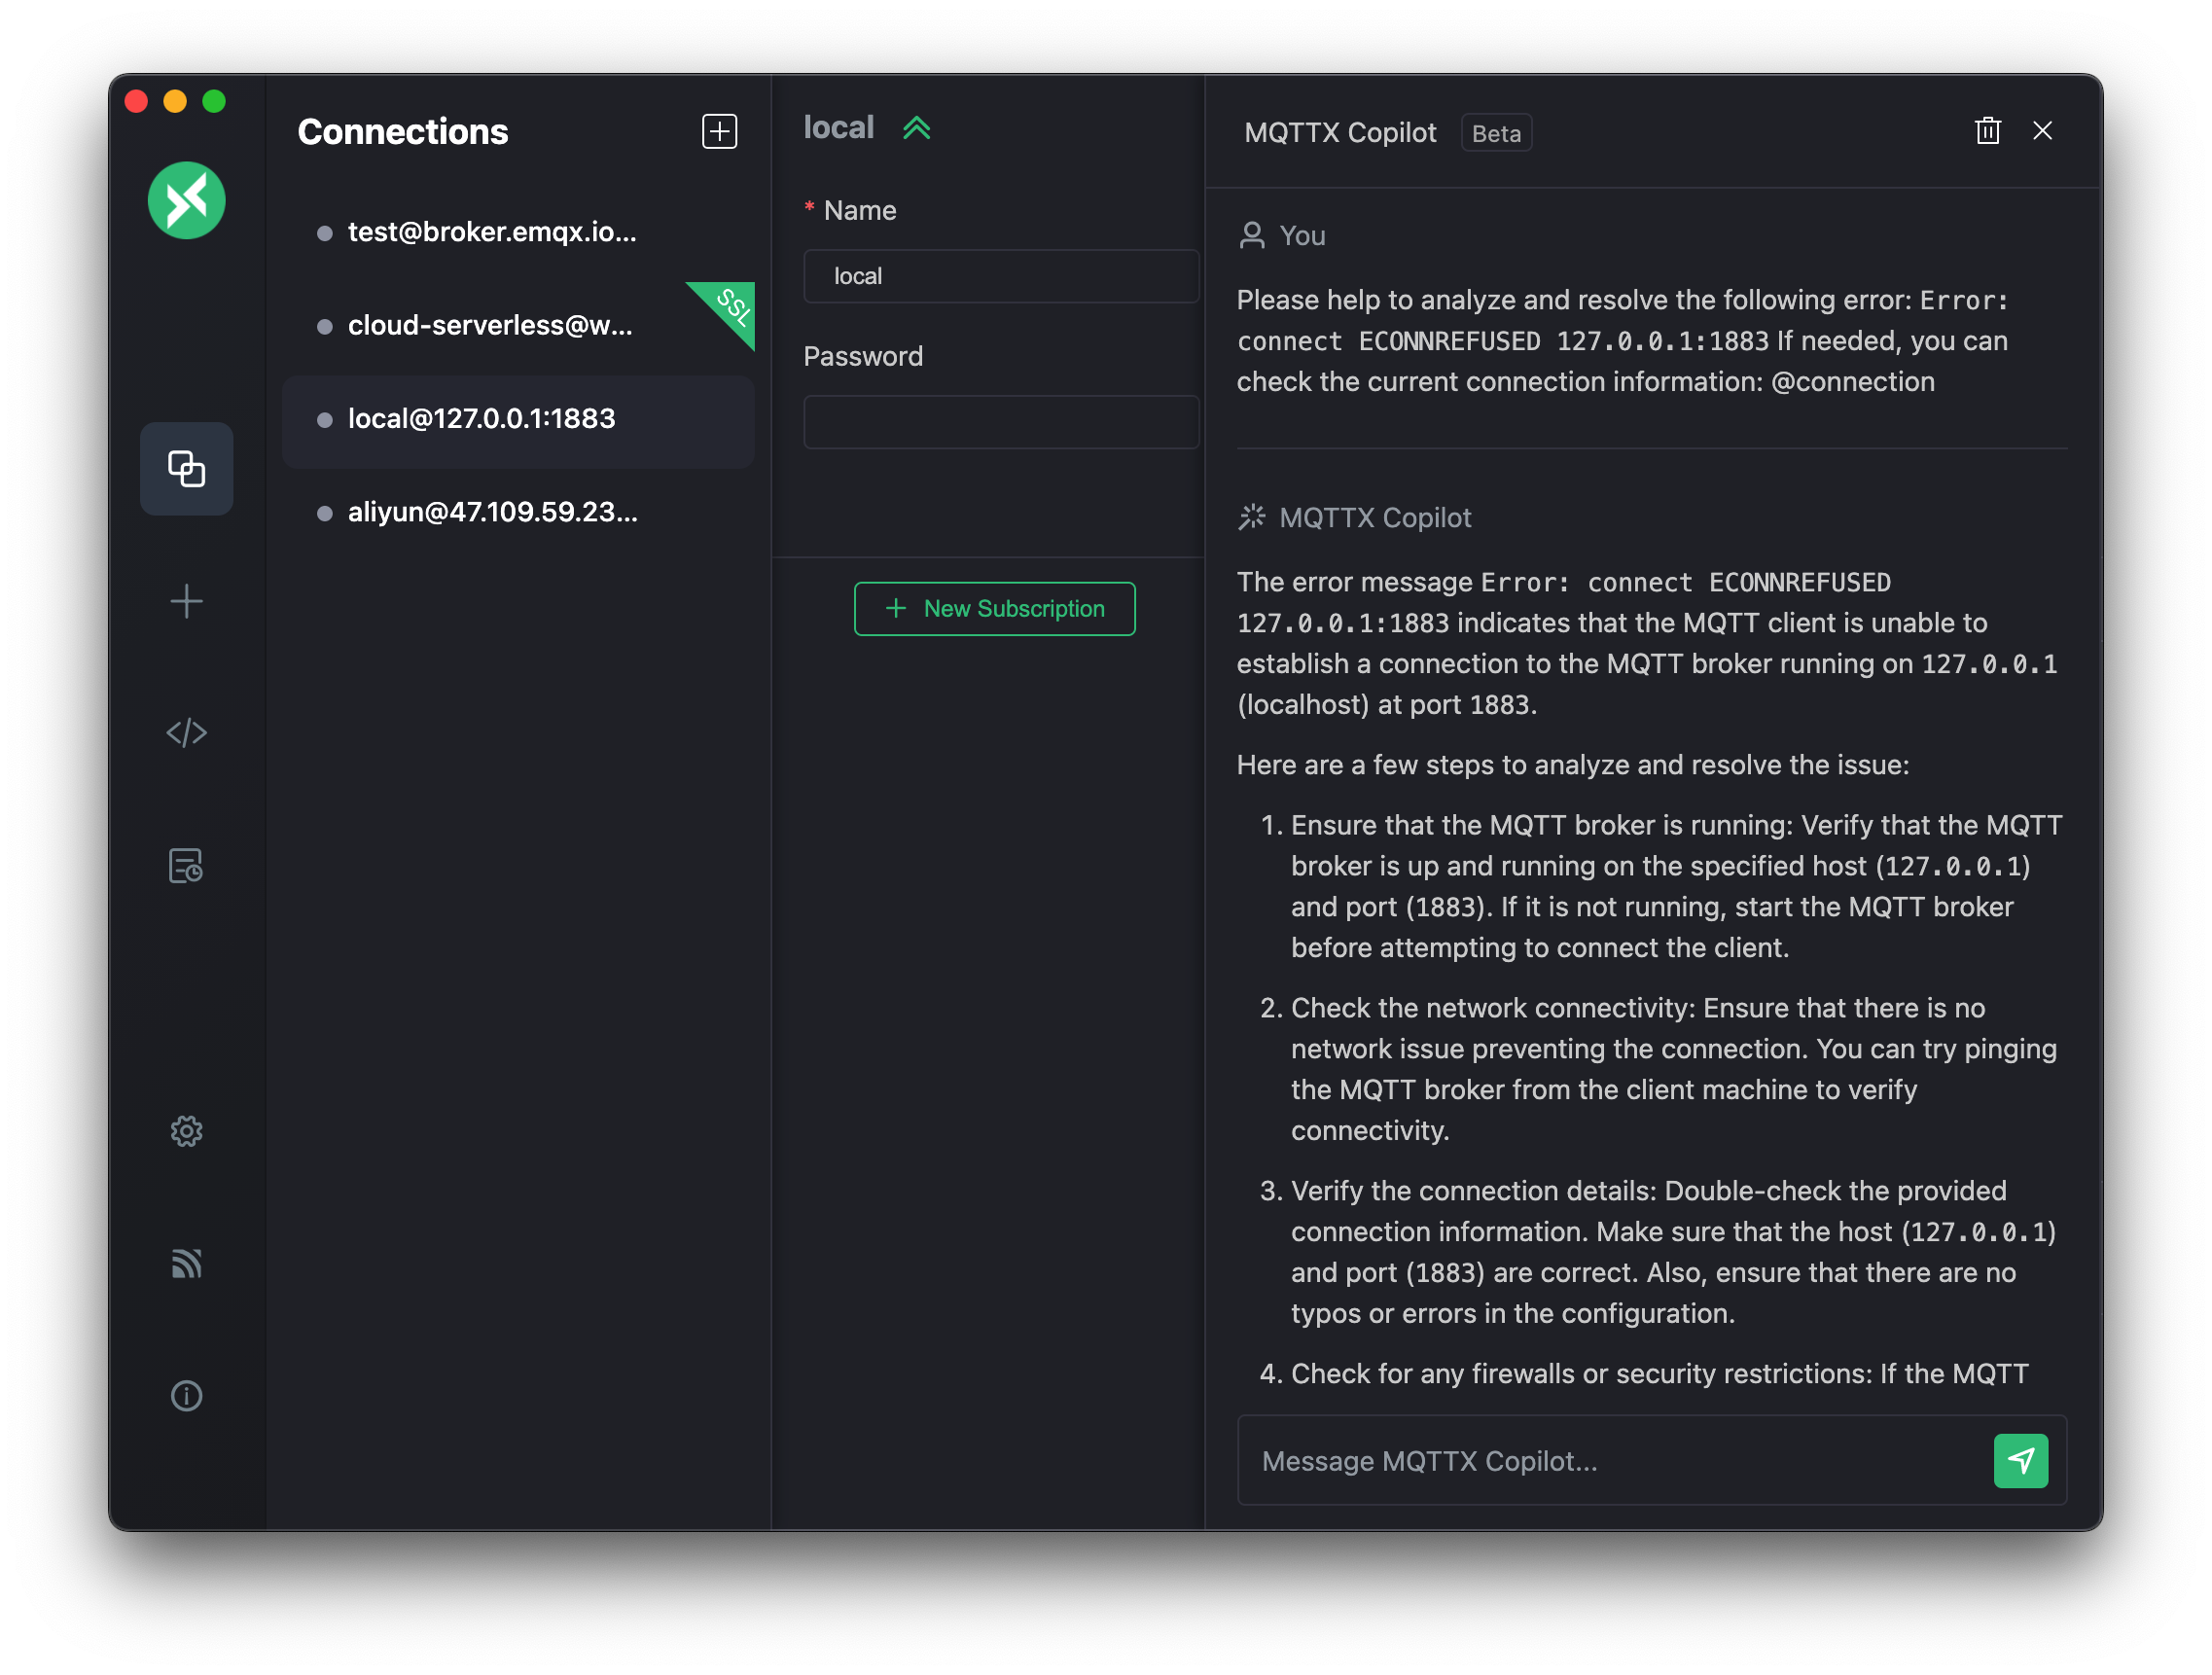
Error Analysis with One Click
When encountering errors during connection or subscription, click the "Ask Copilot" button in the error prompt. MQTTX Copilot assists in analyzing potential causes, enabling systematic troubleshooting to resolve the issue.
Preset Prompts
In MQTTX Copilot, you can type / to quickly view and use a series of preset commands that help you perform various built-in operations conveniently. Here's a brief introduction to some commonly used preset commands:
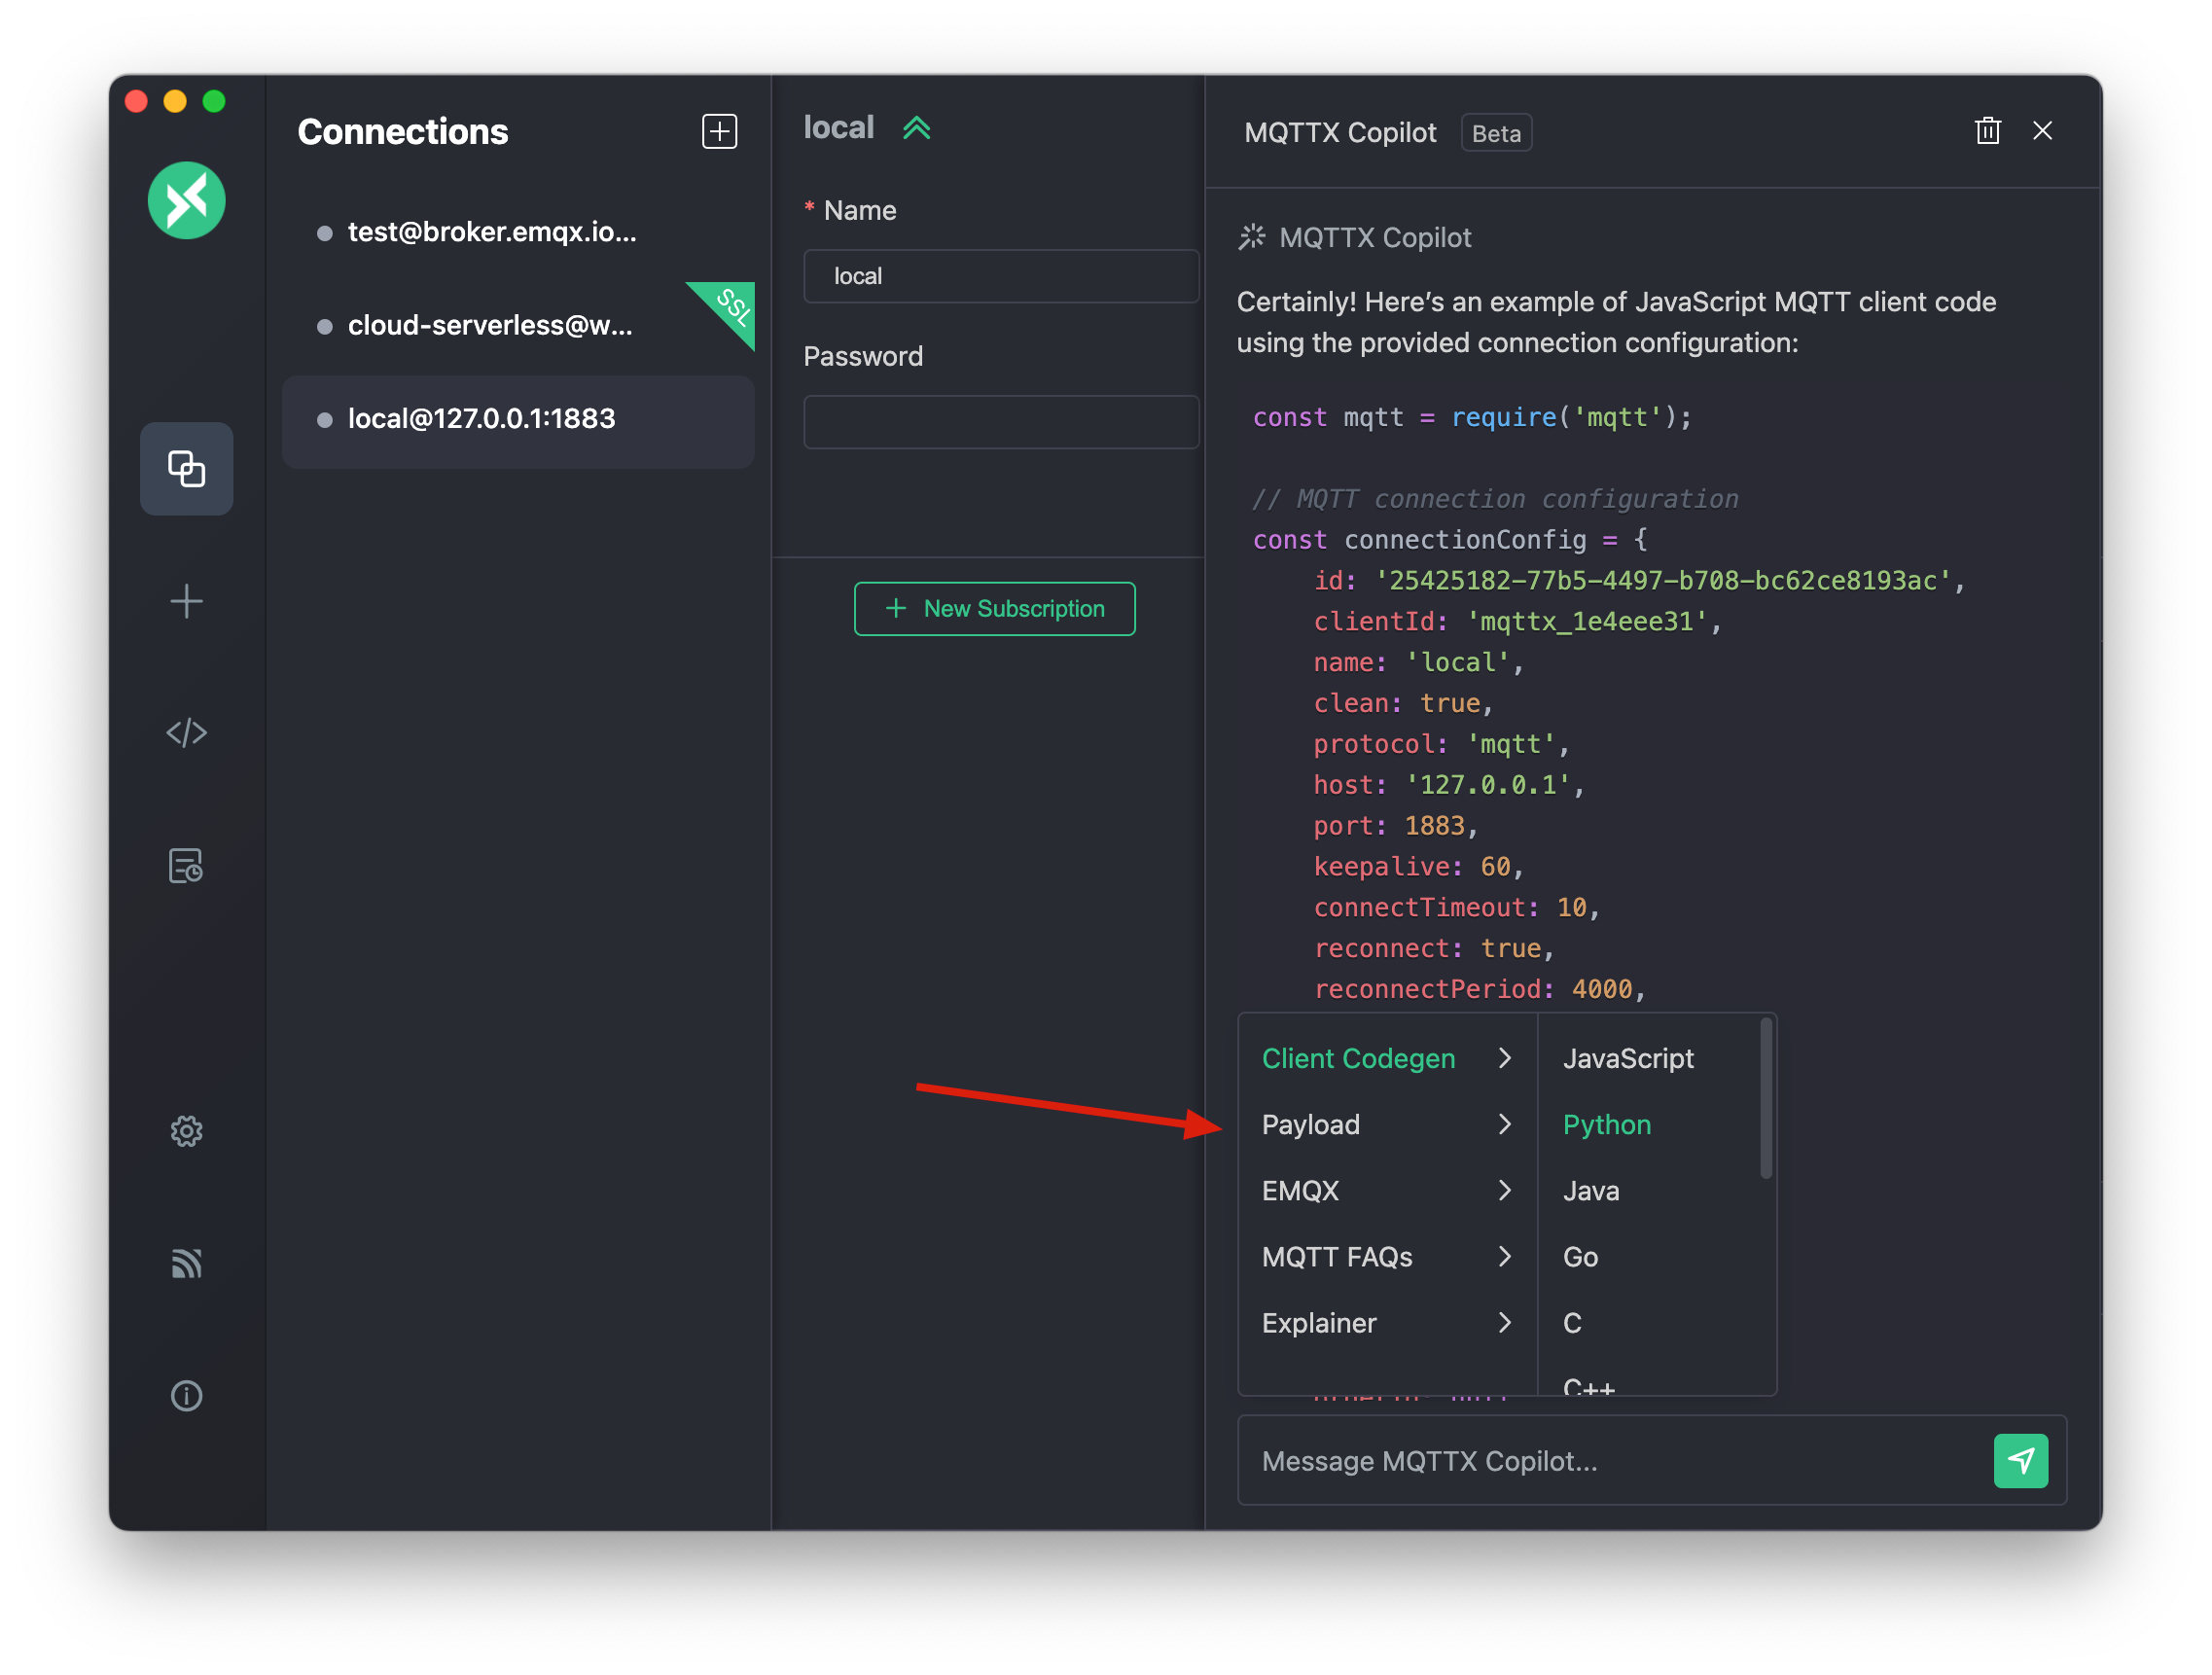
Code Generation:
MQTTX Copilot provides a one-click solution for generating MQTT client code to streamline the setup process for various programming languages.
The available options include JavaScript, Python, Java, Go, C, C++, C#, PHP, Swift, Kotlin, Rust, Dart, and Erlang. Although these are the preset languages, MQTTX Copilot is not limited to them and supports other programming languages. This makes it easier to integrate and develop within MQTT applications.
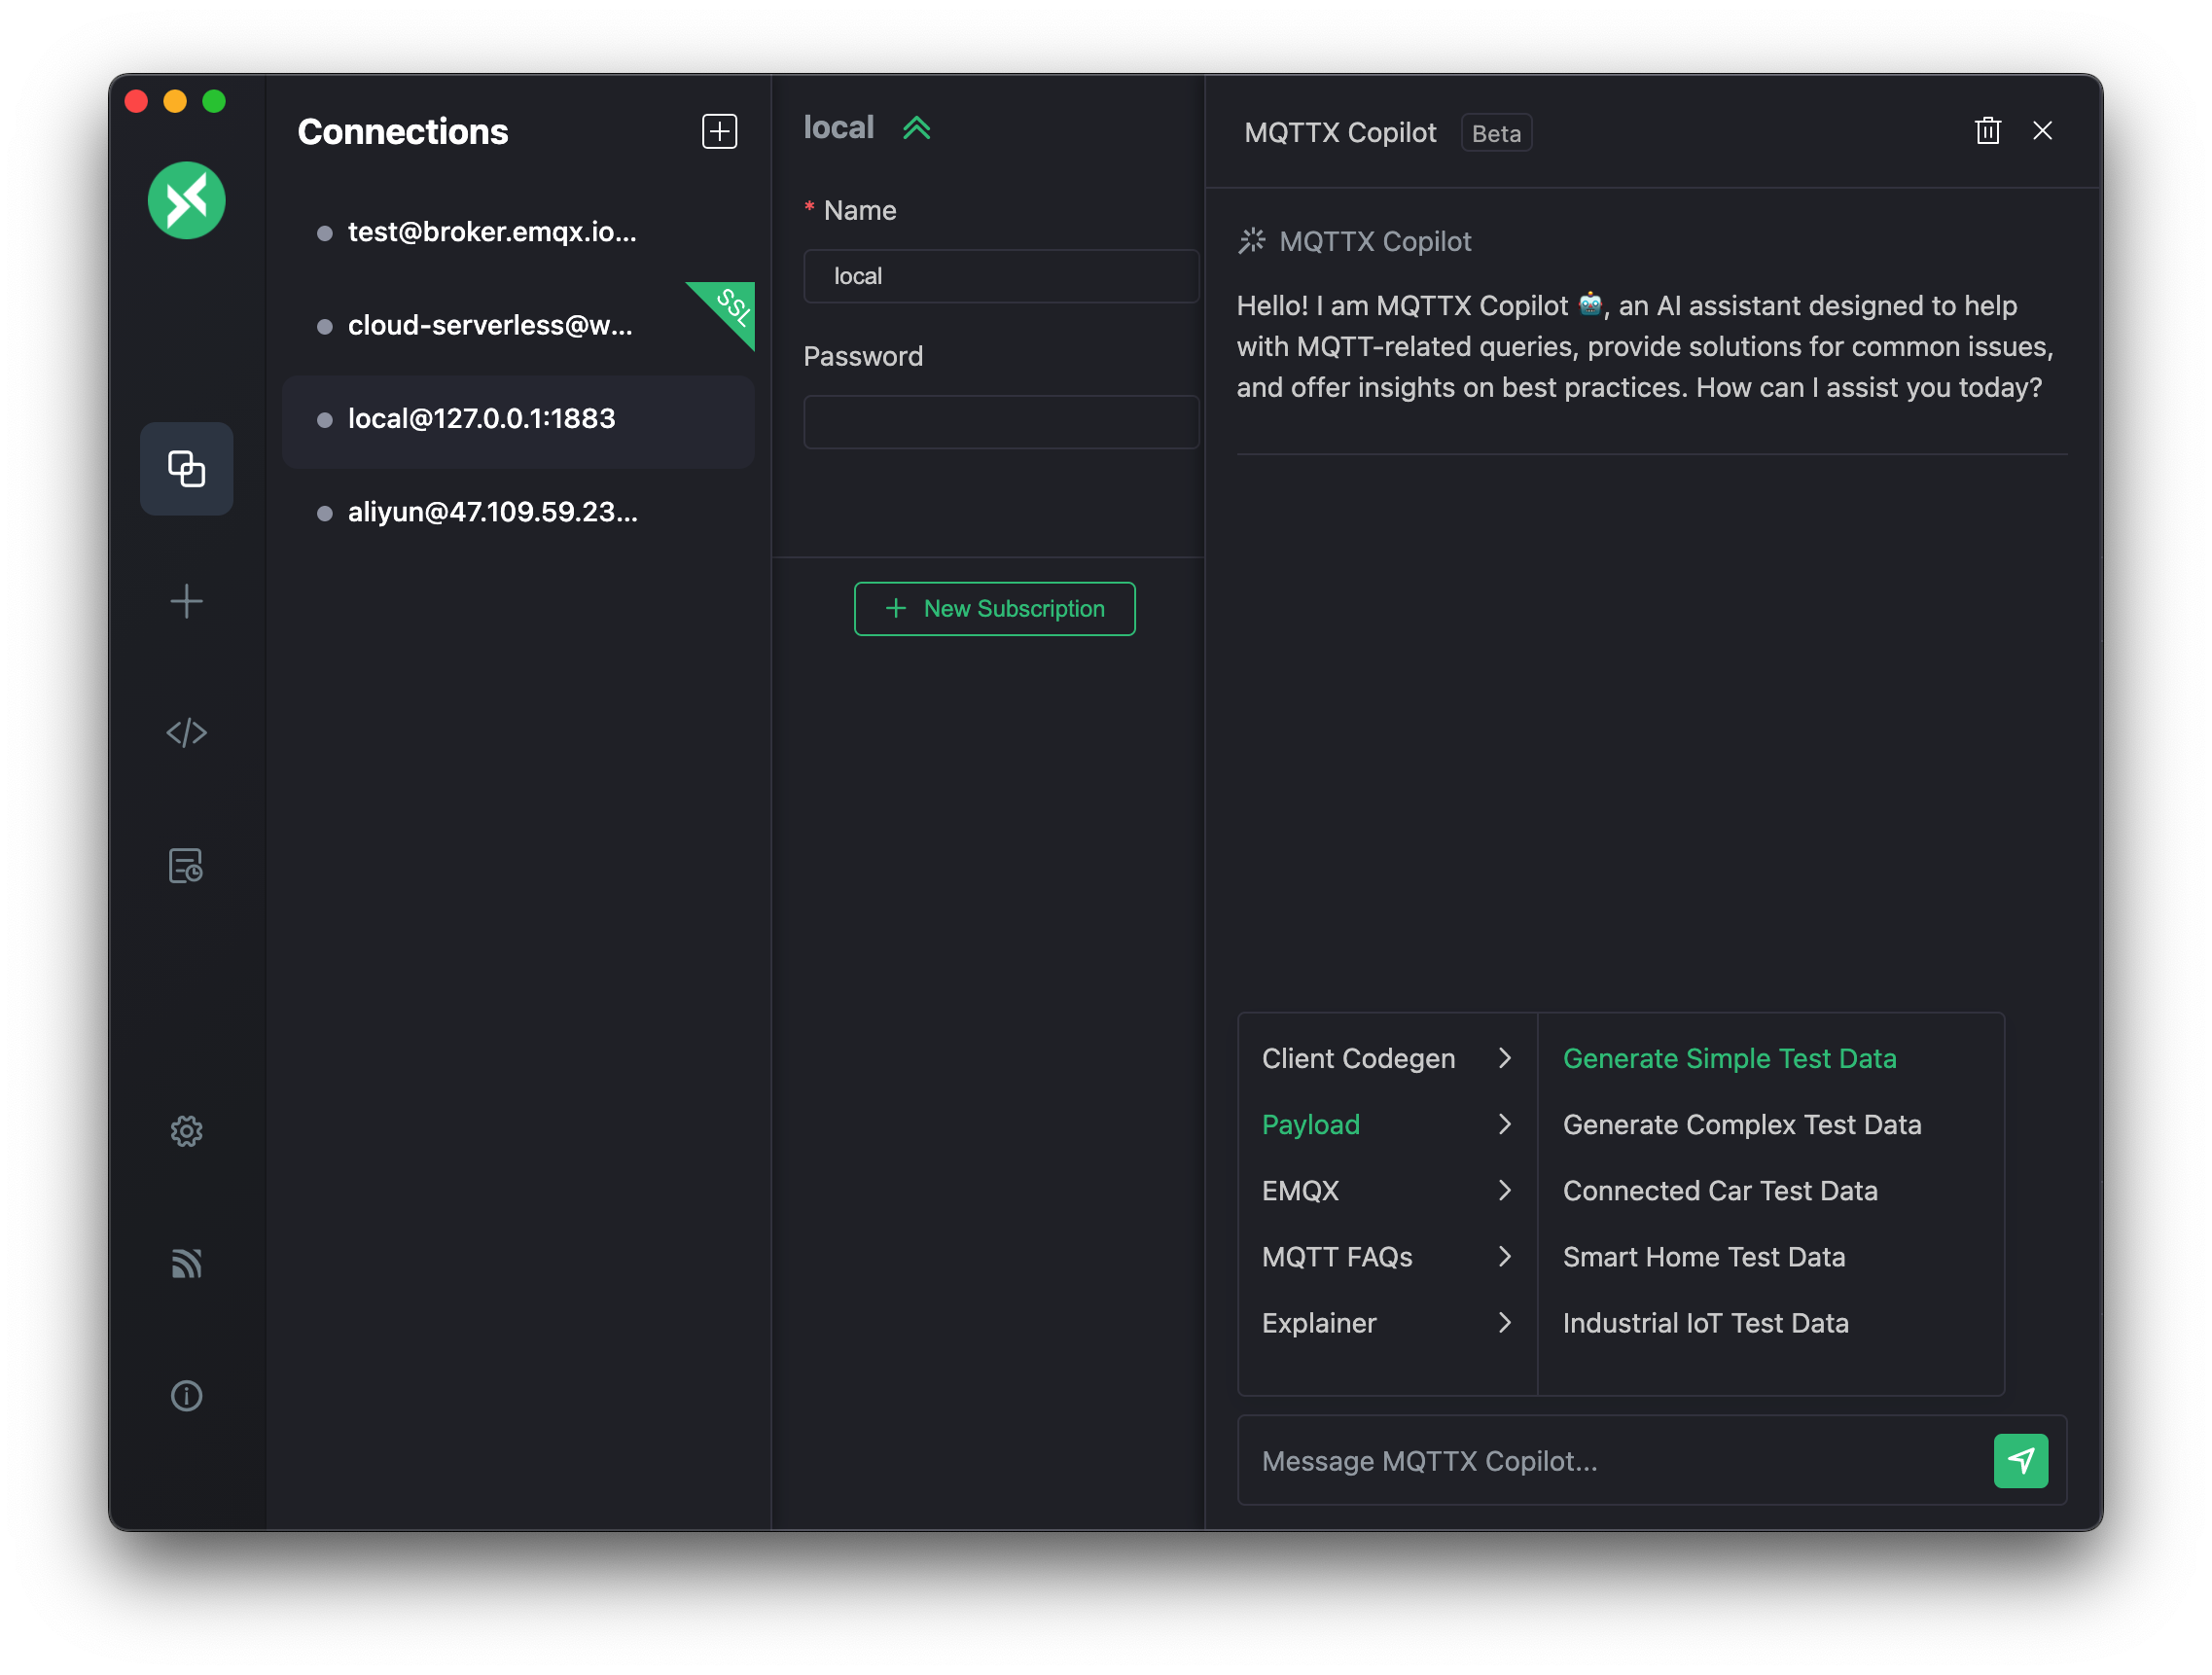
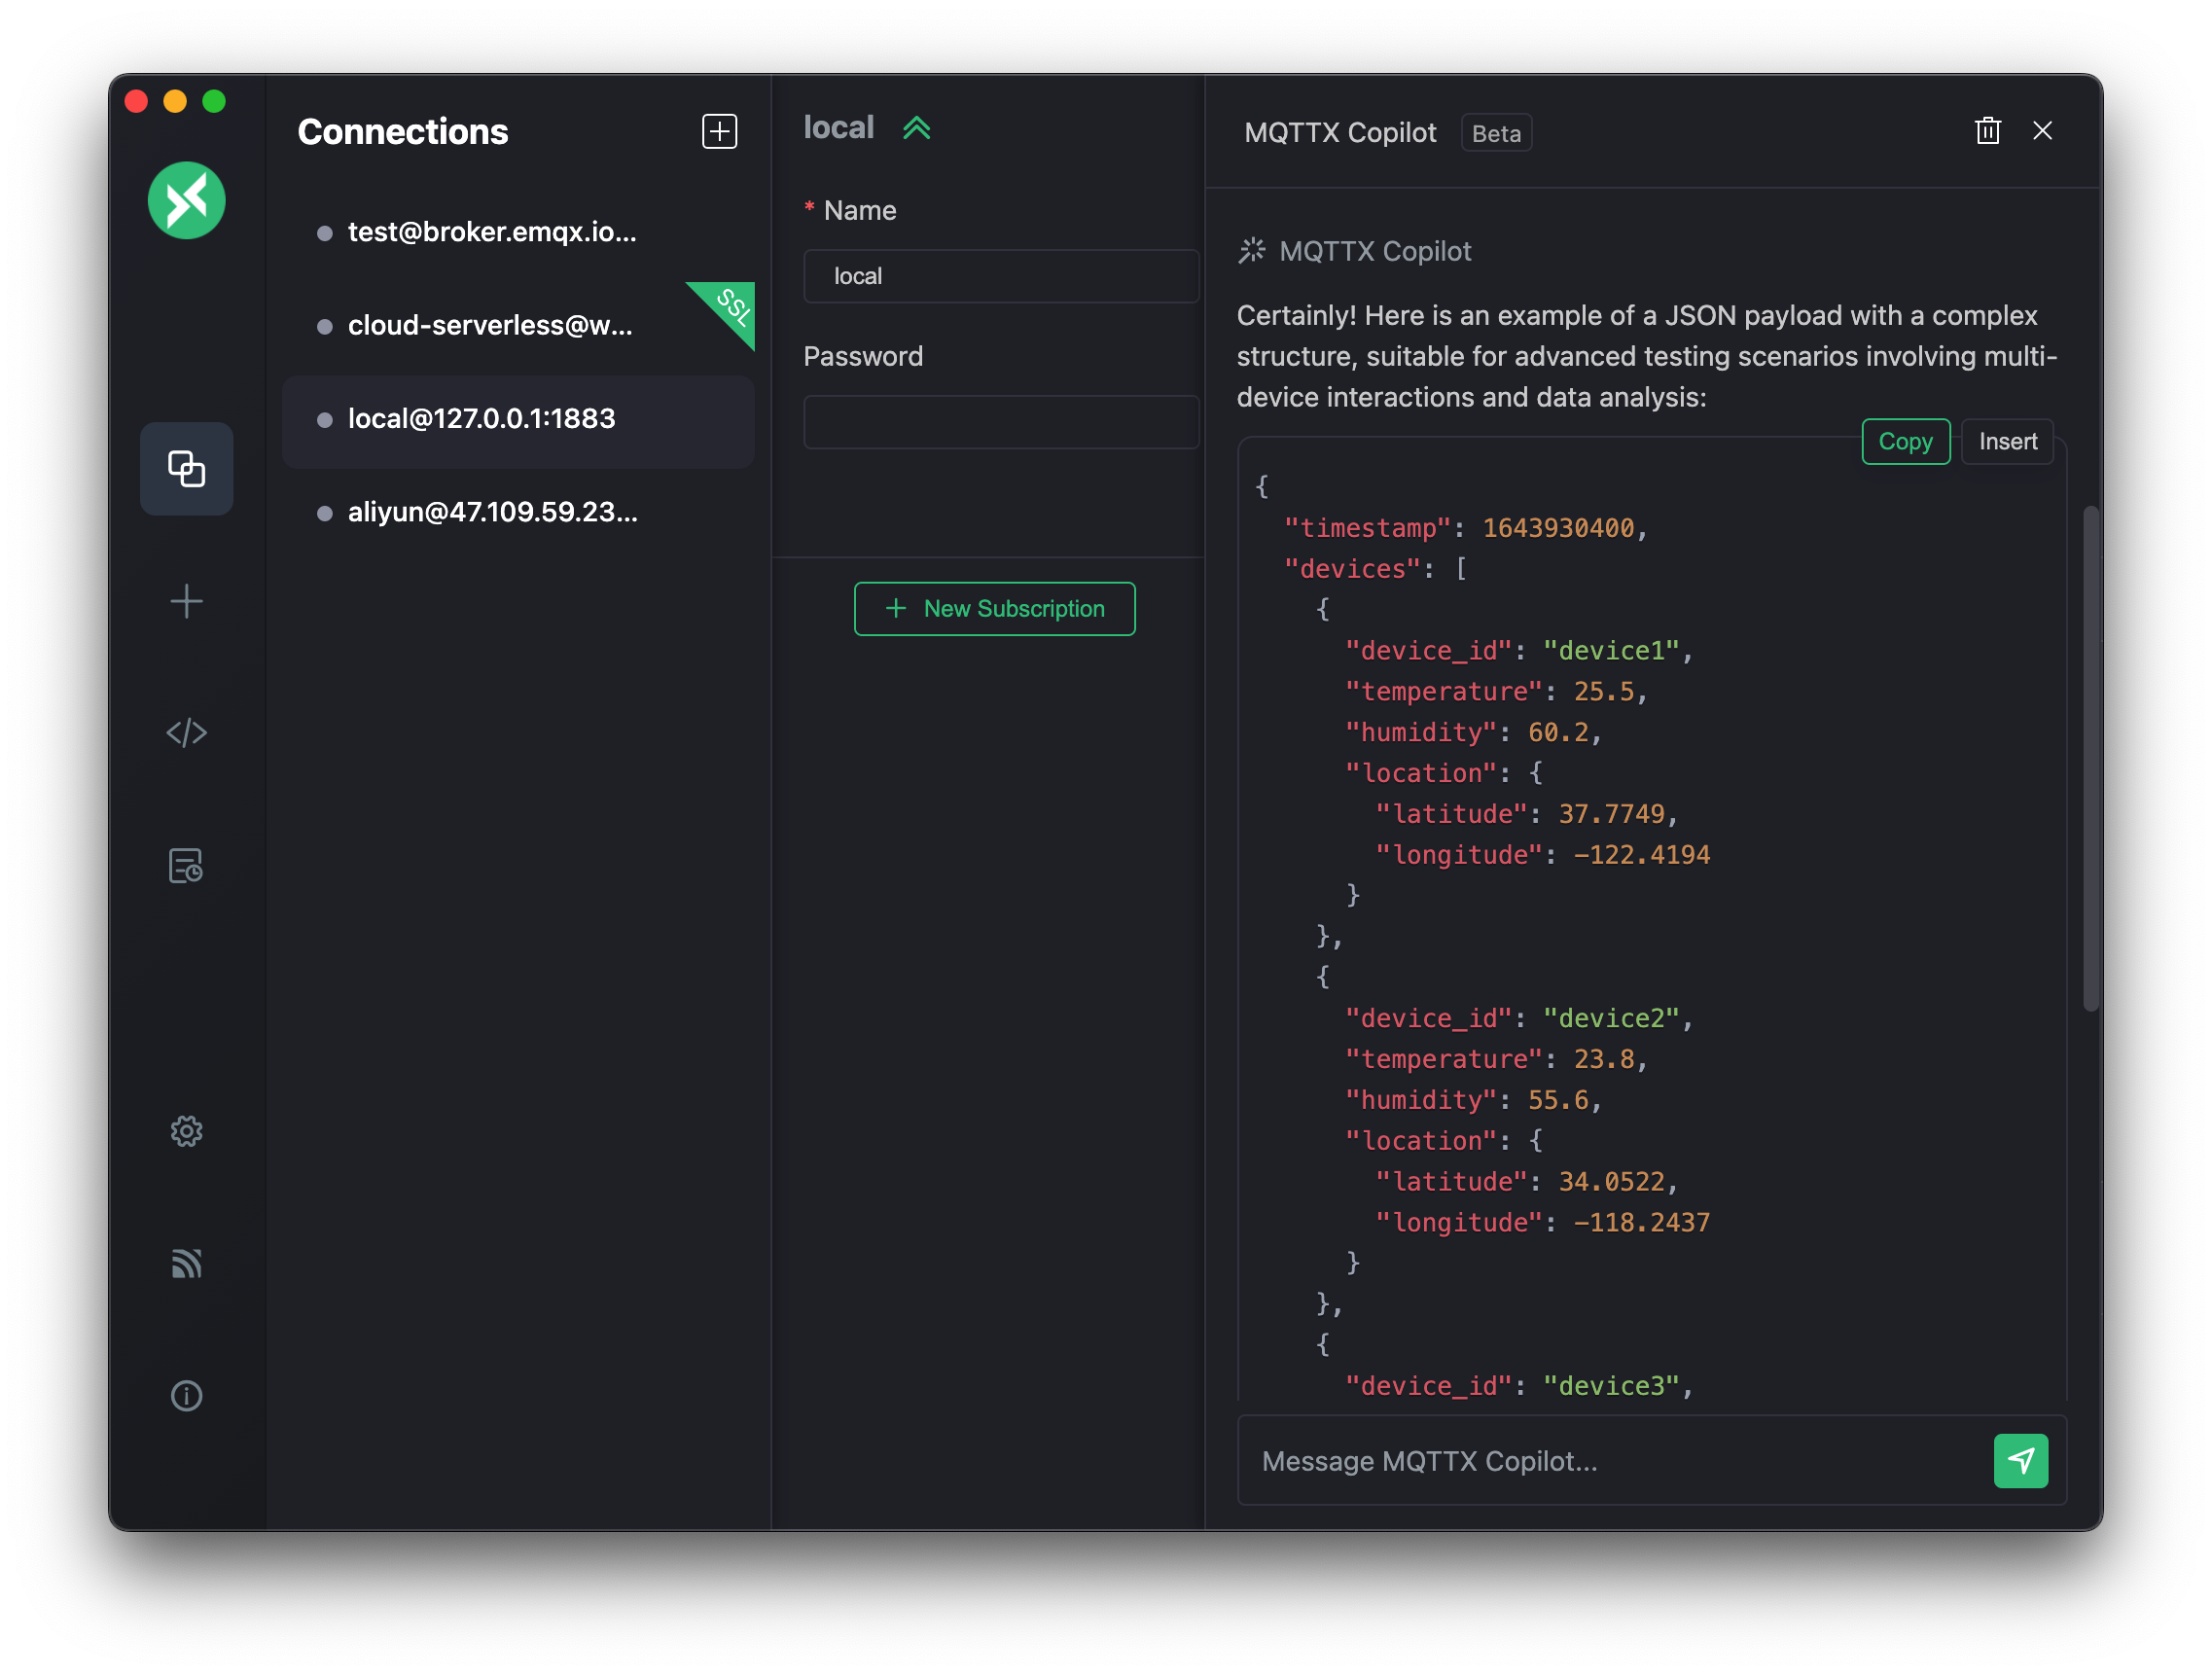
Automated Test Data Generation:
Quickly generate test payloads for analyzing and optimizing MQTT data implementations. This functionality aids in efficiently setting up and evaluating various MQTT scenarios.
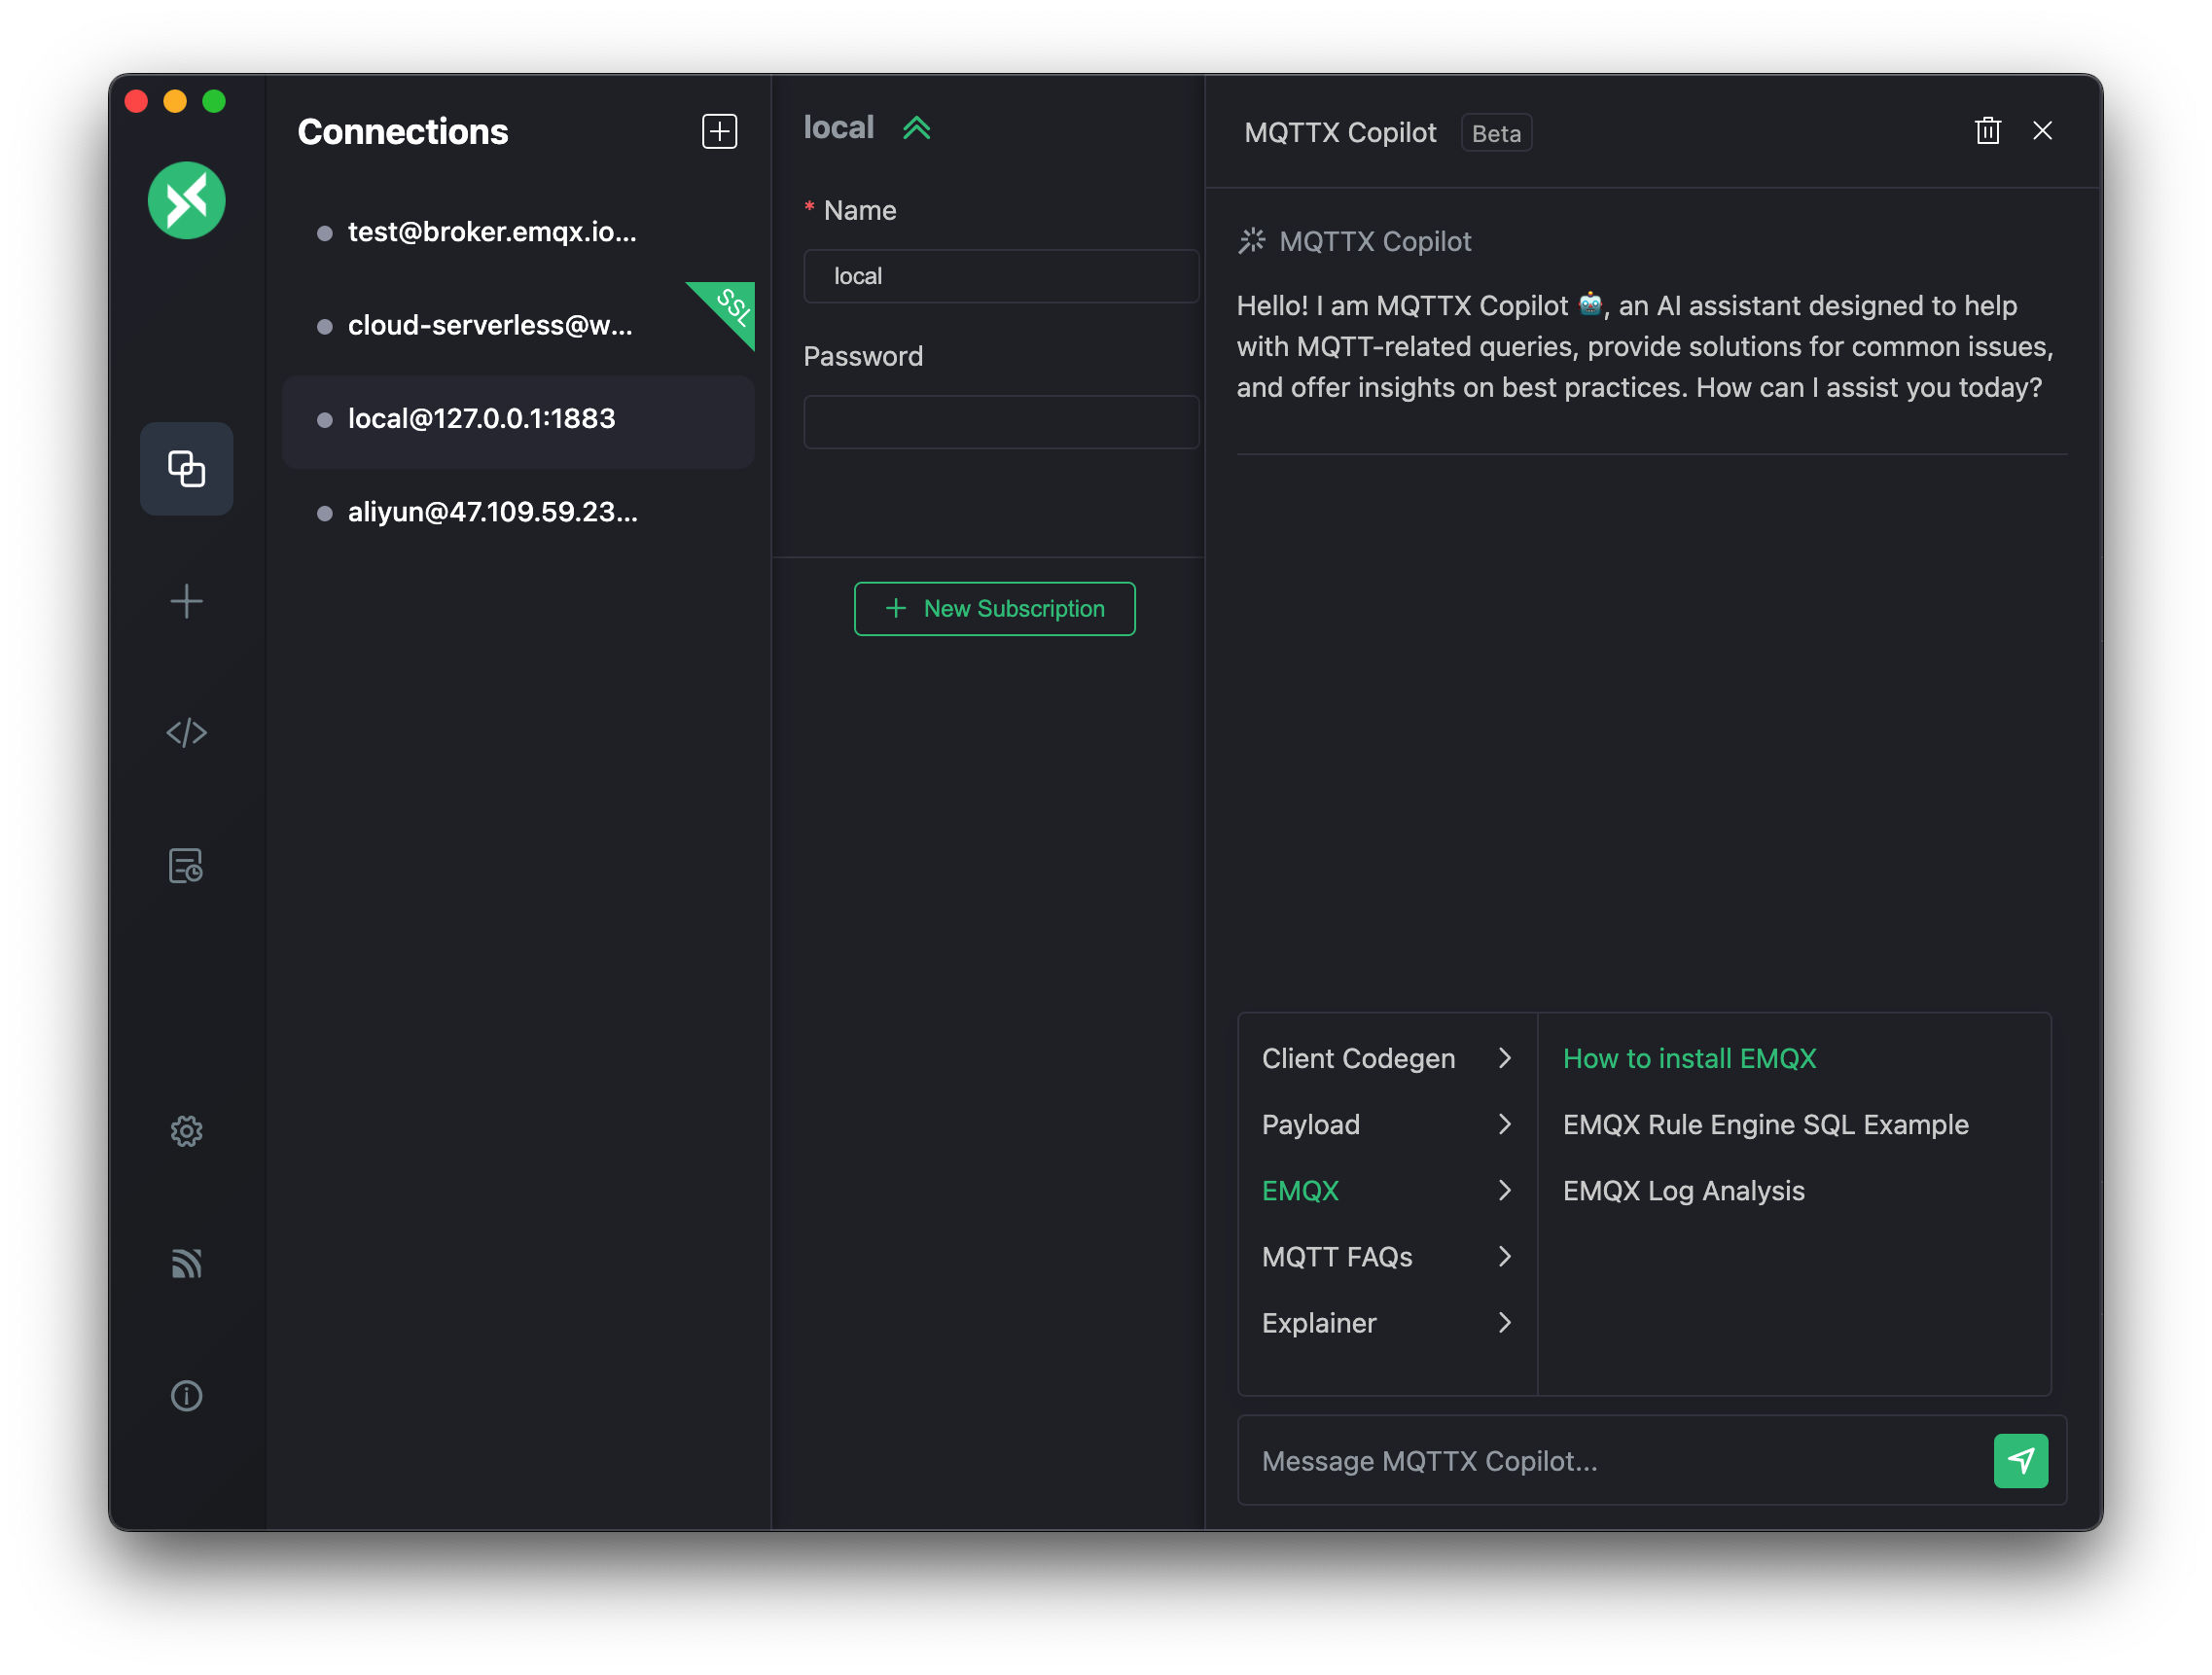
MQTT FAQs, EMQX Tutorials, and Log Analysis:
Get tips, step-by-step guidance on MQTT FAQs, and comprehensive EMQX installation and usage tutorials. These resources are designed to improve user knowledge and skills in both MQTT and EMQX. Additionally, users can now analyze EMQX logs with a single click, simplifying the log review process.
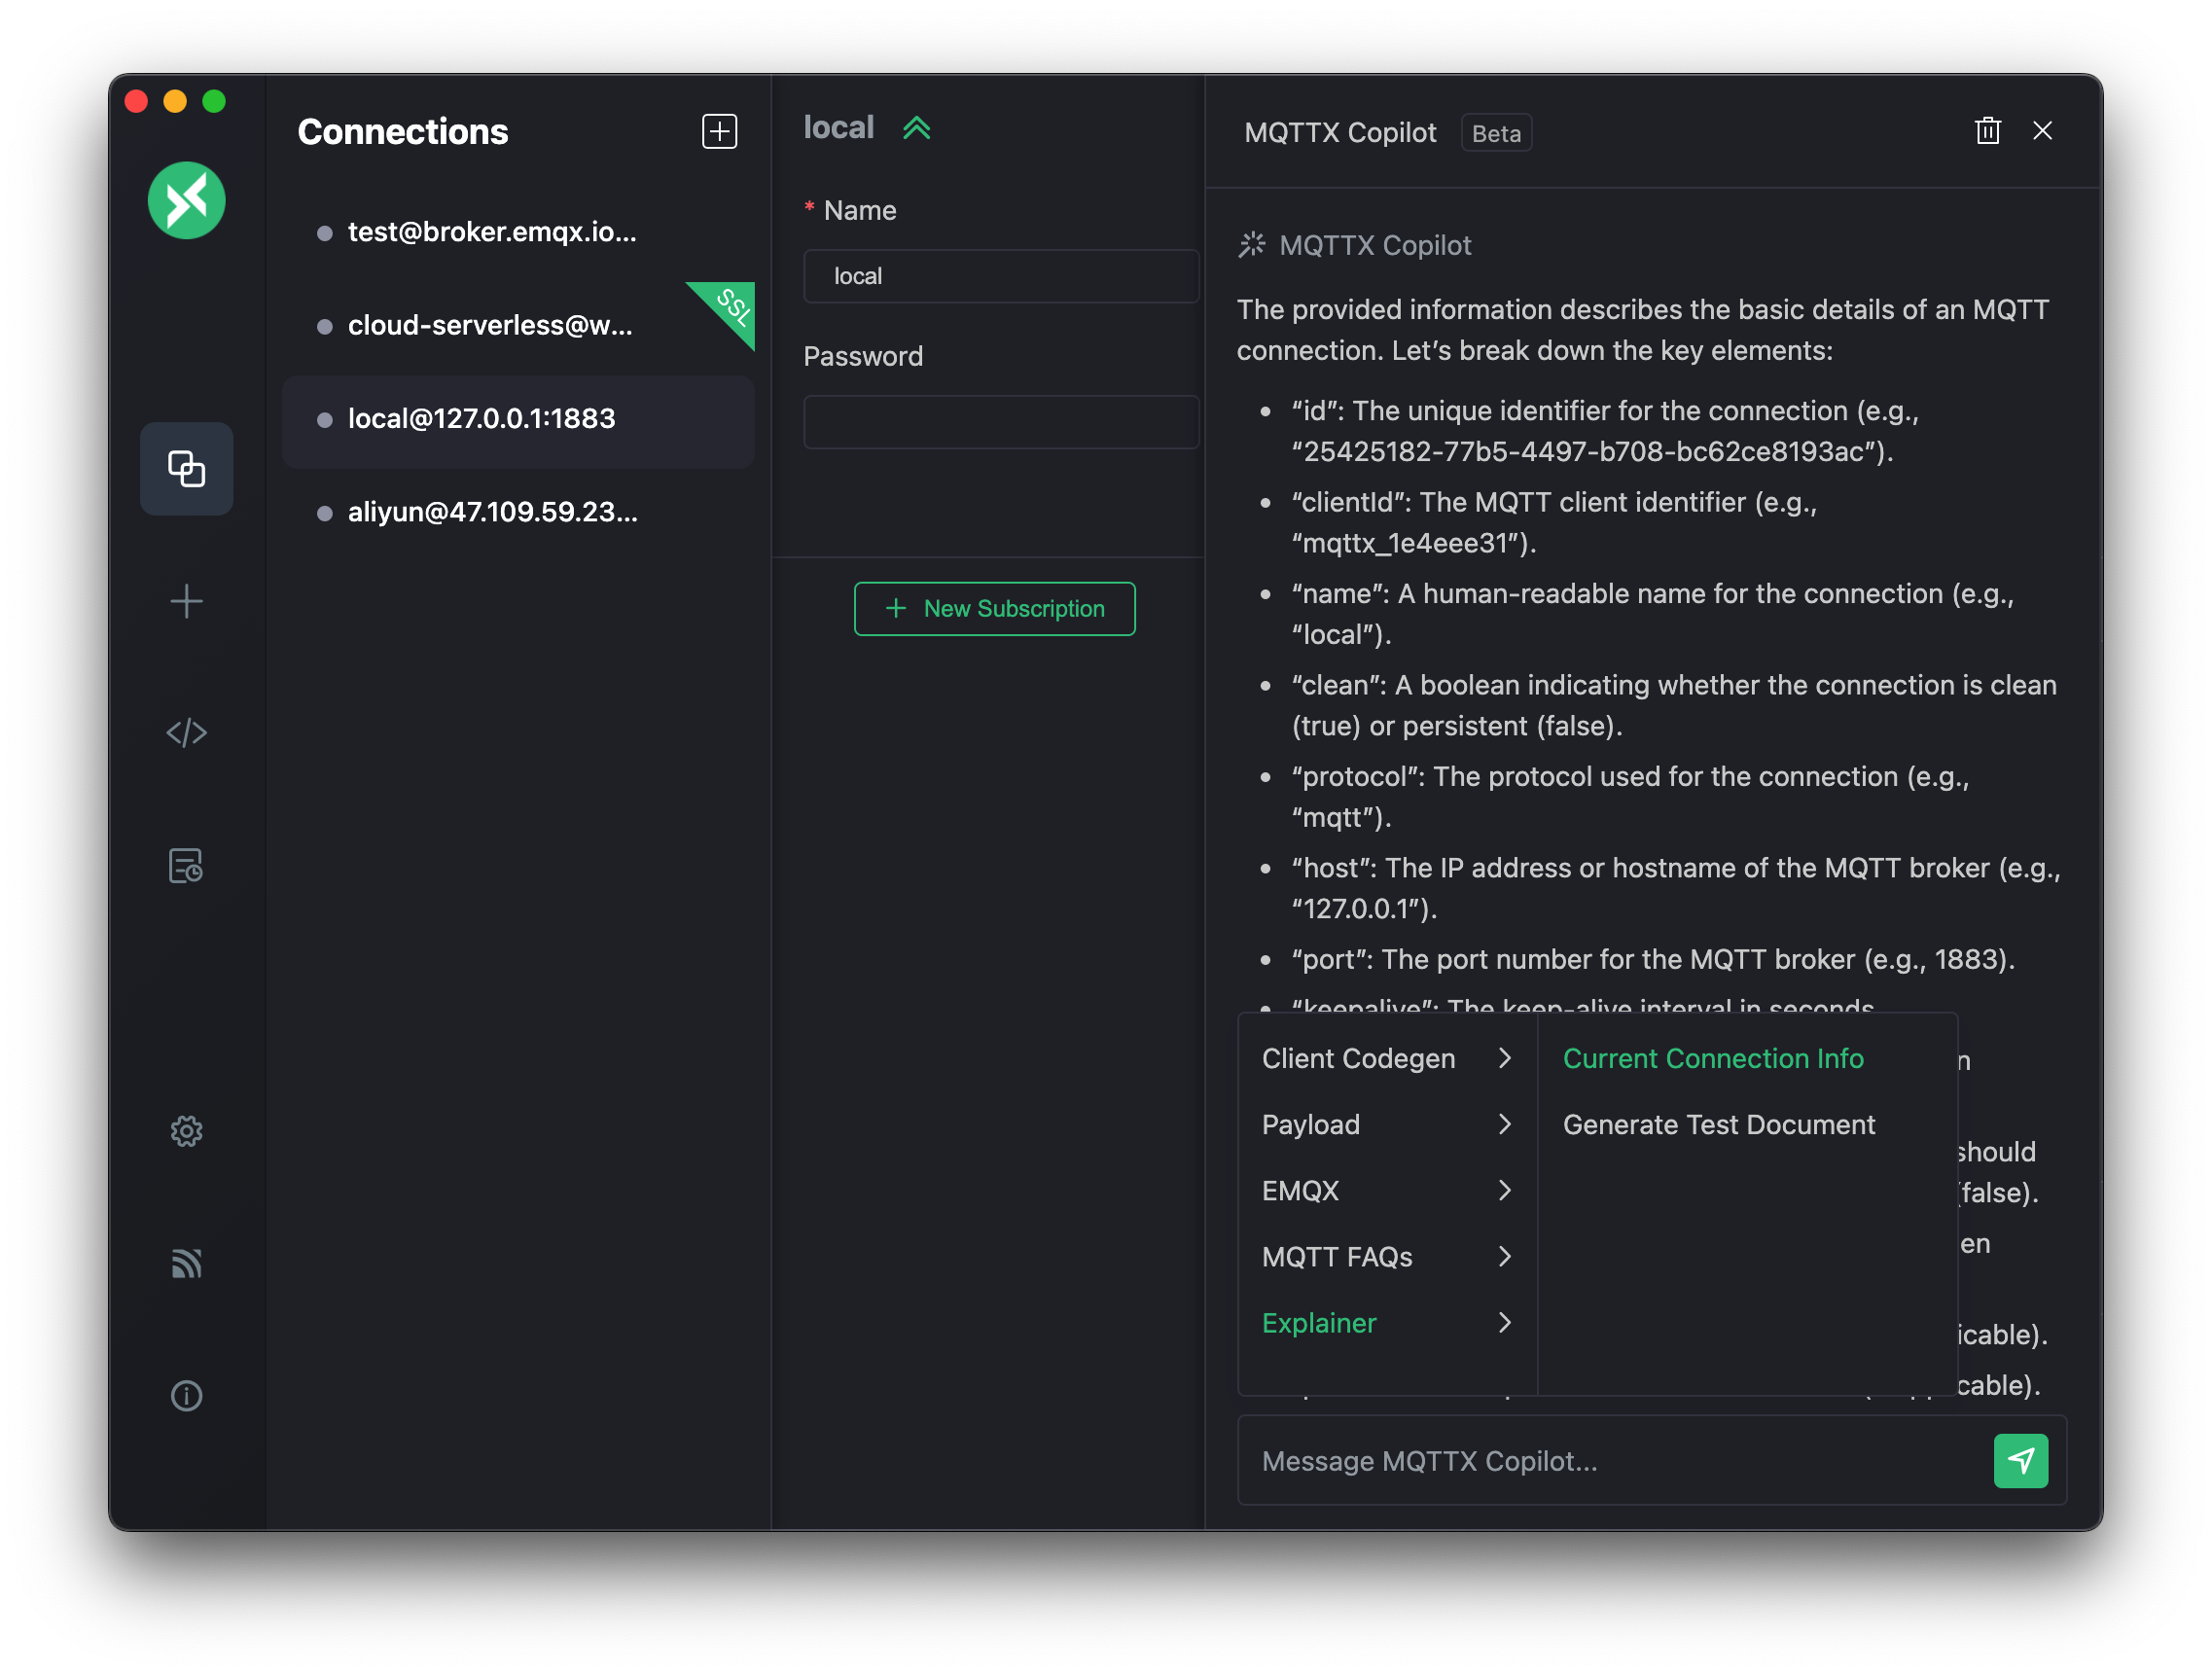
Explainer:
- In-depth Connection Analysis: Quickly analyze and interpret connection information with a single click, providing deep insights into MQTT connections for more efficient management and usage.
- Automatic Test Documentation Generation: MQTTX Copilot automatically generates test documentation for the current MQTT connection, enhancing understanding and offering comprehensive documentation support for MQTT testing scenarios.
Custom Prompts
MQTTX Copilot offers the ability to create custom prompts, adding a layer of personalization to your experience. This feature lets you craft queries or commands according to your unique requirements. For example, you might type "How do I clear a retained message in MQTT?" to get a tailored response based on your needs.

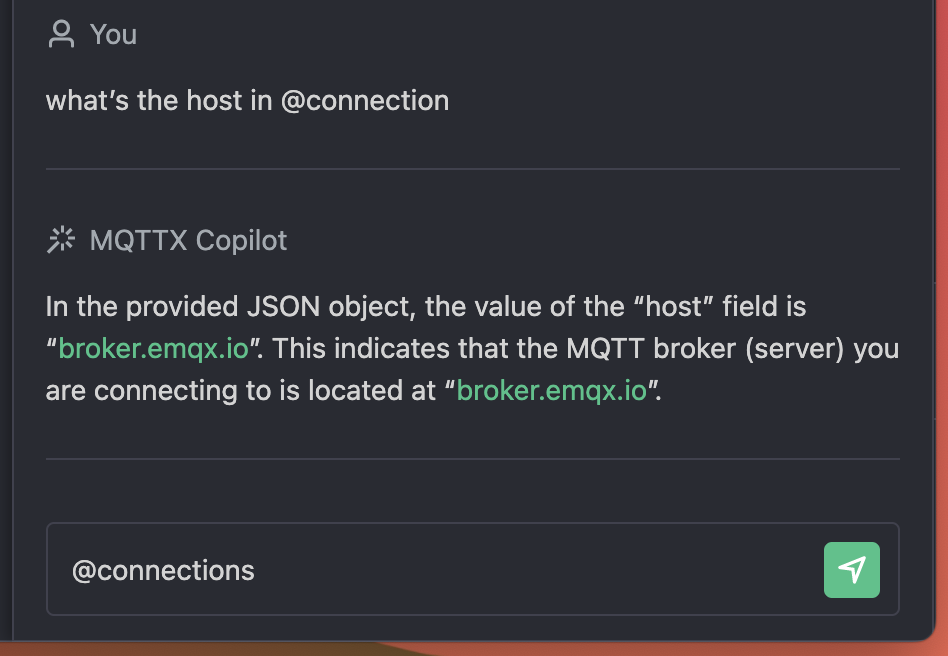
Quick Access with Keywords
MQTTX Copilot enhances interaction by supporting keywords for quick information retrieval. Use a keyword like @connection in your prompt for immediate access to specific data. For instance, typing "what's the host in @connection" quickly fetches the host information from your current connection.
Code Quick Actions
- Copy MQTT Client Code: Enhance your productivity with this feature that allows for quick generation and application of MQTT client code.
- Insert MQTT Test Data: Easily insert pre-generated MQTT test data into the payload editor, streamlining testing process.
Script Code Generation
MQTTX Copilot offers powerful script code generation capabilities. It can help you quickly create JavaScript functions for MQTTX's script feature, for tasks like processing message payloads or implementing custom testing logic. Additionally, it can assist in generating relevant message Schemas. This feature is primarily accessed and used via the MQTTX Copilot icon on the MQTTX Script page.
1. JavaScript Function Generation:
MQTTX Copilot can generate JavaScript script code based on your requirements. This script code can be used in MQTTX's script feature, for example, to process message payloads or implement other custom logic.
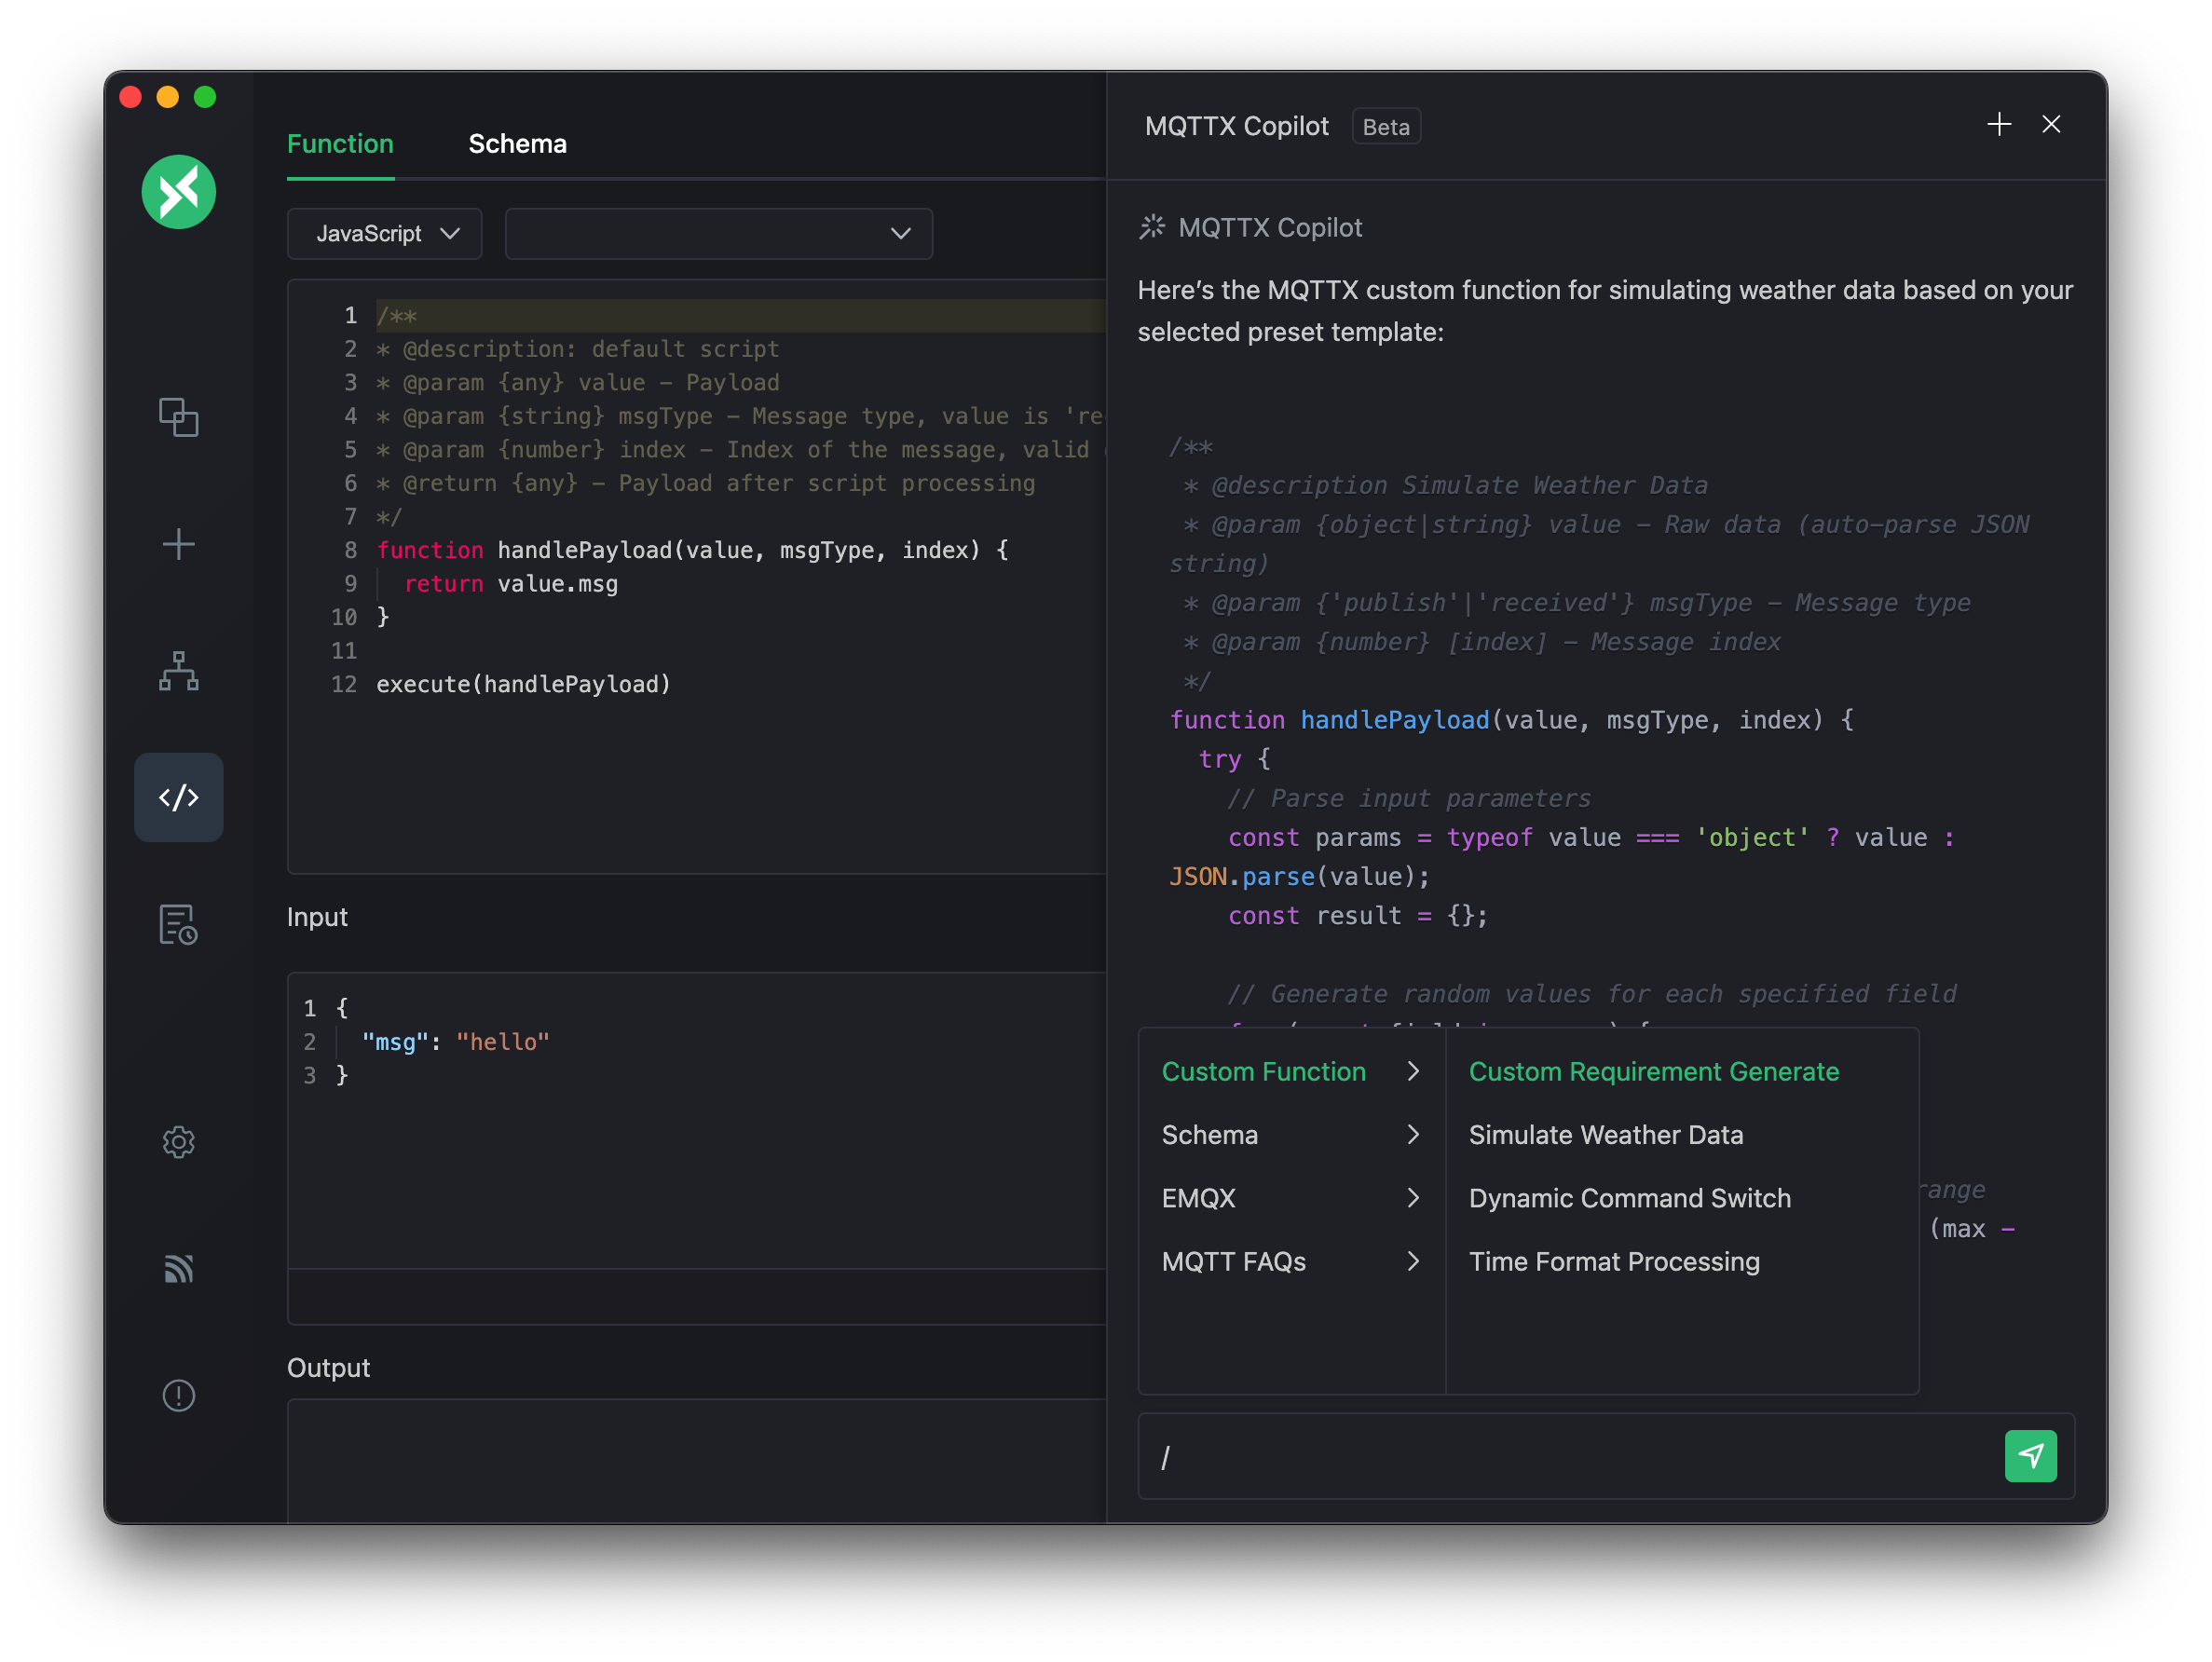
- Preset Templates:
- Quickly generate code for common test scenarios, such as:
- Simulate Weather Data: Generate realistic weather metrics with configurable ranges and random fluctuations.
- Dynamic Command Switching: Create functions that intelligently switch command states based on specific conditions.
- Time Format Processing: Convert timestamps into human-readable date-time strings.
- Quickly generate code for common test scenarios, such as:
- Custom Generation:
- Describe the function logic you need in natural language, and MQTTX Copilot will attempt to generate custom code.
- The generated code usually includes necessary error handling and comments for better understanding and usability.
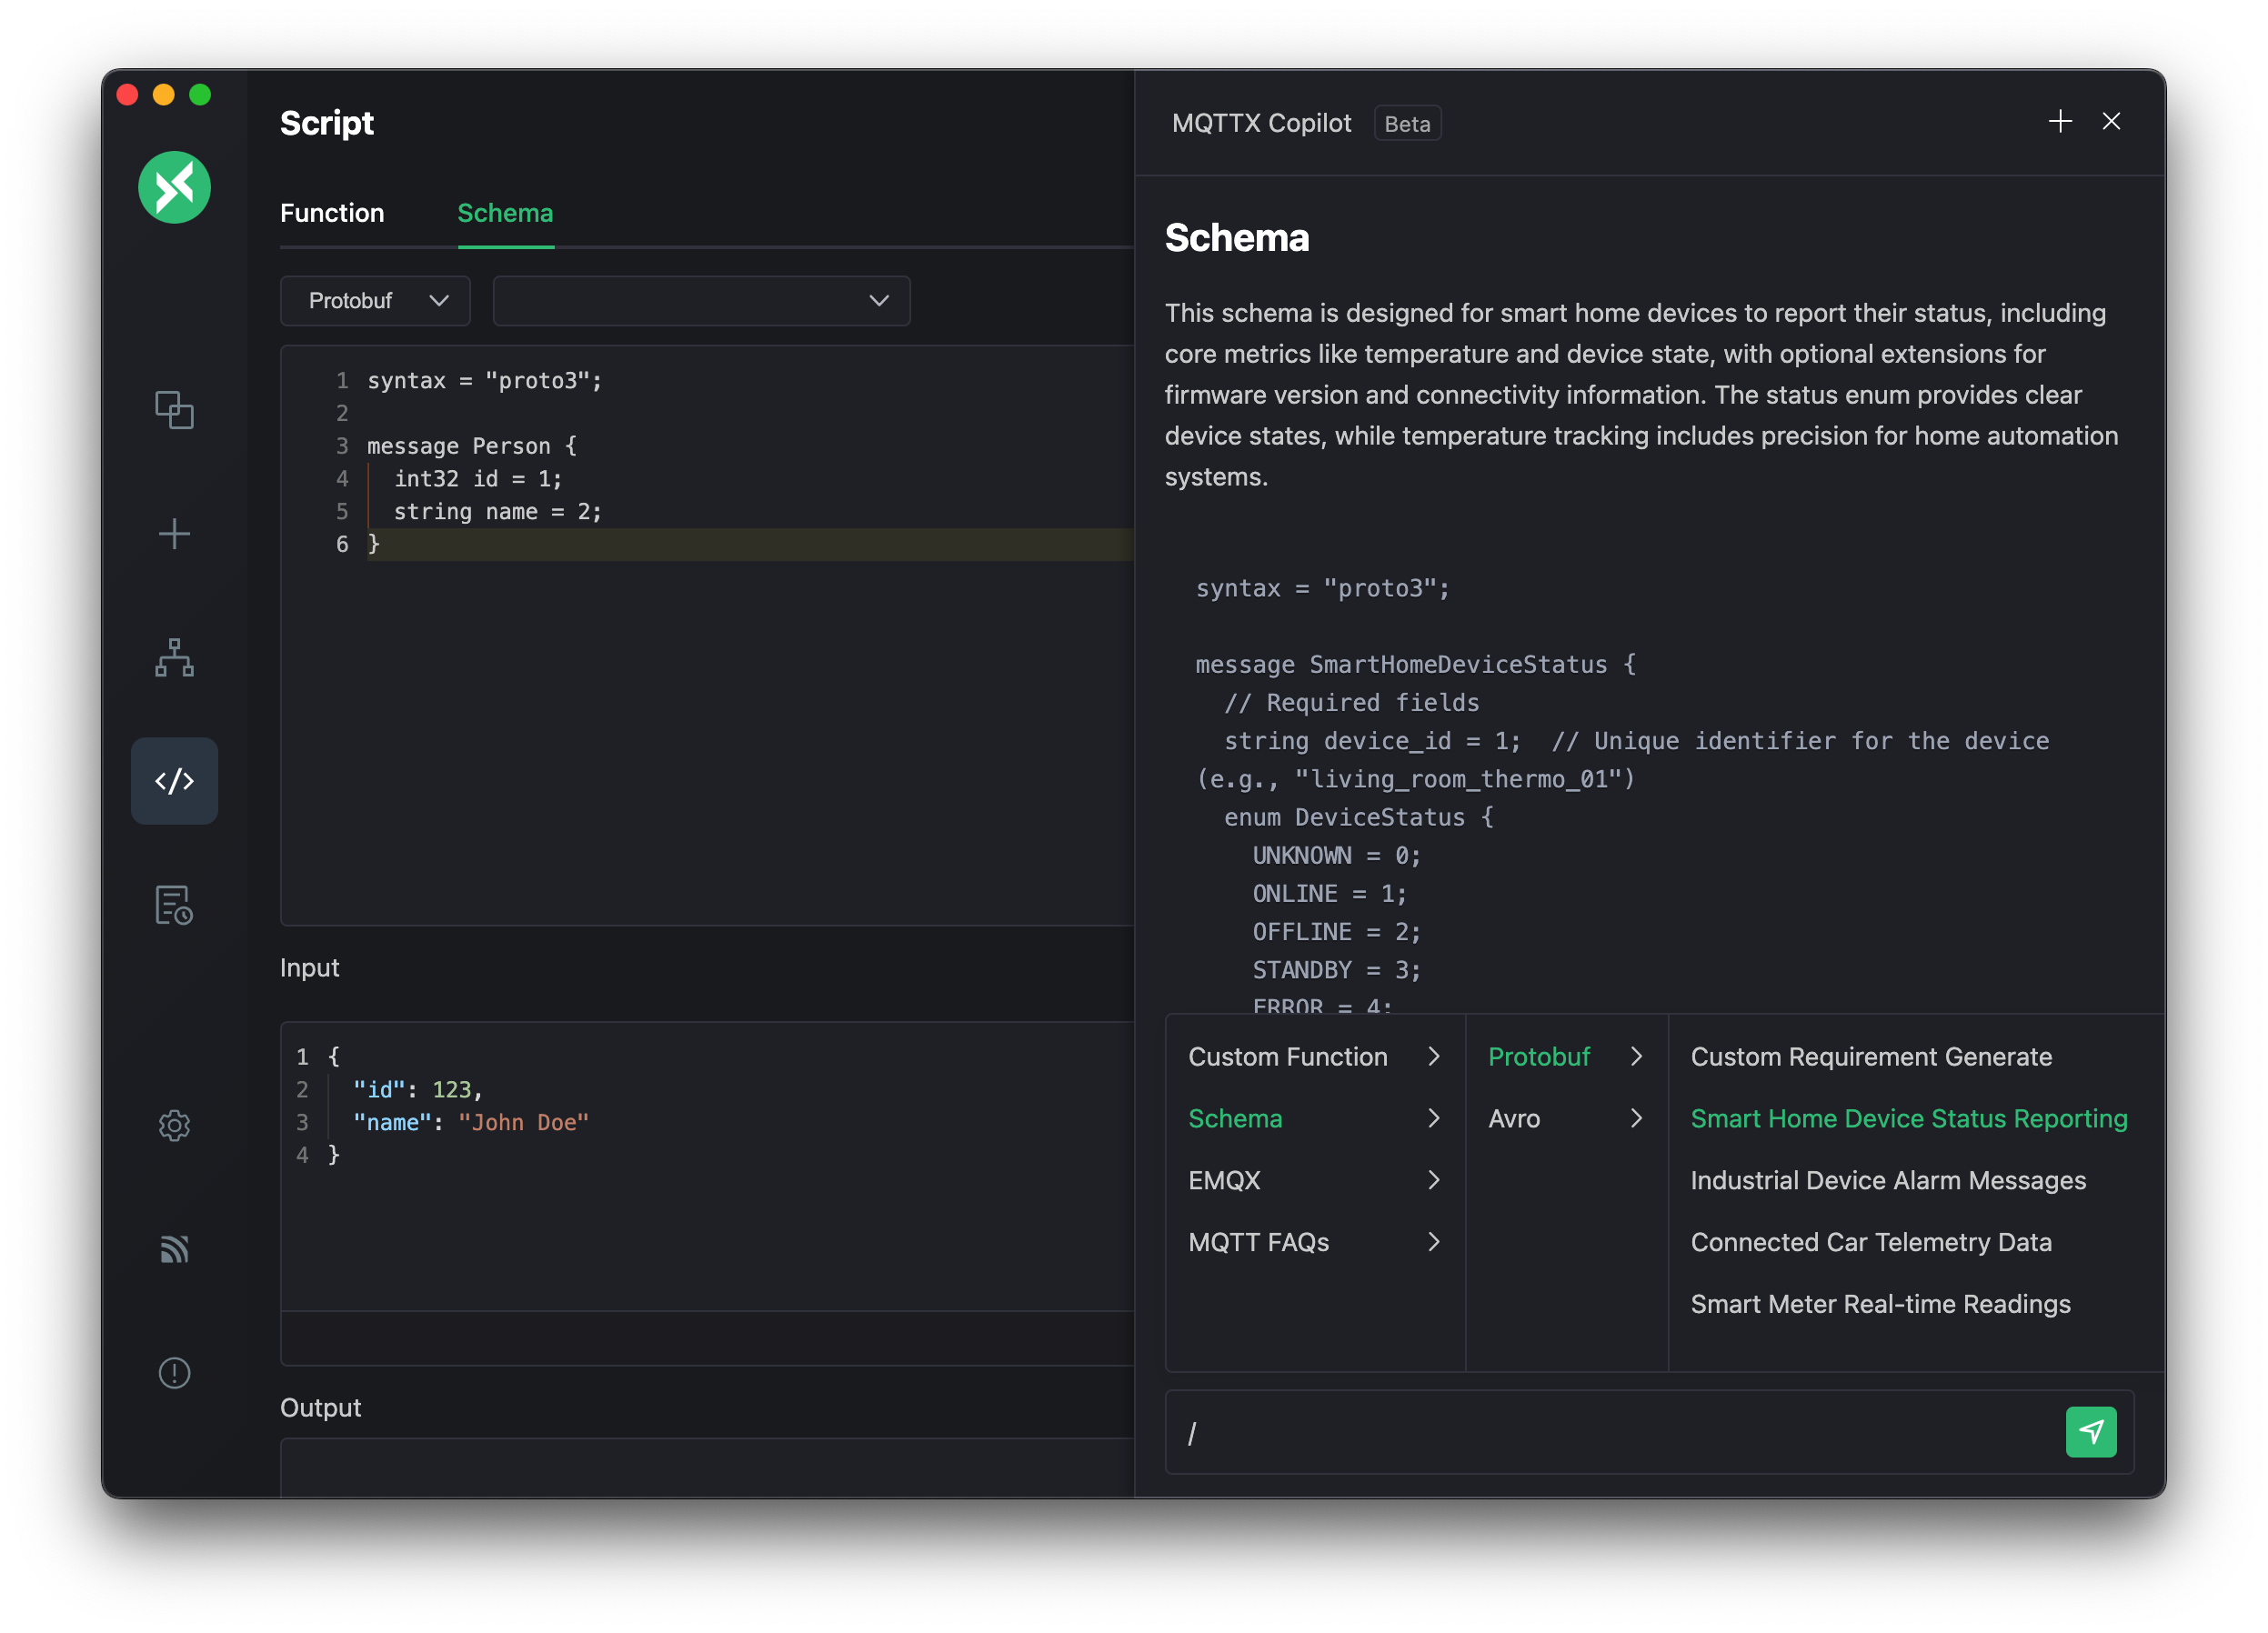
2. Schema Generation:
Automatically generate Schema definitions in Protobuf or Avro format for MQTT messages, which helps in standardizing data structures.
- Preset Scene Schemas:
- Directly generate Schemas for common IoT application scenarios, such as:
- Smart home device status
- Industrial equipment alarms
- Connected vehicle telemetry data
- Smart meter readings
- Directly generate Schemas for common IoT application scenarios, such as:
- Custom Schema:
- Describe your data structure in natural language, and MQTTX Copilot will generate the corresponding Schema specification.
MCP Integration
MQTTX (v1.12.0-beta+) enhances its Copilot AI capabilities by integrating the Model Context Protocol (MCP). This integration transforms MQTTX into an MCP Host, allowing MQTTX Copilot to interact directly with MQTT brokers and local resources, opening up new possibilities for IoT applications.
Note: This is a Beta feature. Please manually download and install v1.12.0-beta.2 or later from MQTTX Releases.
What is MCP?
The Model Context Protocol (MCP) is a standardized interface between AI models and external tools or data sources. It enables MQTTX Copilot to:
- Access contextual information beyond its training data.
- Interact securely with local and remote systems.
- Maintain a consistent interface across different AI providers.
- Execute specialized functions through standardized tool calls.
MCP follows a client-server architecture where MQTTX, as an MCP client, connects to MCP servers to utilize their capabilities.
Configuring MCP in MQTTX
MQTTX supports Stdio (Standard Input/Output) and SSE (Server-Sent Events) types of MCP servers.
Configuration Steps:
- Navigate to Settings > Copilot in MQTTX.
- Ensure MQTTX Copilot is enabled and your AI model is configured.
- Scroll down to the MCP section and enable it.
- Add your MCP server configuration in the JSON input field. The format is as follows:
{ "mcpServers": { "your-server-id-stdio": { "command": "npx", "args": ["-y", "@modelcontextprotocol/server-filesystem", "/path/to/allowed/dir1"] // "cwd": "/optional/working/directory" }, "your-server-id-sse": { "url": "http://localhost:4000/your-sse-endpoint" } } }your-server-id-stdio,your-server-id-sse: Unique identifiers for your servers.command,args,cwd: For Stdio-type servers (typically local command-line processes).url: For SSE-type servers (HTTP endpoints).
- After adding the configuration, servers will appear in the list below.
- Click the connection button in the upper right corner of each server entry to test connectivity.
- For successfully connected servers, the available tools will usually be displayed.
- Use the toggle switch next to each server to enable or disable it.

Example Scenarios
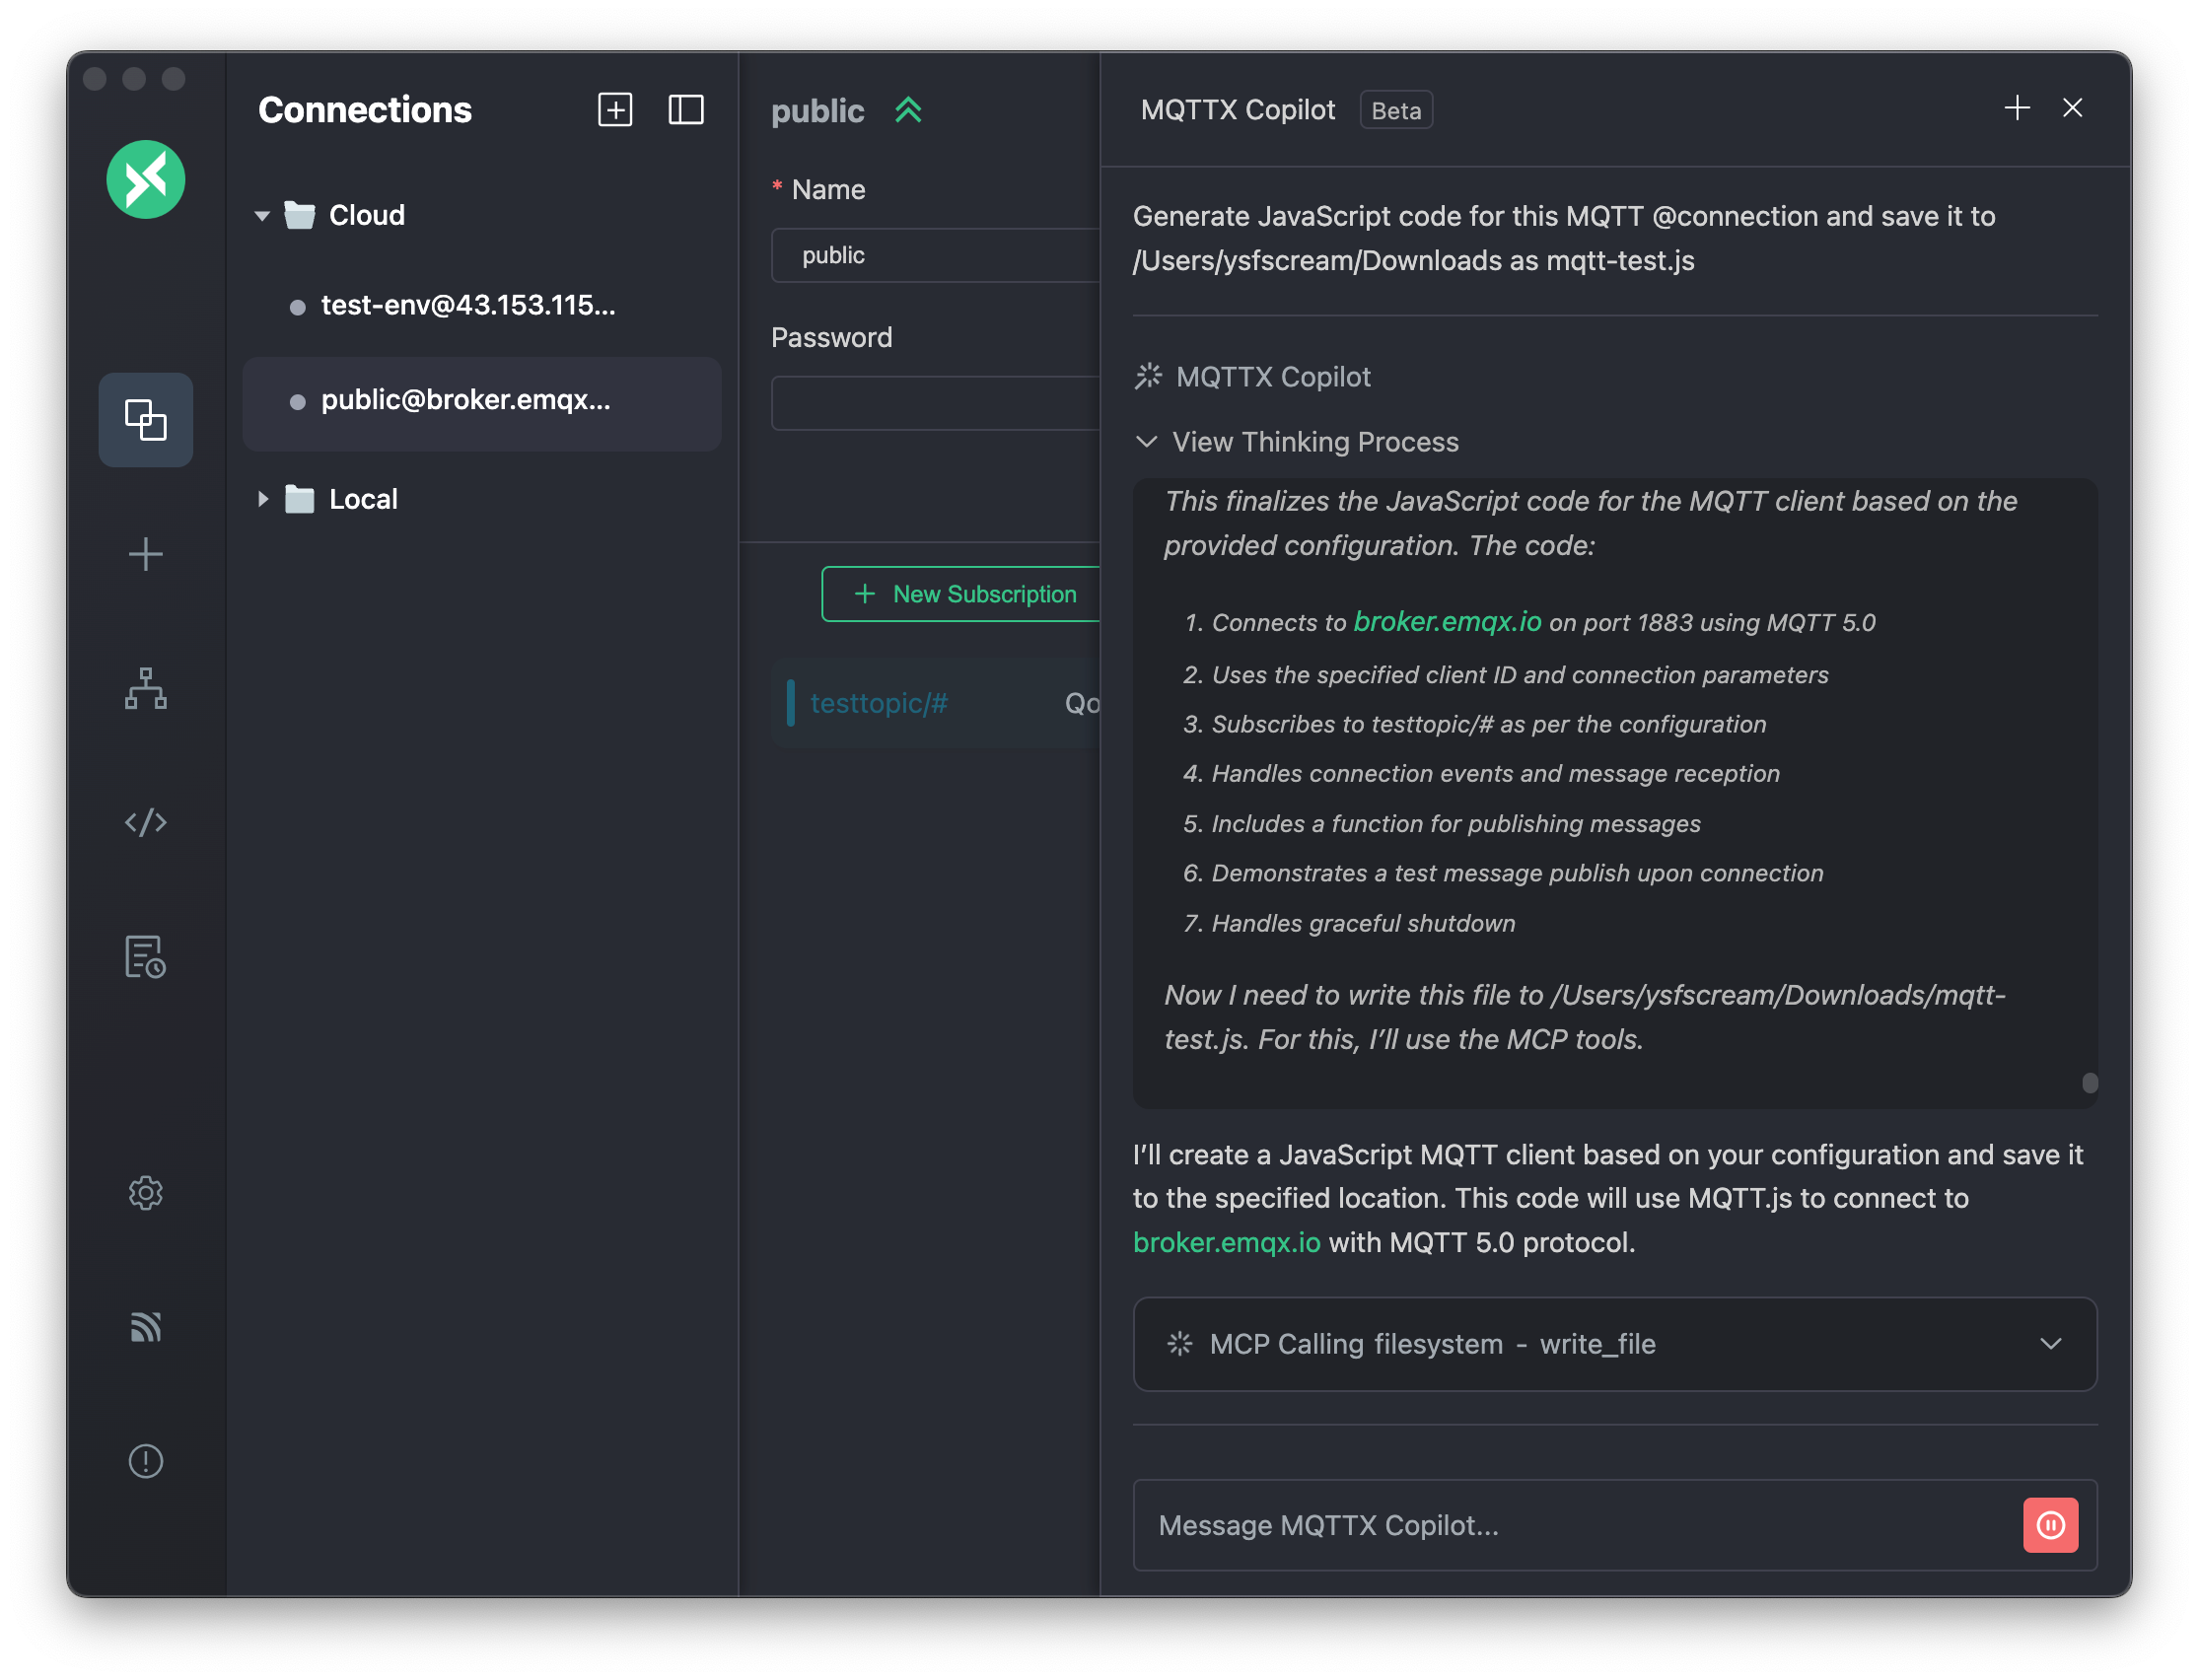
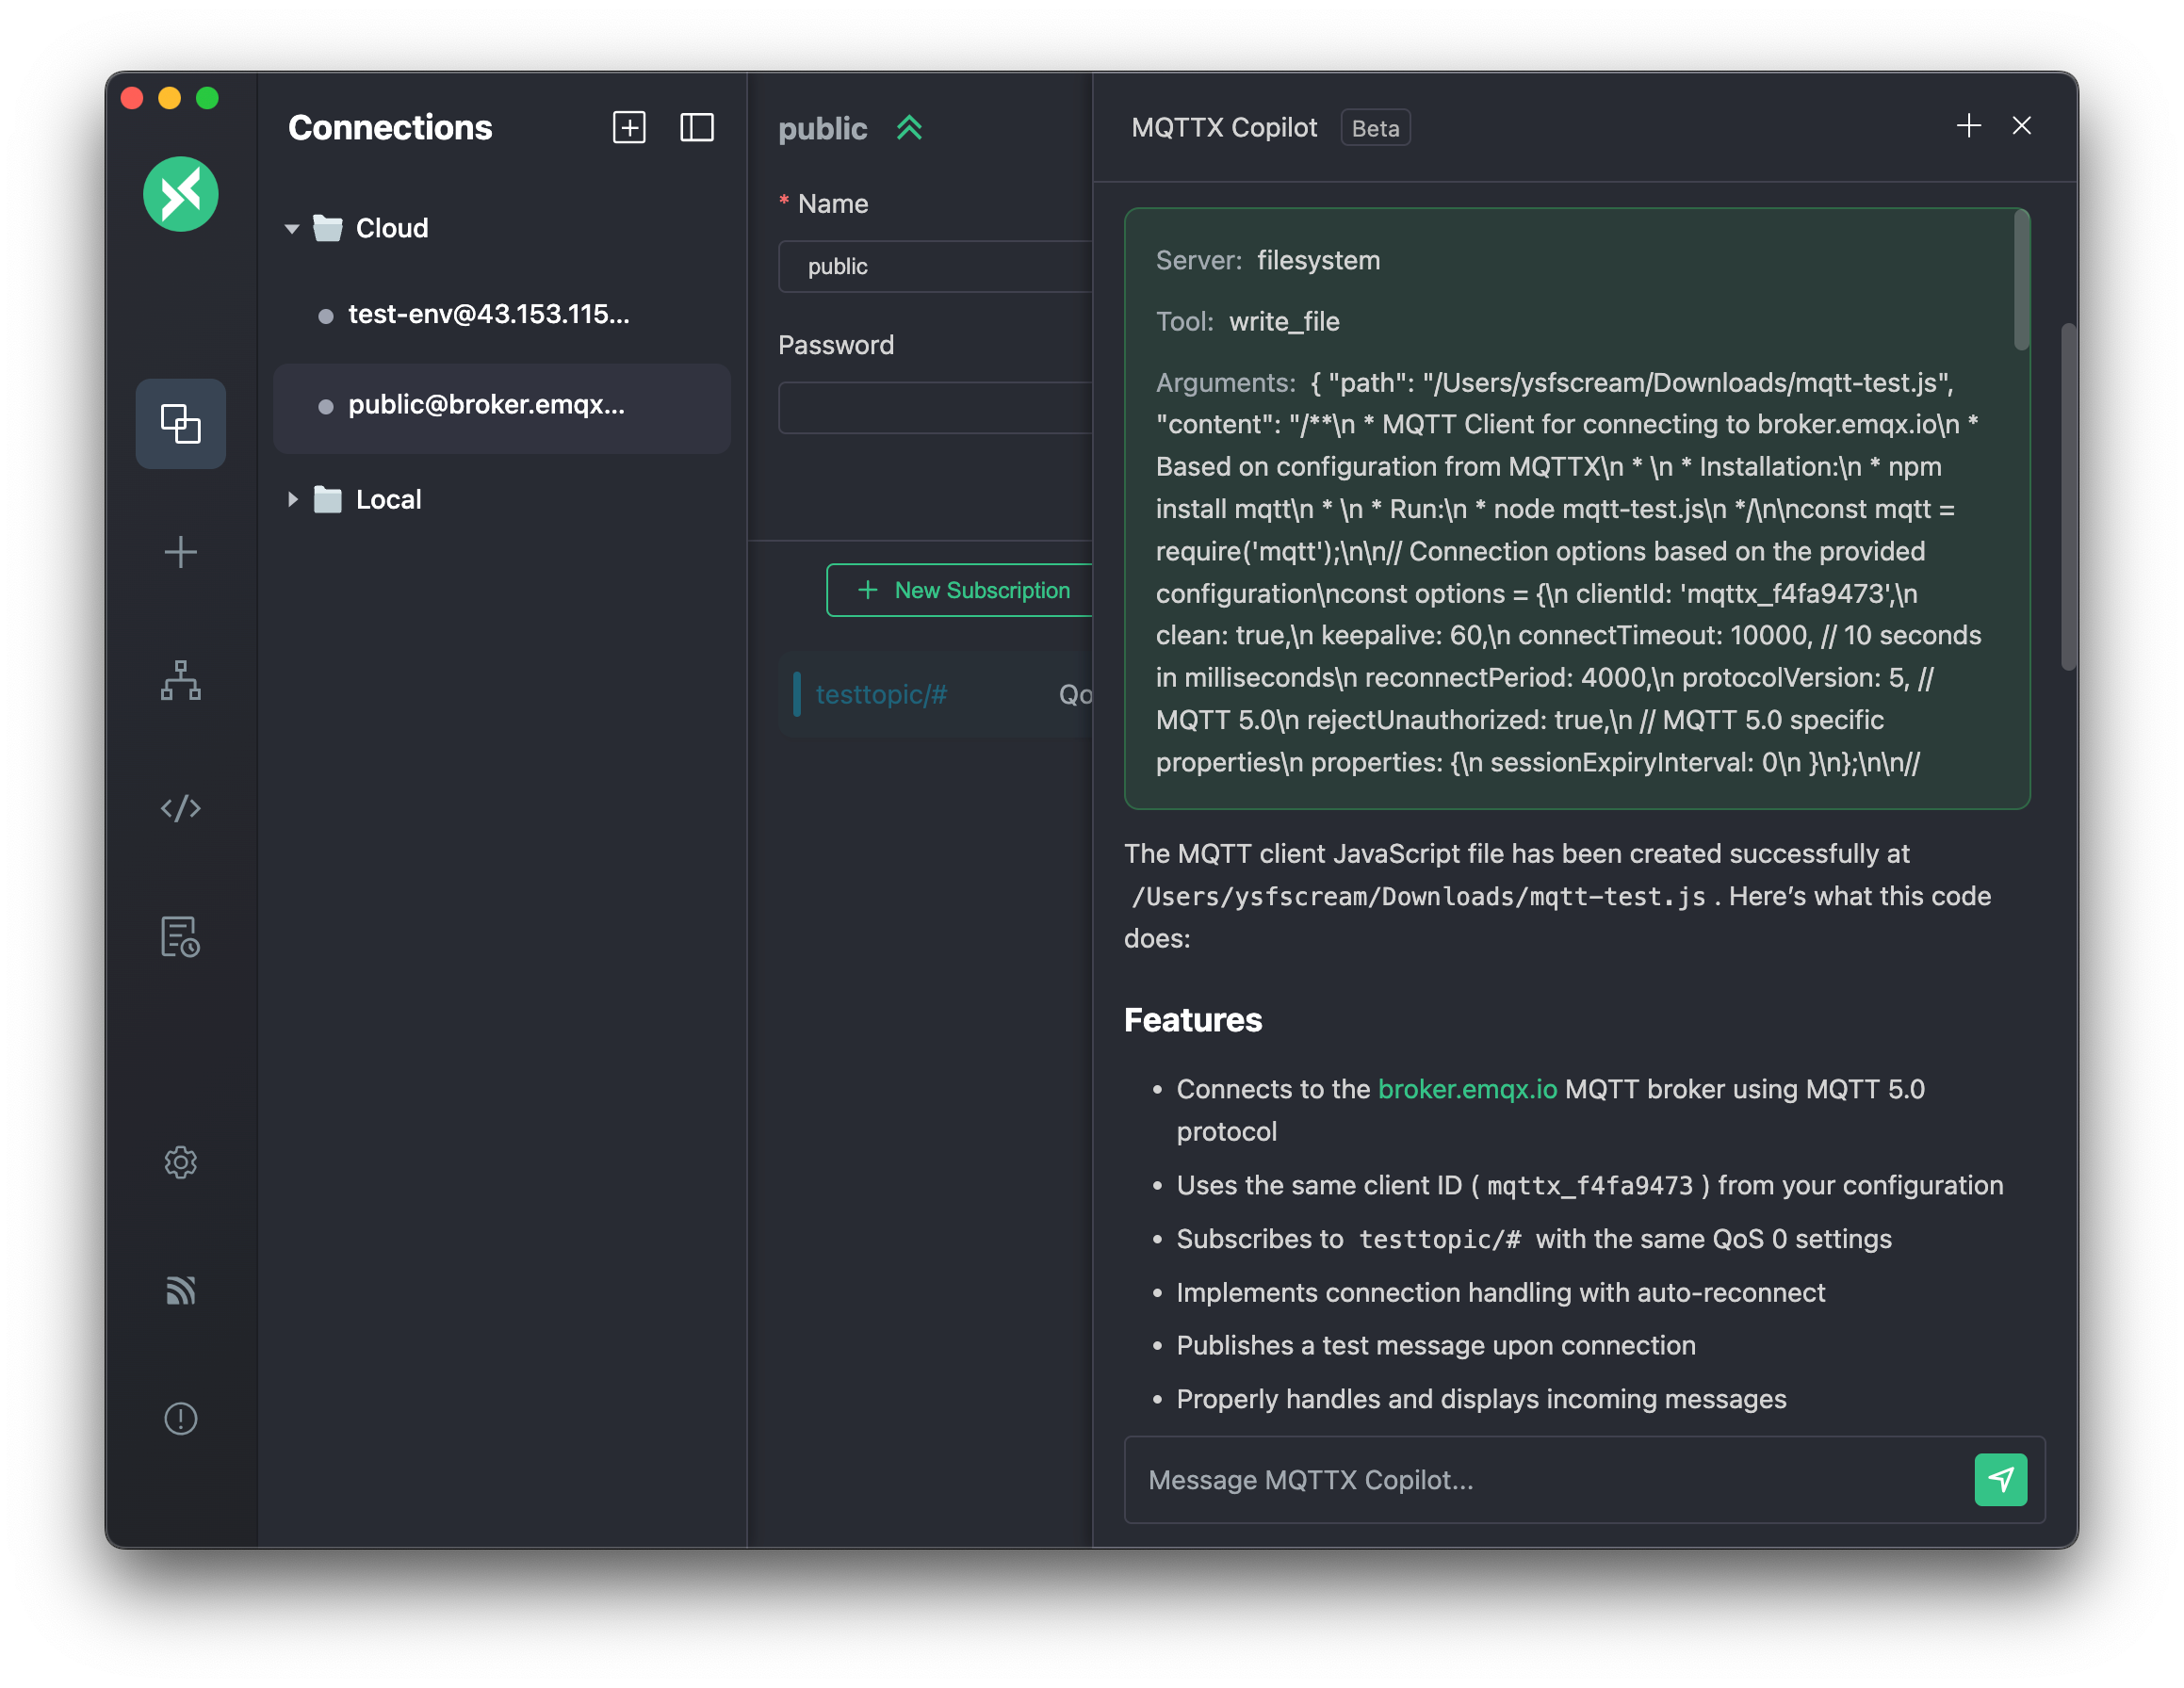
1. Local File System Interaction:
Allows MQTTX Copilot to read and write local files. For example, generating code and saving it directly.
MCP Server Configuration (Stdio - File System):
{
  "mcpServers": {
    "filesystem_access": {
      "command": "npx",
      "args": [
        "-y",
        "@modelcontextprotocol/server-filesystem",
        // Authorized directories for Copilot access, modify as needed
        "/Users/your_username/Downloads",
        "/Users/your_username/Desktop/mqtt_scripts"
      ]
    }
  }
}
Important:
- Replace
/Users/your_username/...with your actual paths. - For security, only authorize necessary directories.
Workflow:
- Configure and enable the file system MCP server as shown above.
- In the MQTTX Copilot chat box, get current connection details:
@connection. - Instruct MQTTX Copilot: "Generate JavaScript code for the current
@connectionand save it to/Users/your_username/Downloads/mqtt-test.js." - MQTTX Copilot will create and save the file via MCP.
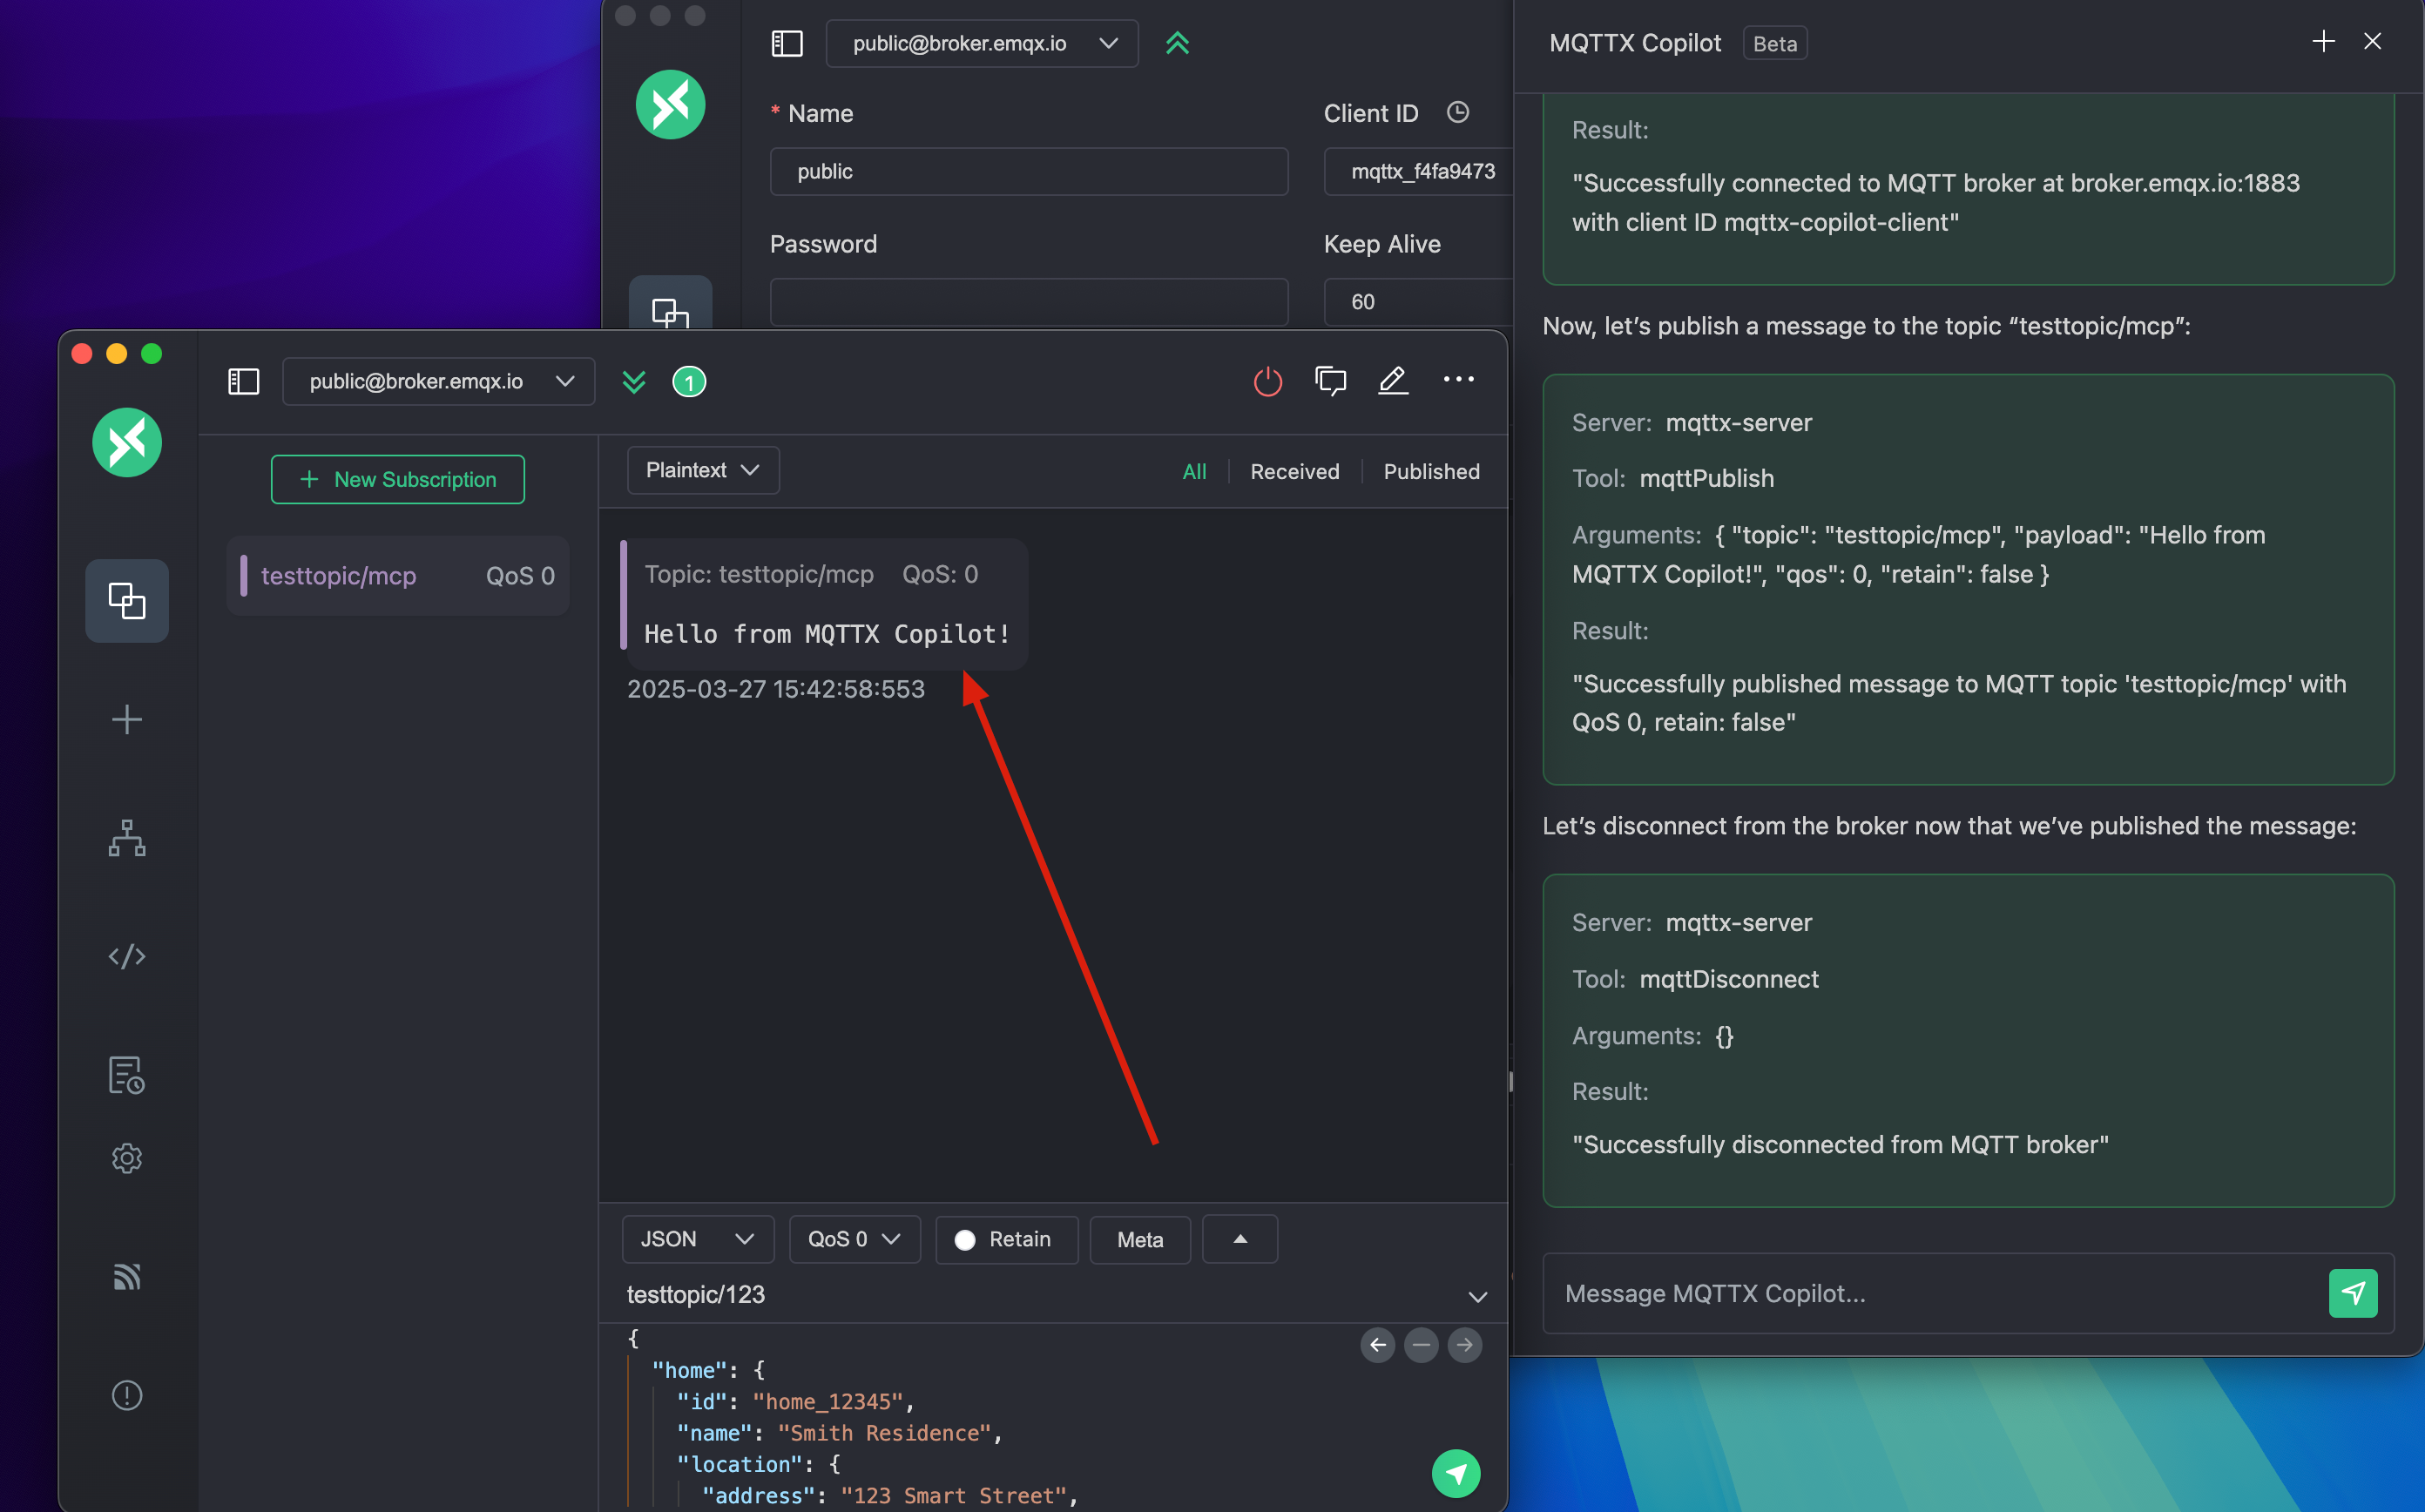
2. Performing MQTT Operations via MCP:
Control MQTTX Copilot to perform MQTT operations like connect, publish, subscribe, etc., using natural language through a dedicated MCP server. You can use the example SSE server provided by EMQ: mqttx-mcp-sse-server
MCP Server Configuration (SSE - MQTT Operations):
Assuming your SSE server is running at http://localhost:4000/mqttx/sse.
{
  "mcpServers": {
    "mqtt_operations_service": {
      "url": "http://localhost:4000/mqttx/sse"
    }
  }
}
Workflow:
- Deploy your MQTT operations MCP SSE server.
- Configure and enable the MCP server in MQTTX as shown above.
- In the MQTTX Copilot chat box, instruct: "Connect to
mqtts://broker.emqx.io:8883, then publish the messageHello from MQTTX Copilot!to the topictesttopic/mcp." - Subscribe to the
testtopic/mcptopic in another MQTTX client to receive the message.
Upcoming Features
- Expanded Keywords: Adding
@payload,@topics, etc., for quick data insights and management.
FAQ
Is it Free to Use?
While MQTTX Copilot itself is free to use, it depends on a paid API Key from OpenAI or other supported AI services. MQTTX remains completely open-source.
How to Provide Feedback?
For bug reports or feature suggestions, please submit your Feedback on GitHub Issues.
What is the Default Context Limit?
MQTTX Copilot has a default context limit of 20. Exceeding this limit may require starting a new conversation for accurate responses.
How to Start a New Conversation?
To start a new conversation in MQTTX Copilot, click the + button at the top of the dialogue box. This action clears all previous conversations, allowing you to initiate a fresh dialogue.