Getting Started
Preparing the MQTT Broker
Public MQTT Broker
For a quick test that doesn't require local MQTT Broker deployment, you can use the online public version of EMQX;
Broker address: broker.emqx.io
Broker TCP port: 1883
Broker SSL port: 8883
Fully Managed MQTT Cloud
EMQX Cloud is a fully managed, cloud-native MQTT Messaging Service for IoT that allows you to create an MQTT Broker instantly in just a few minutes.
Sign up for a 14-day free trial of EMQX Cloud
No credit card required.
Self-managed MQTT Broker
If you plan on running an MQTT Broker locally, we recommend EMQX. EMQX Broker is a cloud-native, distributed MQTT Broker for IoT, powering event streaming for IoT devices at massive scale.
To install EMQX using Docker:
docker run -d --name emqx -p 1883:1883 -p 8083:8083 -p 8883:8883 -p 8084:8084 -p 18083:18083 emqx/emqx
Connect
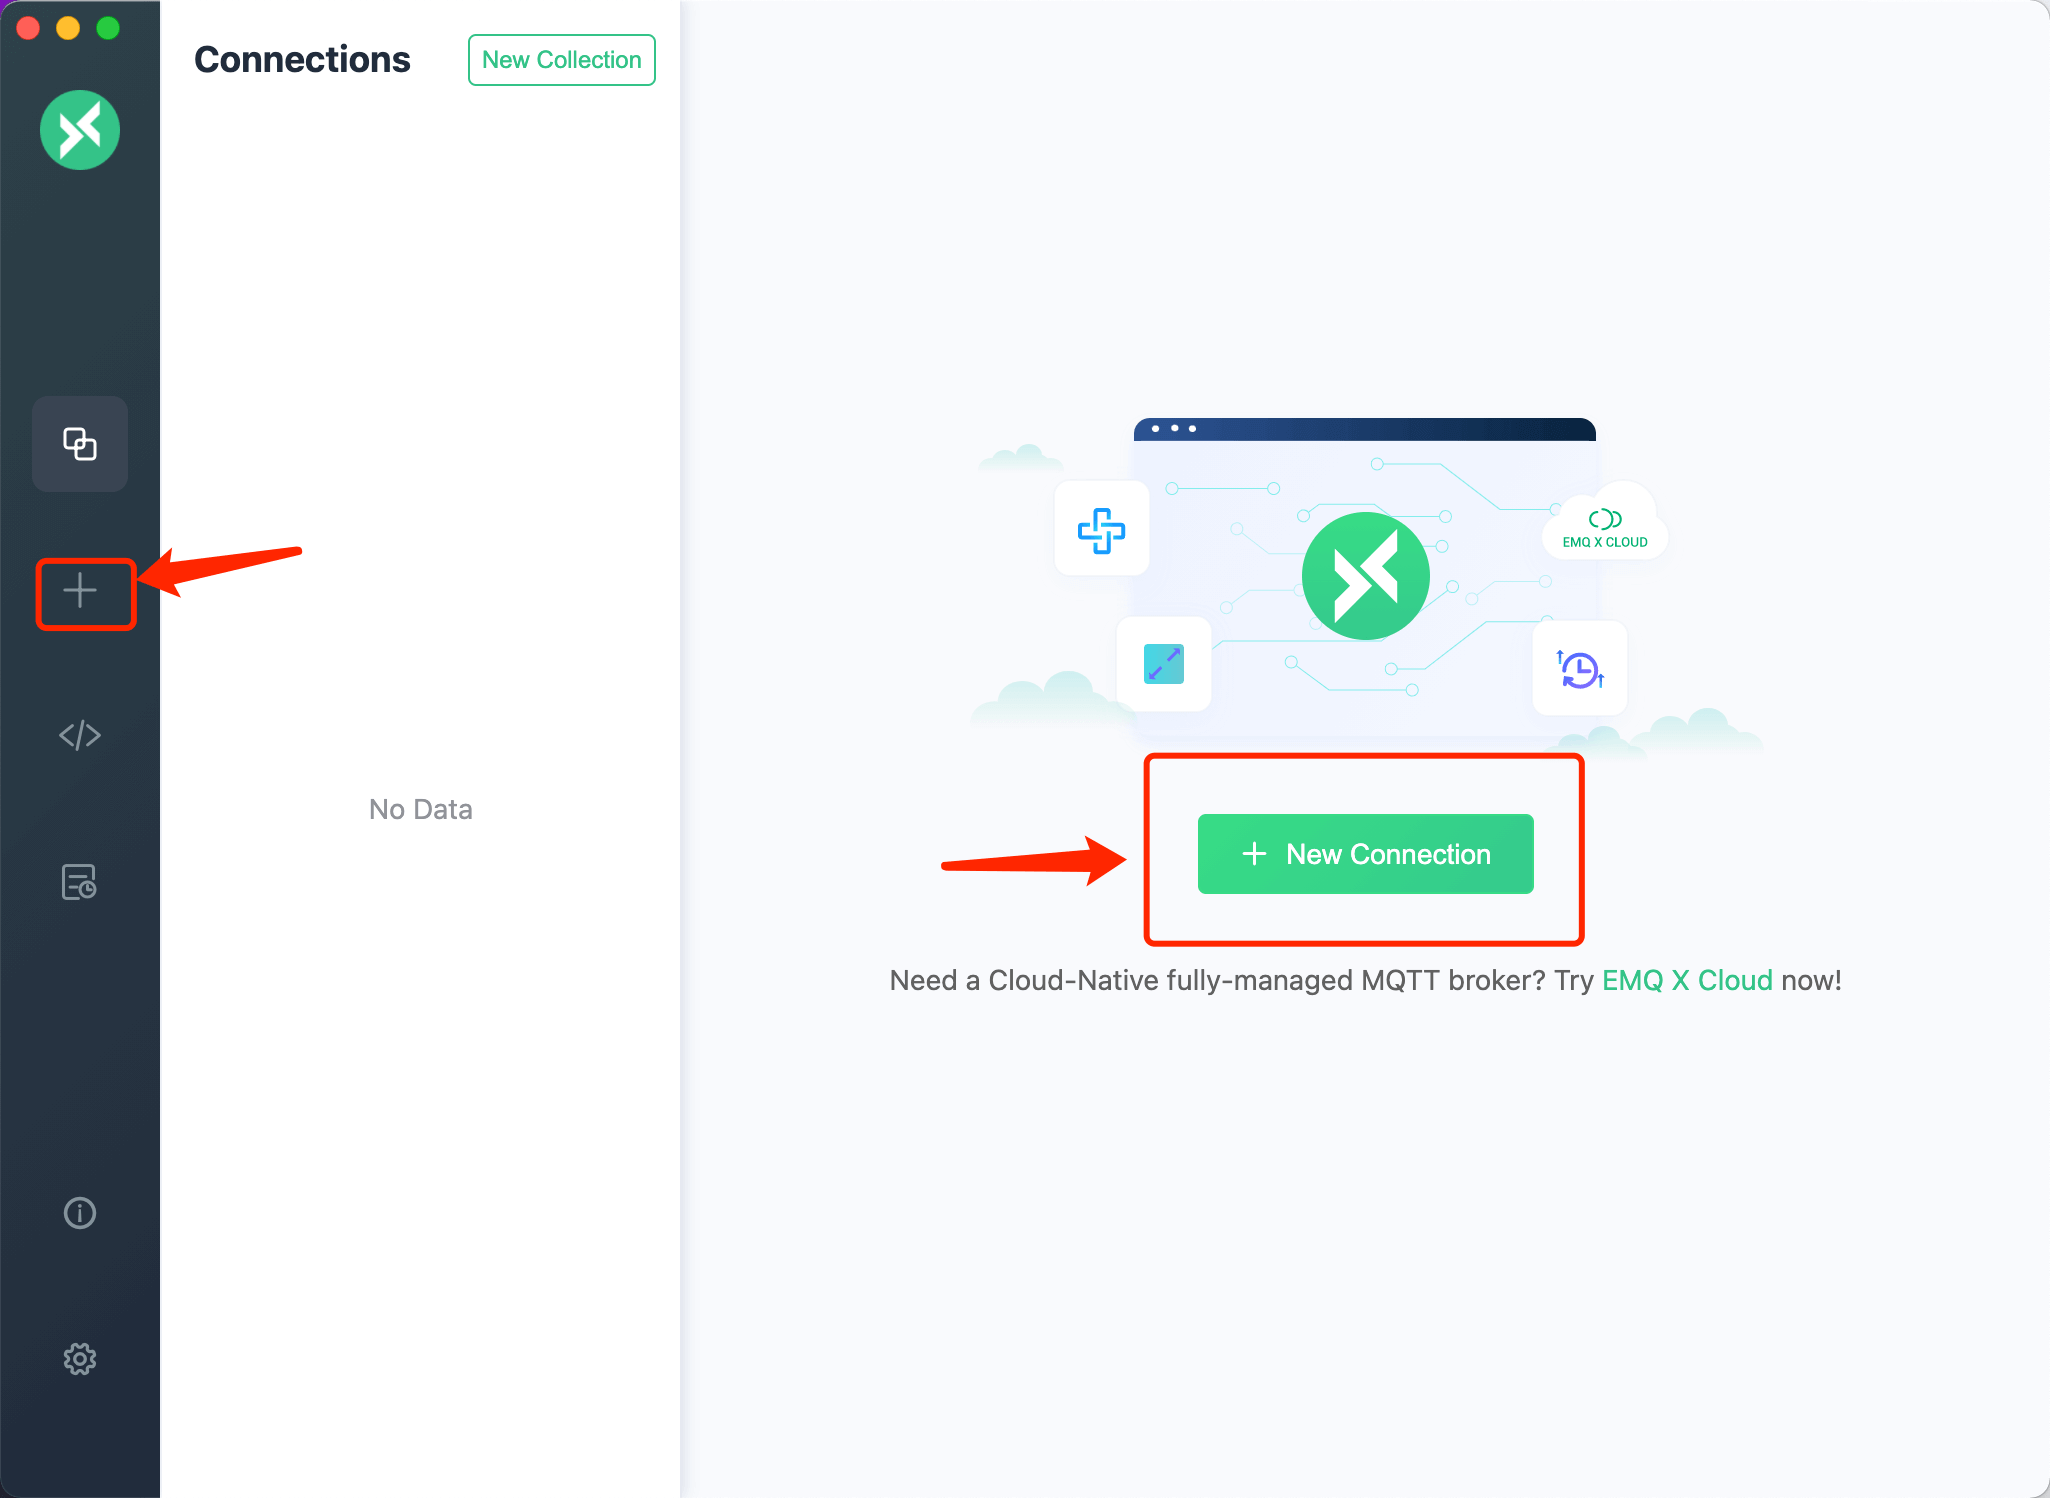
When your MQTT Broker is ready, click the + icon in the left menu bar to navigate to the main program page. If there's no data on this page, click on the new connection button to the right to swiftly configure a new client connection.
Client-Related Information
Once you've navigated to the creation page, you'll need to configure or fill out the relevant information to connect to the client.
- Broker Information
TheBrokerinformation,Client ID,Host, andPortwill already be filled in by default. If needed, you can modify this based on your actualBrokerinformation. Click the refresh button next toClient IDto generate a newClient IDquickly.
The drop-down box in front ofHostis used to select the connection protocol, supportingmqtt: //,ws: //. If you're using anSSL / TLSauthenticated connection, it needs to be changed tomqtts: //,wss: //.
Note: If the protocol is changed, the connection port also needs to be adjusted.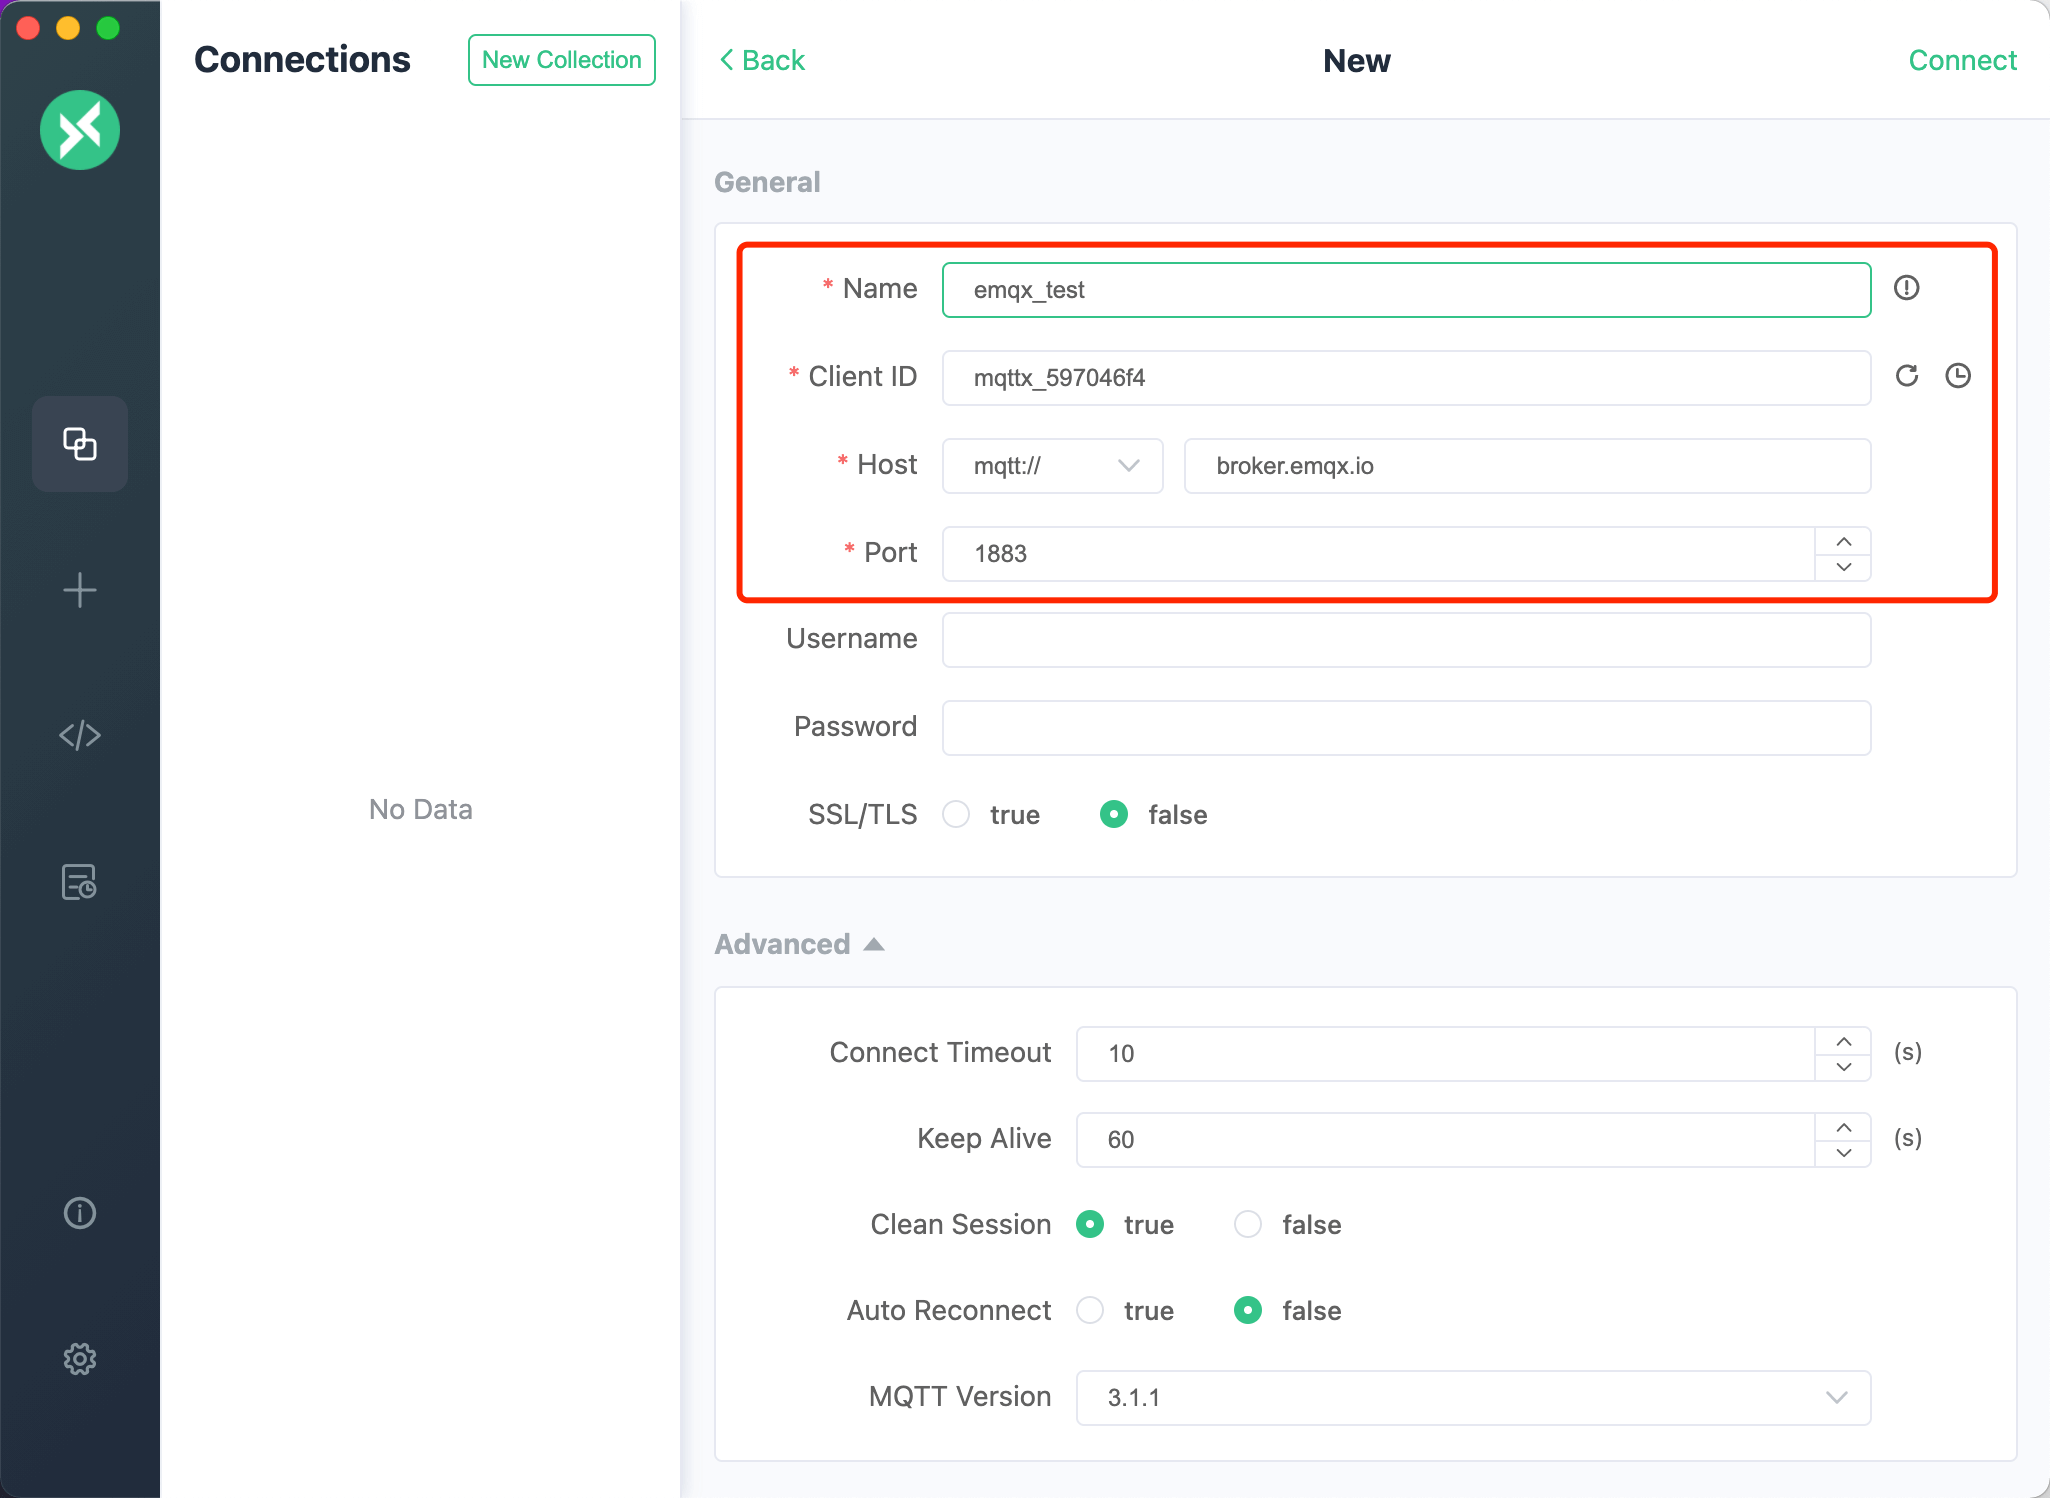
- User Authentication Information
If your broker has enabled user authentication, you can input yourUsernameandPasswordinformation into the configuration item.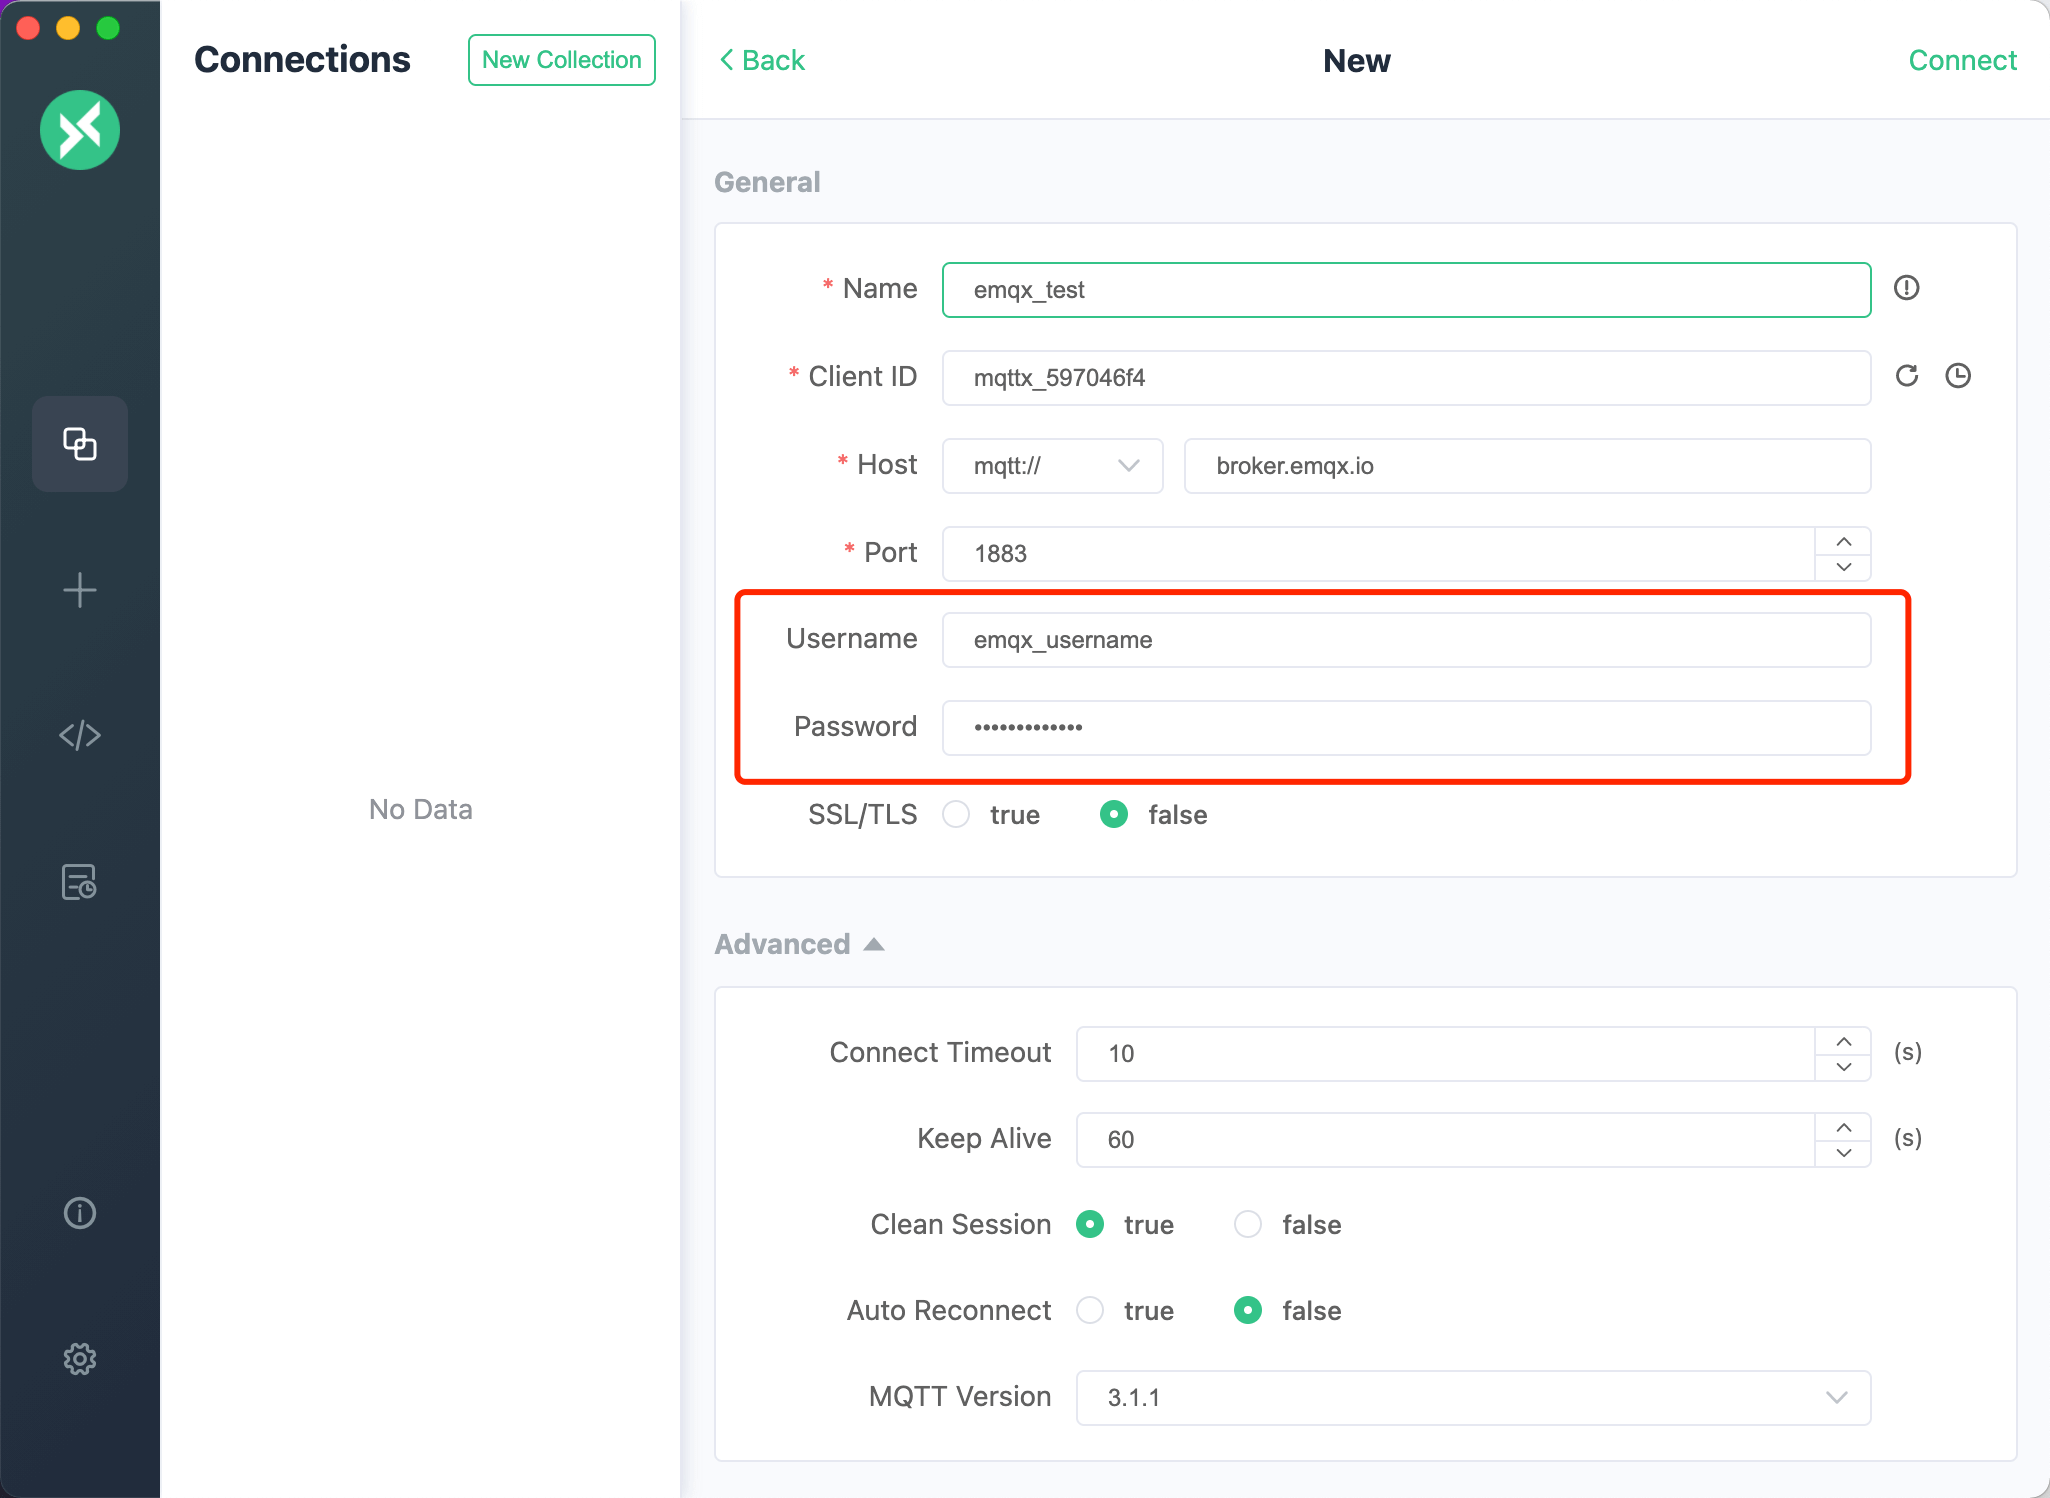
- SSL/TLS
When you need to enable SSL/TLS authentication, simply turn on the SSL/TLS switch in the configuration. Two methods are provided,CA signed serverandSelf signed.
IfSelf signedis chosen, certificate configuration can be performed. Click the folder icon on the far right to select the certificates you've created. For a one-way connection, only yourCA Fileneeds to be selected. For two-way authentication, you also need to configure theClient Certificate FileandClient key file. EnableStrict validate Certificateto activate a more thorough certificate verification connection. This is generally recommended when testing the production environment.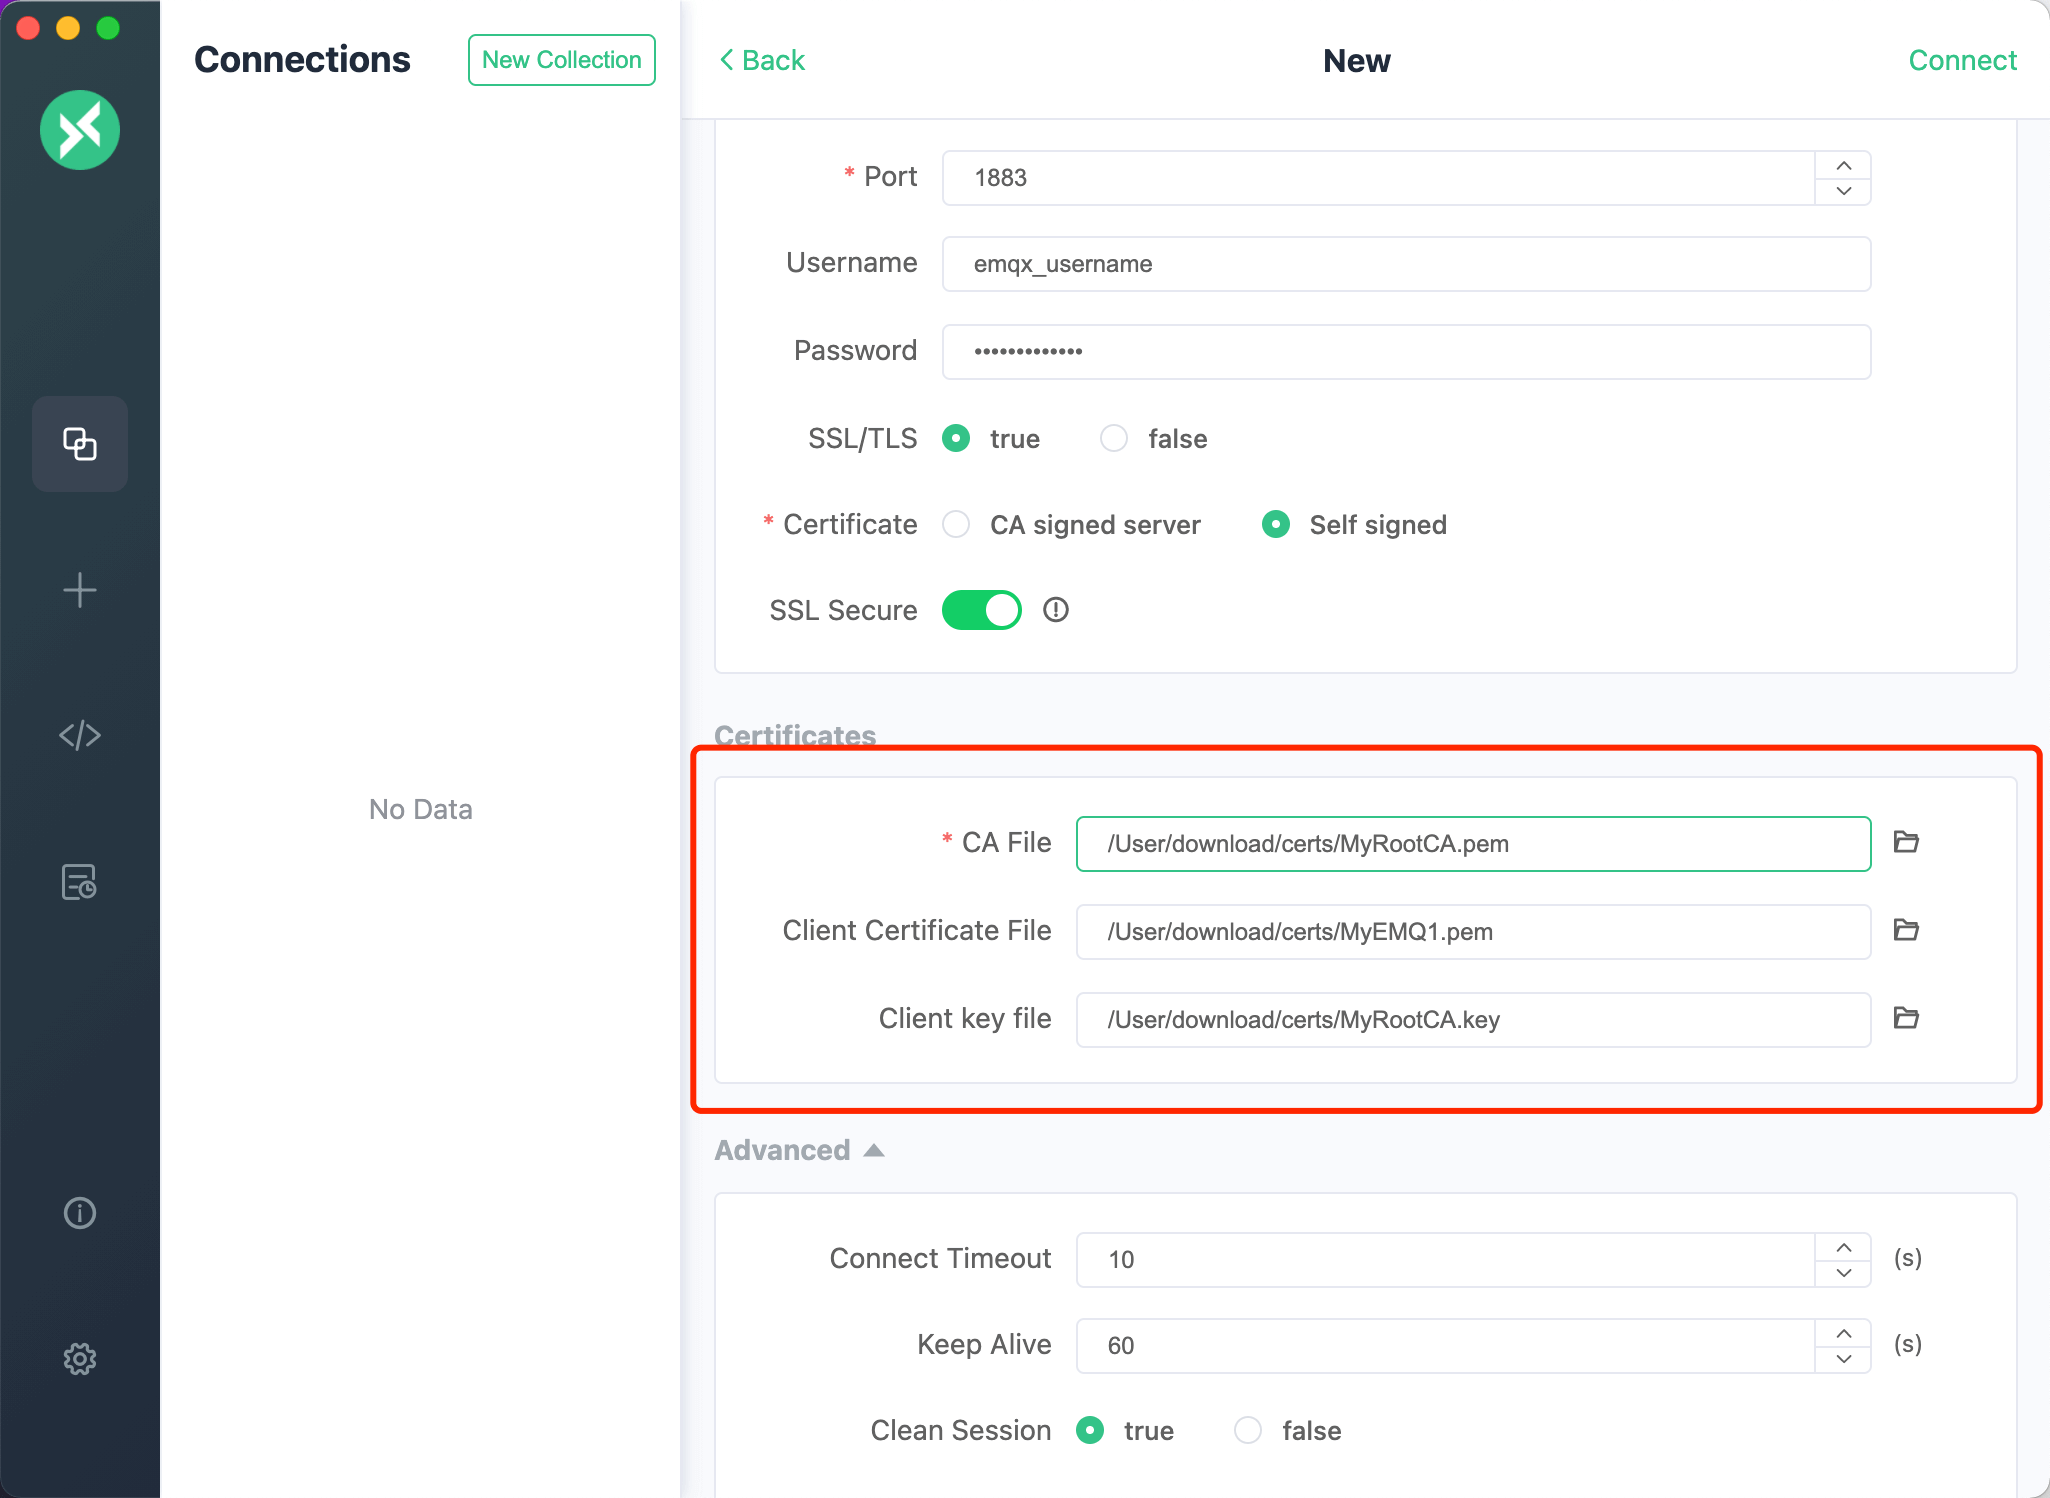
About SSL Secure Switch:
The SSL secure switch in your MQTT configuration determines whether to verify the server certificate chain and hostname during the connection. When turned off, no verification is performed, allowing connections to unverified servers.
Scenarios for using the SSL secure switch:- Development Environment: In development, for testing and debugging, you can turn off the SSL secure switch to connect to unverified servers.
- Internal Network: In trusted internal networks without external access risk, consider turning off the SSL secure switch to simplify certificate management.
Note: Turning off the SSL secure switch reduces security. In production or when communicating with external networks, enable the switch to ensure secure communications. - Advanced Configuration
In the advanced configuration, you can adjustConnection Timeout Duration, KeepAlive,Clean Session,Auto Reconnect,MQTT Version, etc. - MQTT 5.0
In the advanced configuration, you can select the MQTT protocol version, including MQTT v3.1.1 and MQTT v5.0; the default is v3.1.1. If v5.0 is chosen, you can configureSession Expiry Interval,Receive Maximum, andTopic Alias Maximum(optional).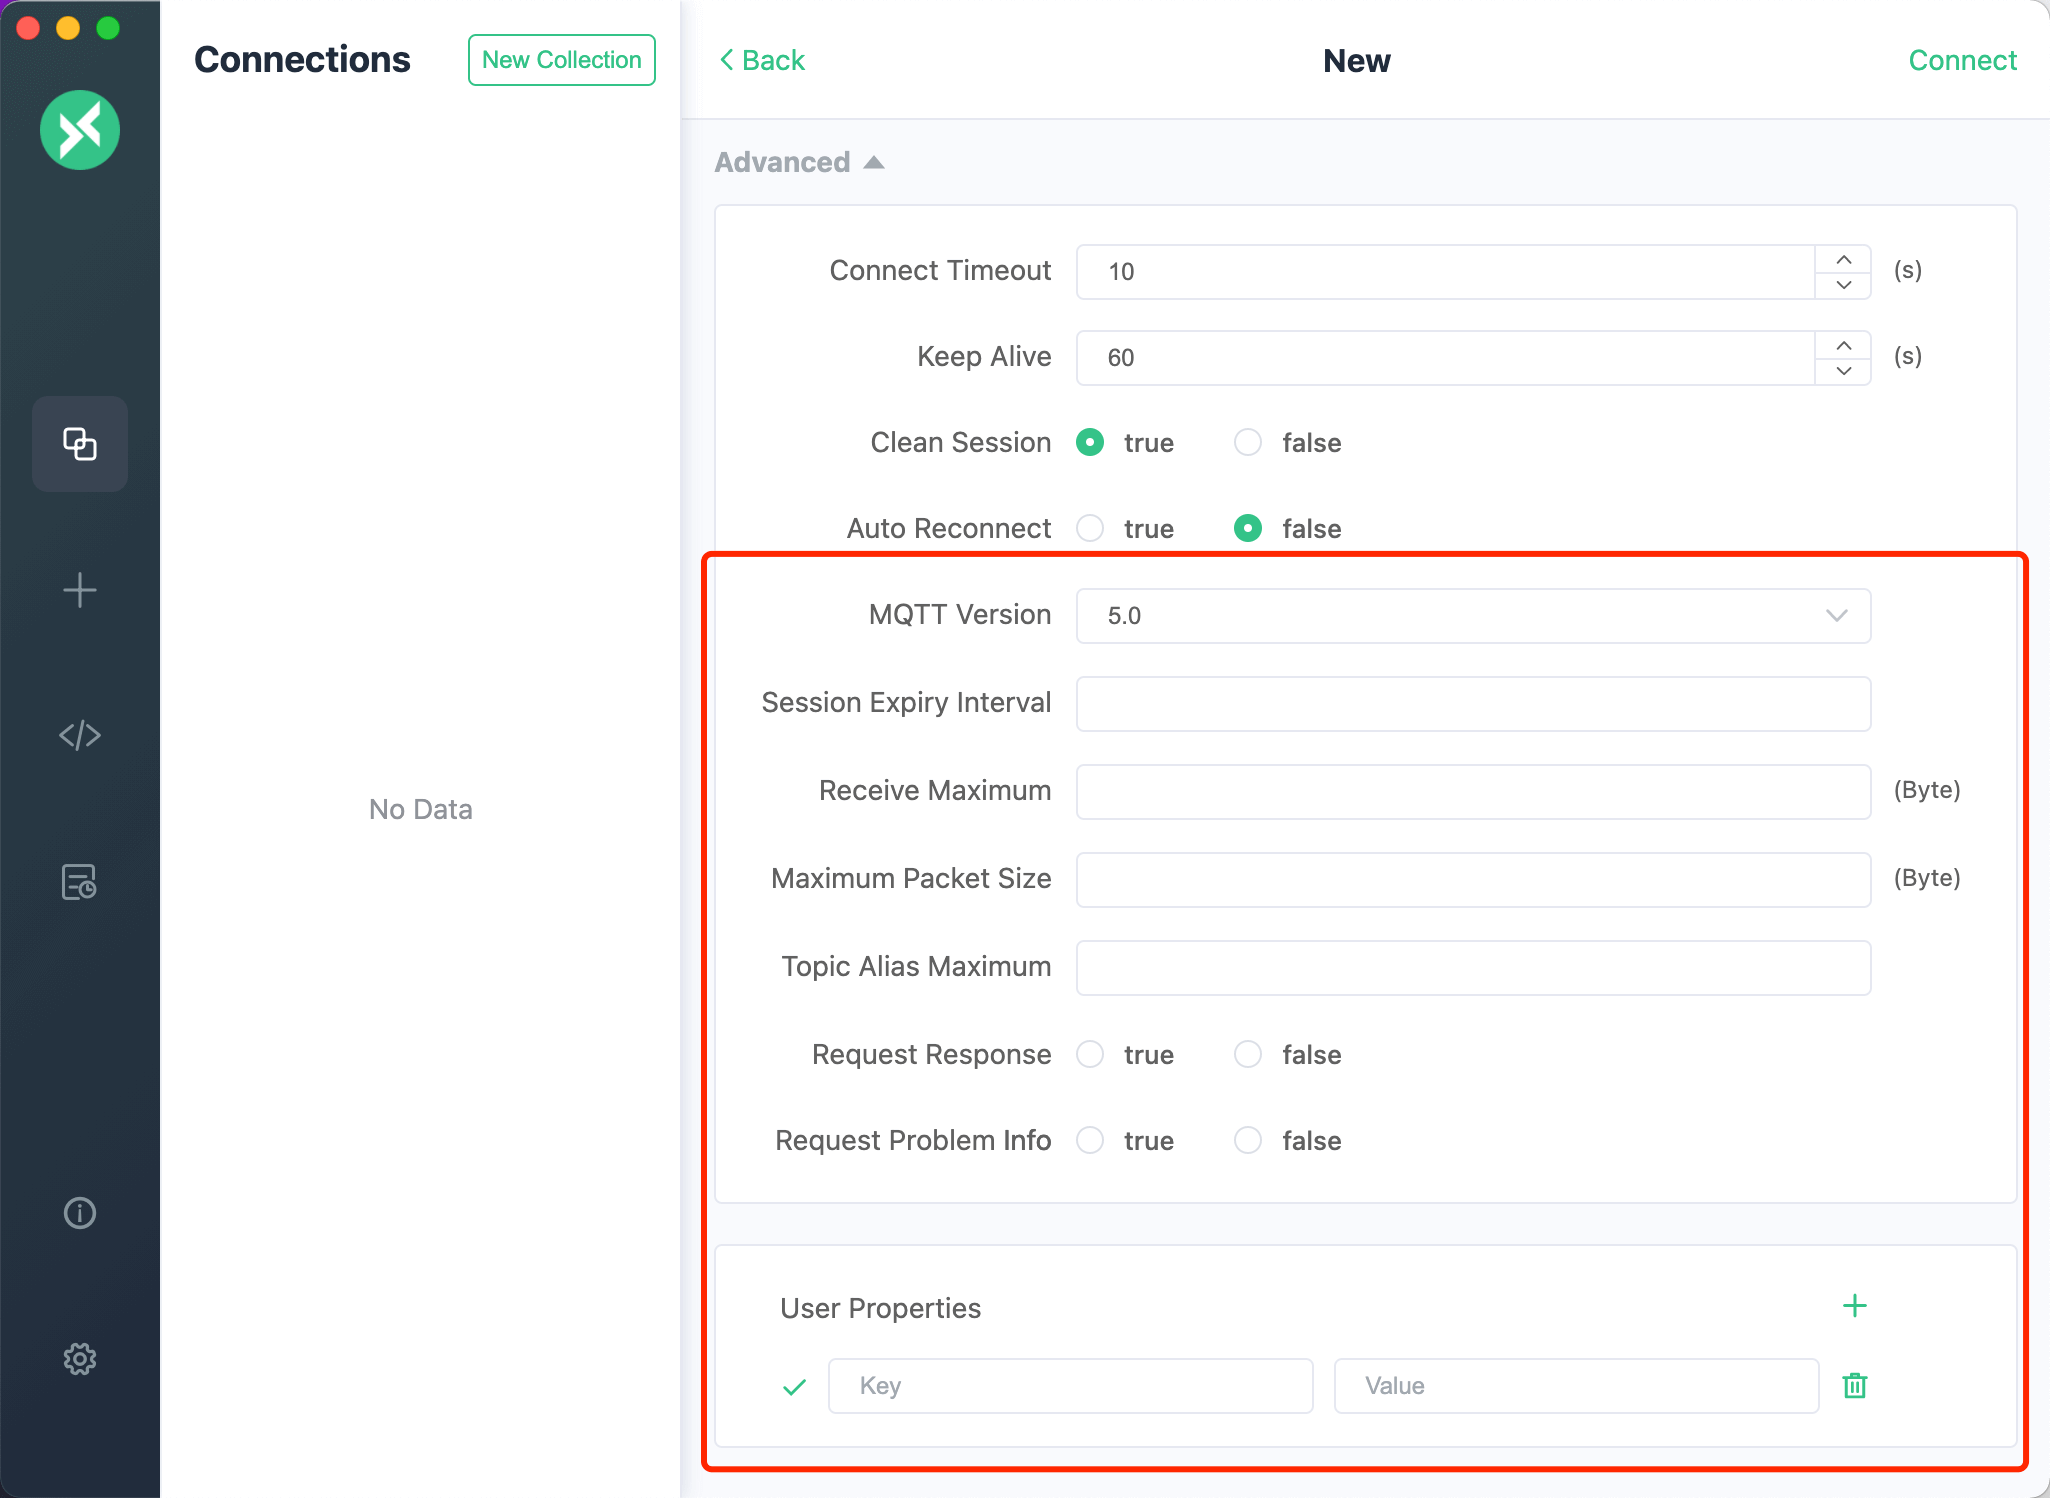
- Will Message
Below the advanced configuration, you can configure the Will Message. TheLast-Will-QoSandLast-Will-Retainfields are preset with 0 andFalse, respectively. Input theLast-Will-TopicandLast-Will-Payloadvalues to complete the Will Message configuration.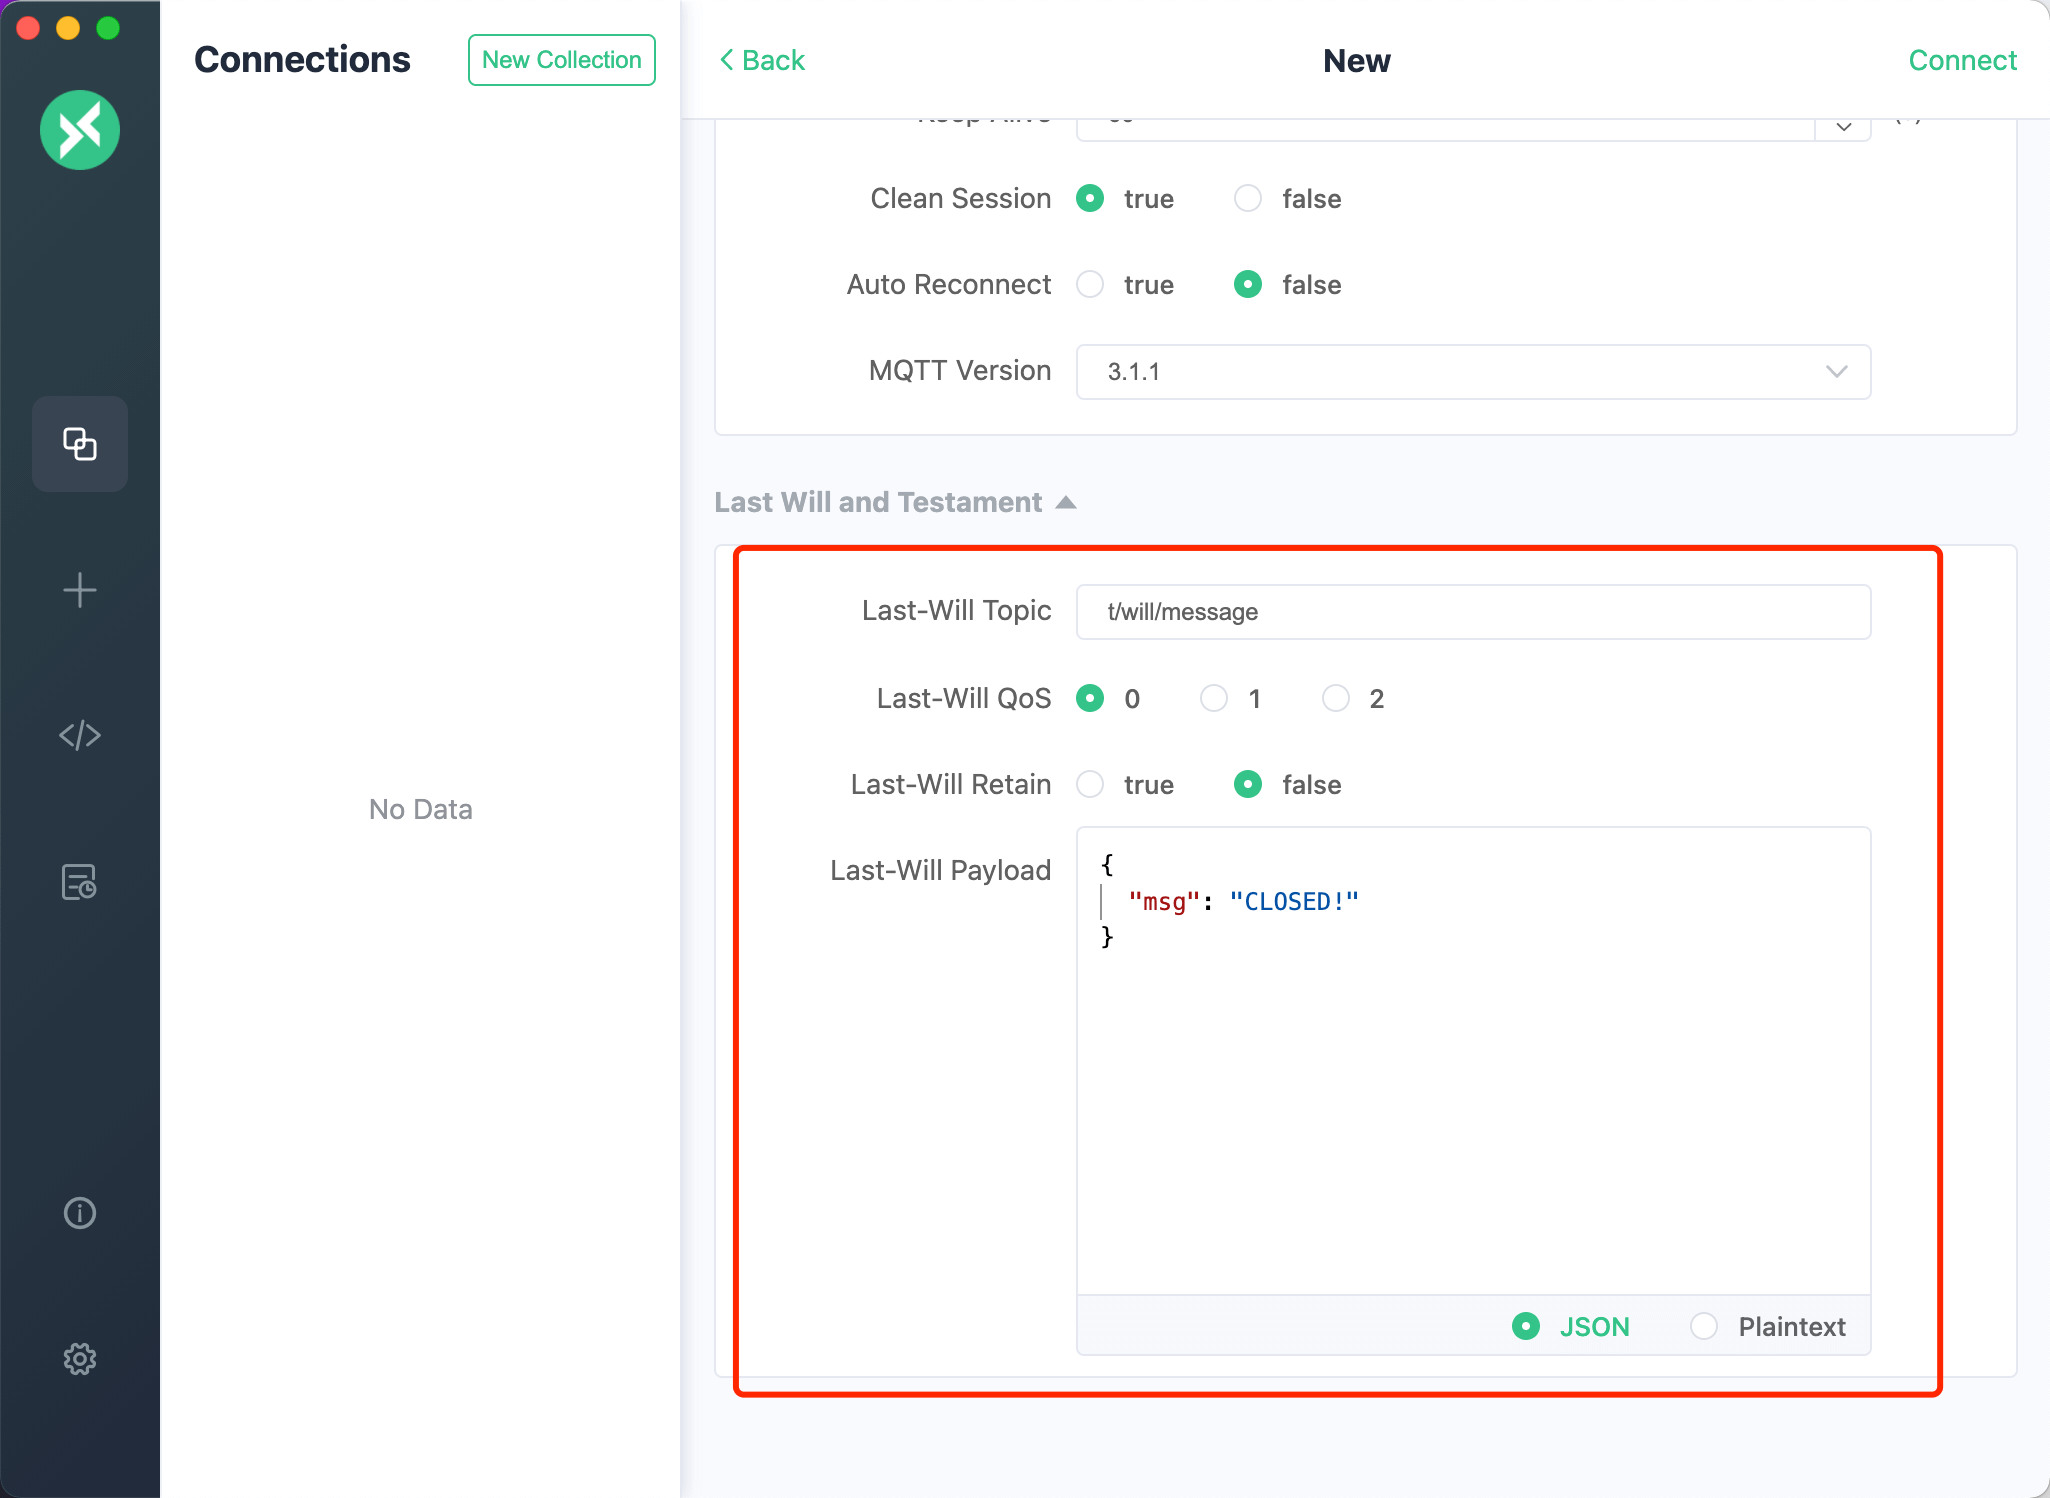
After completing the configuration, click the Connect button in the upper right corner to swiftly create a connection and connect to the MQTT Broker.
Subscribe and Publish
Main Interface
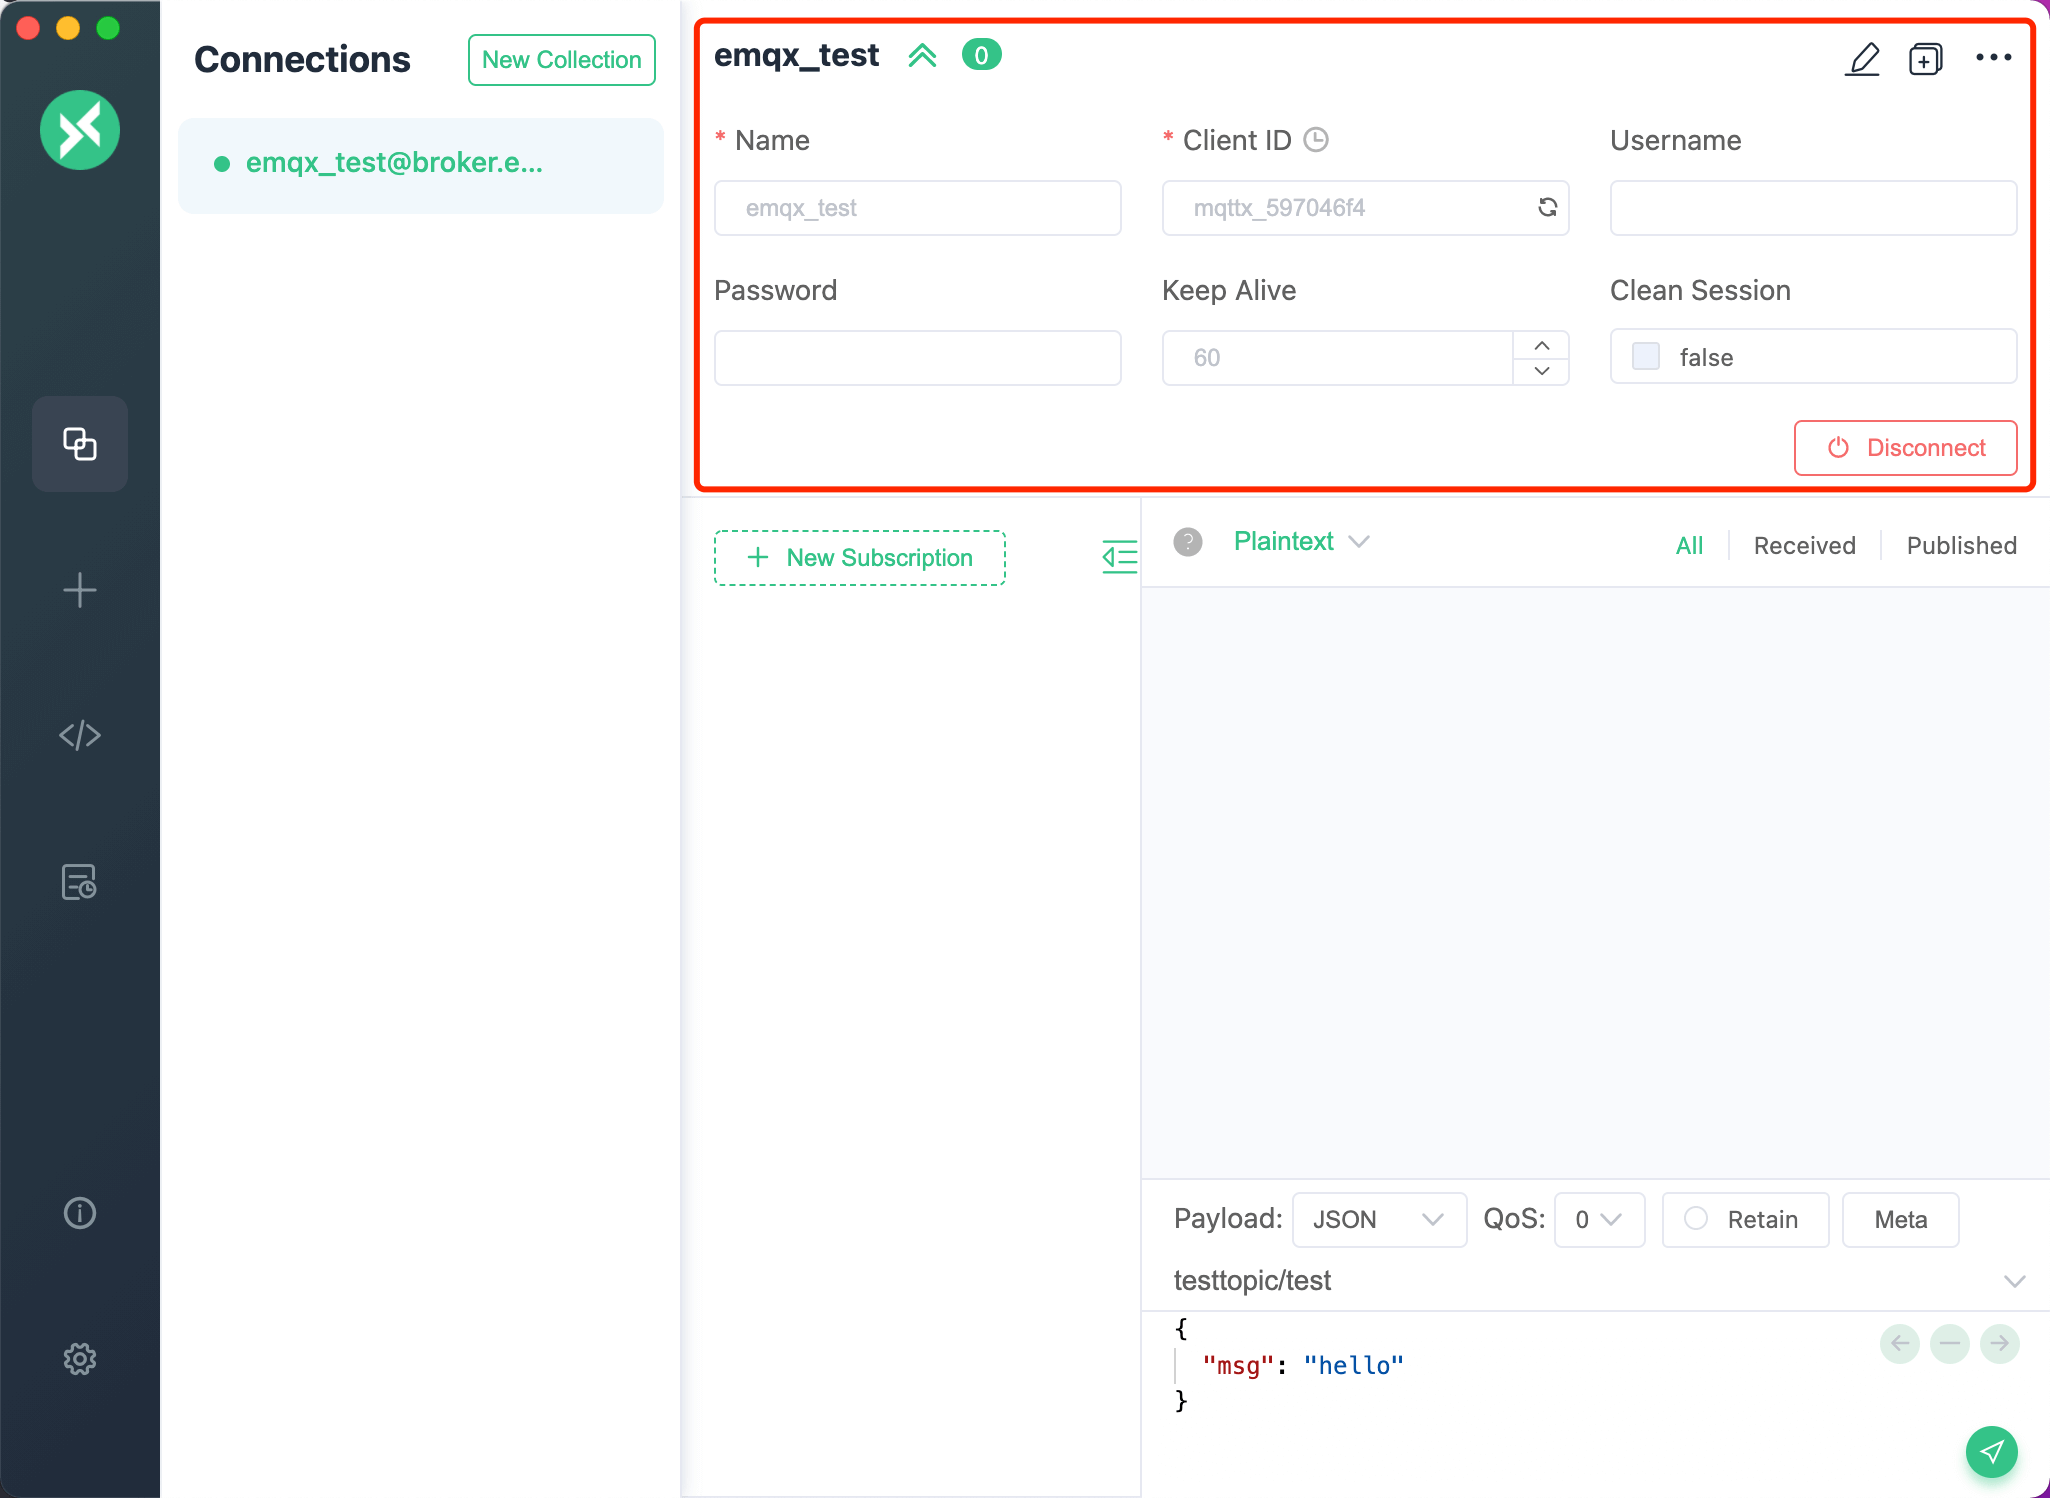
Upon successful connection, you'll access the main interface of the connection. Click the fold button next to the connection name at the top to expand and display the basic configuration information. This feature is handy for swiftly modifying several common connection configurations. Note that modifications require a disconnect, then a re-connect to take effect. After each successful connection, the panel will automatically fold up. In the disconnected state, you can click the configuration button on the right to modify more connection configurations.
Add Subscription
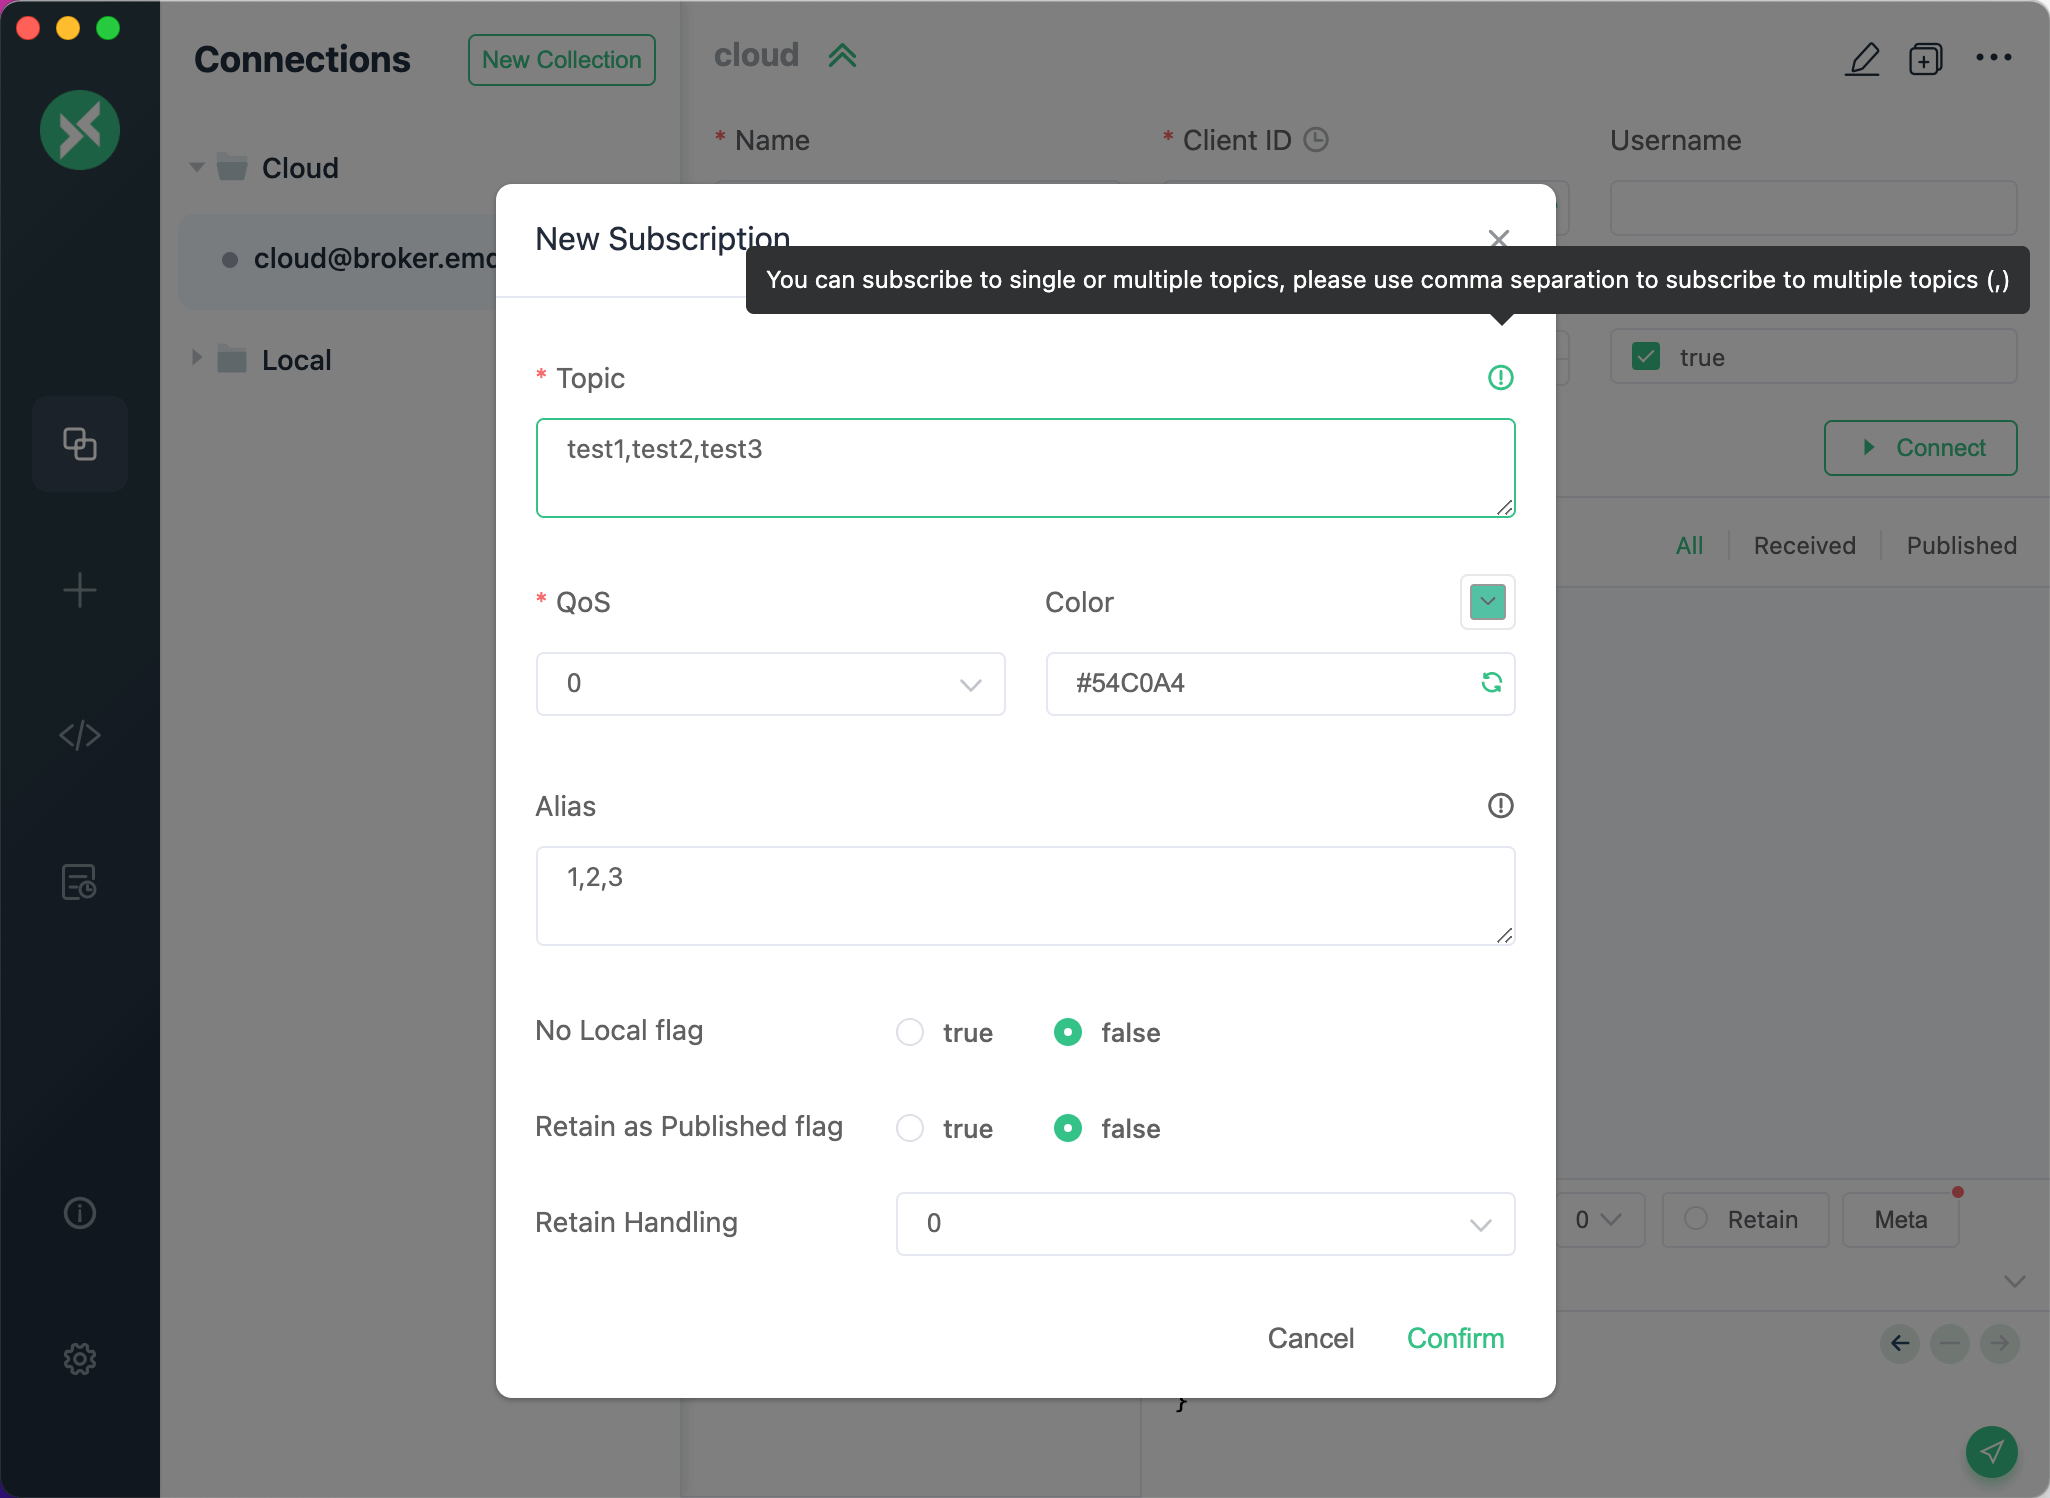
Click the New Subscription button in the lower left corner to swiftly add a Topic. Each Topic can be marked with a color, which can be randomly generated or chosen via the color selector. The rightmost button at the top of the subscription list can hide the subscription list to make more room on the page. After completion, click on the subscribed Topic items in the subscription list for message filtering. The message view will only display the message content subscribed to the current topic. Click again to cancel the filter; You can also directly click other subscribed Topic items to view the corresponding message content. By clicking on the topic name, you can quickly copy the current topic information. When you need to send a message to this topic, you can quickly paste it into the topic input box of the message bar to modify it, and you can quickly complete the operation.
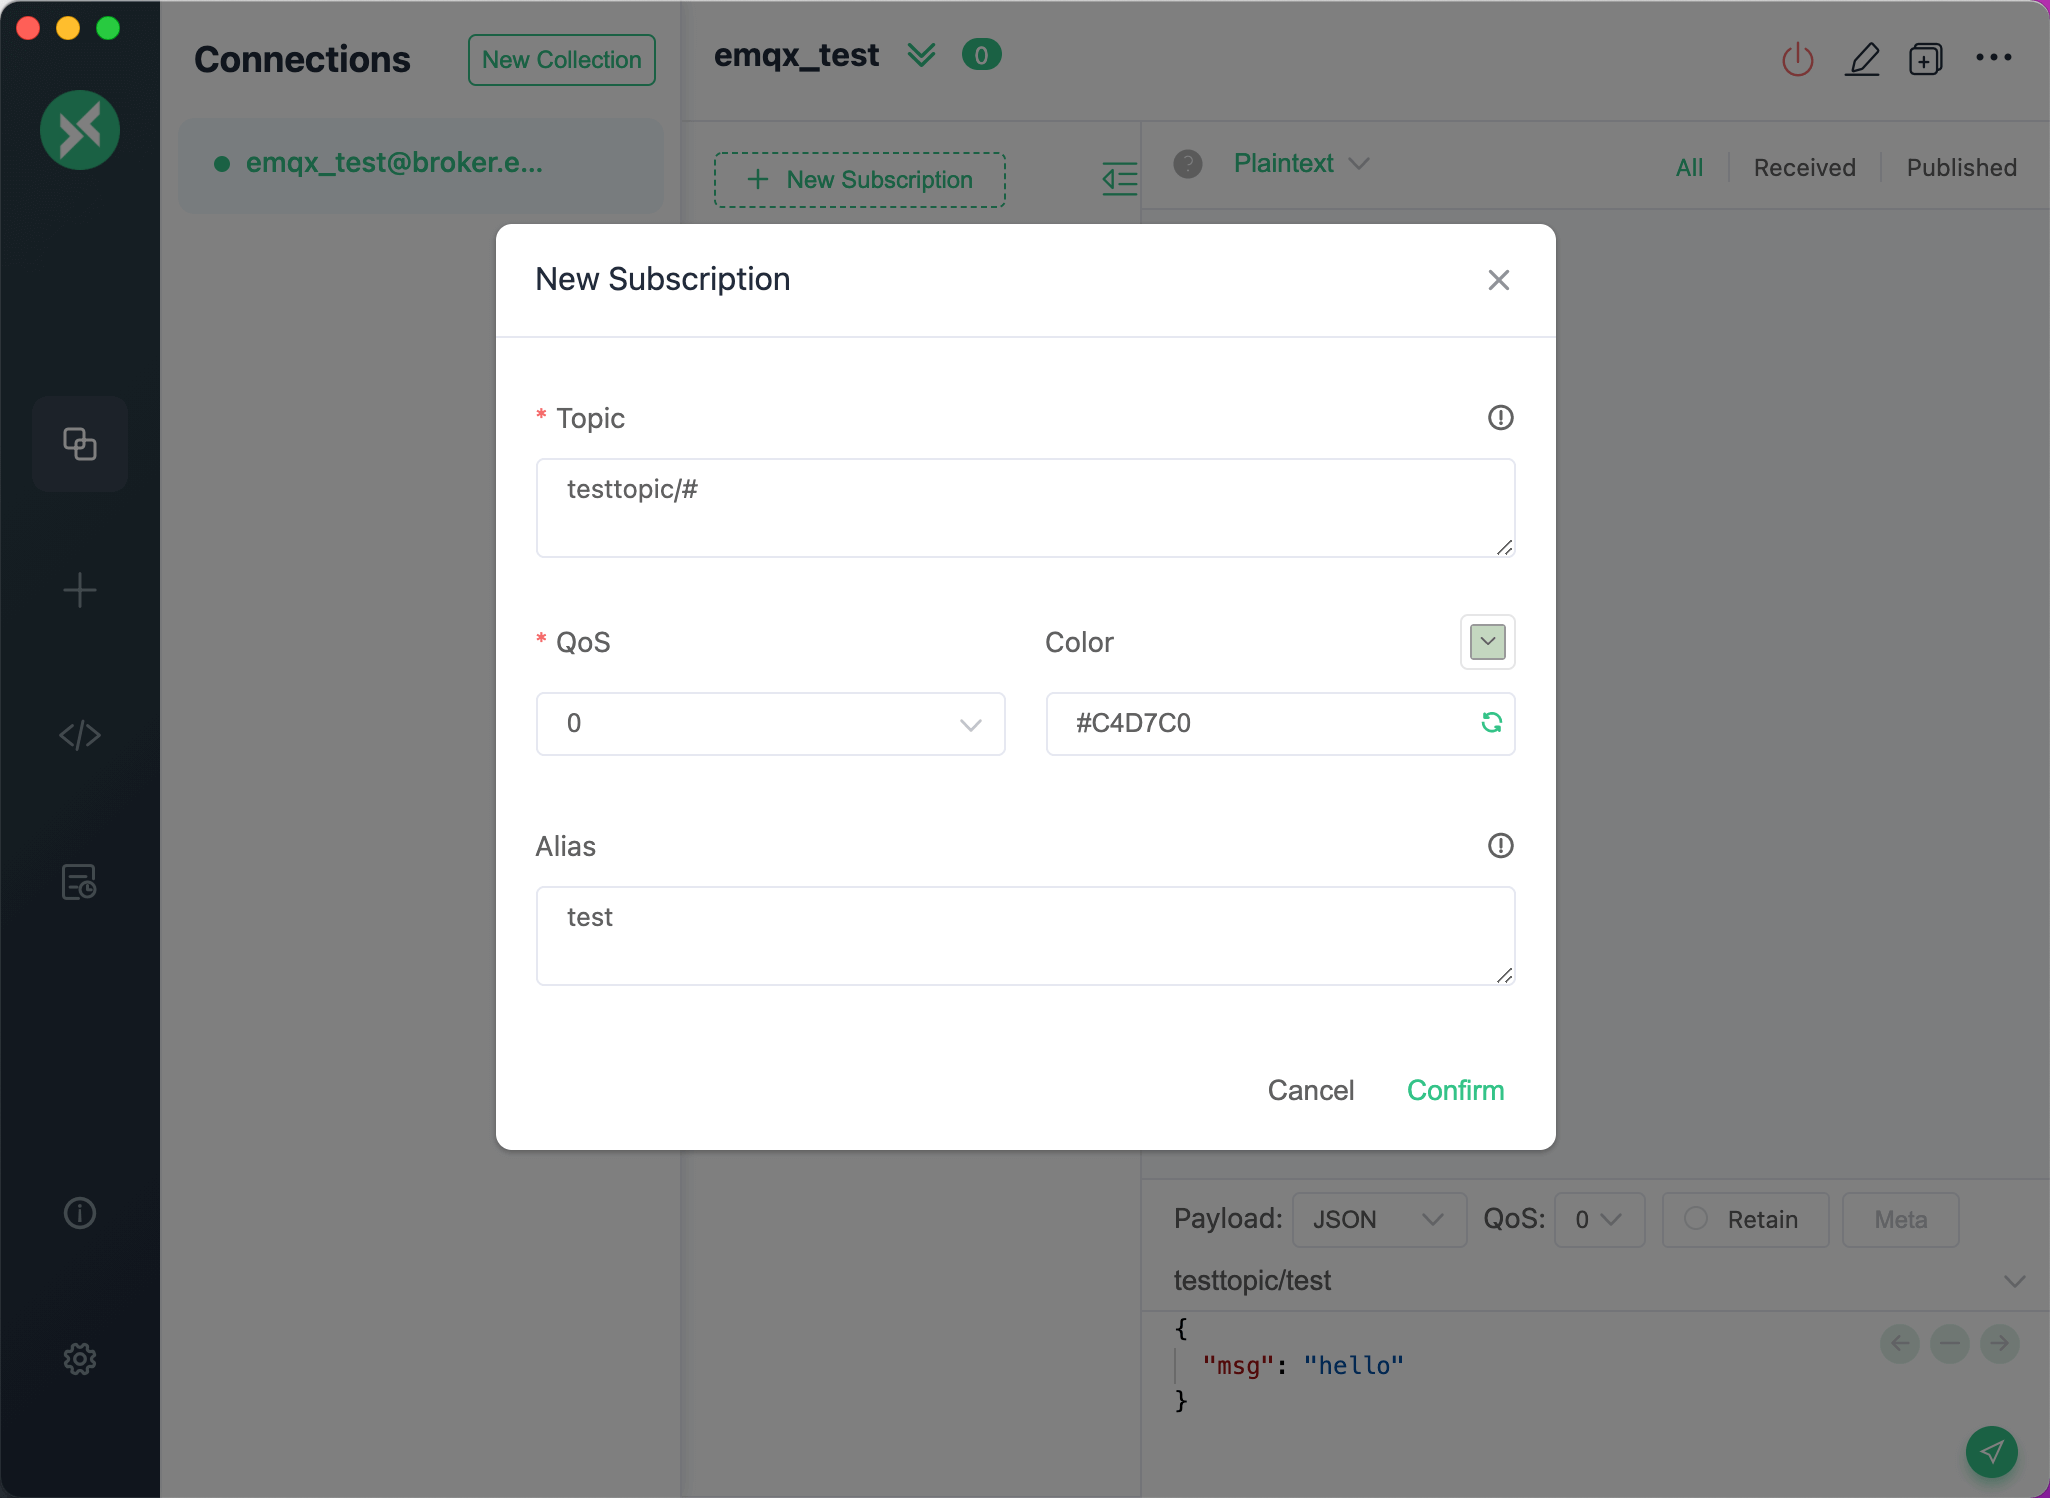
When adding Topic, you can set an alias for each Topic. This option is optional. When the subscription is set and added, the Topic in the subscription list will be displayed as an alias, and hovering over the Topic item will also display the original value of the Topic. This is very helpful when multiple Topics that need to be monitored are too long to distinguish the specific meaning of Topic.

We open the dialog of the subscription topic, in the Topic input box, enter multiple Topics and use comma (,) to split, click to confirm the success of the subscription, we can see that the subscription list contains multiple Topics. for the use of the client layer alias function can also support the simultaneous setting of multiple Topics, the same use of comma separation (,).
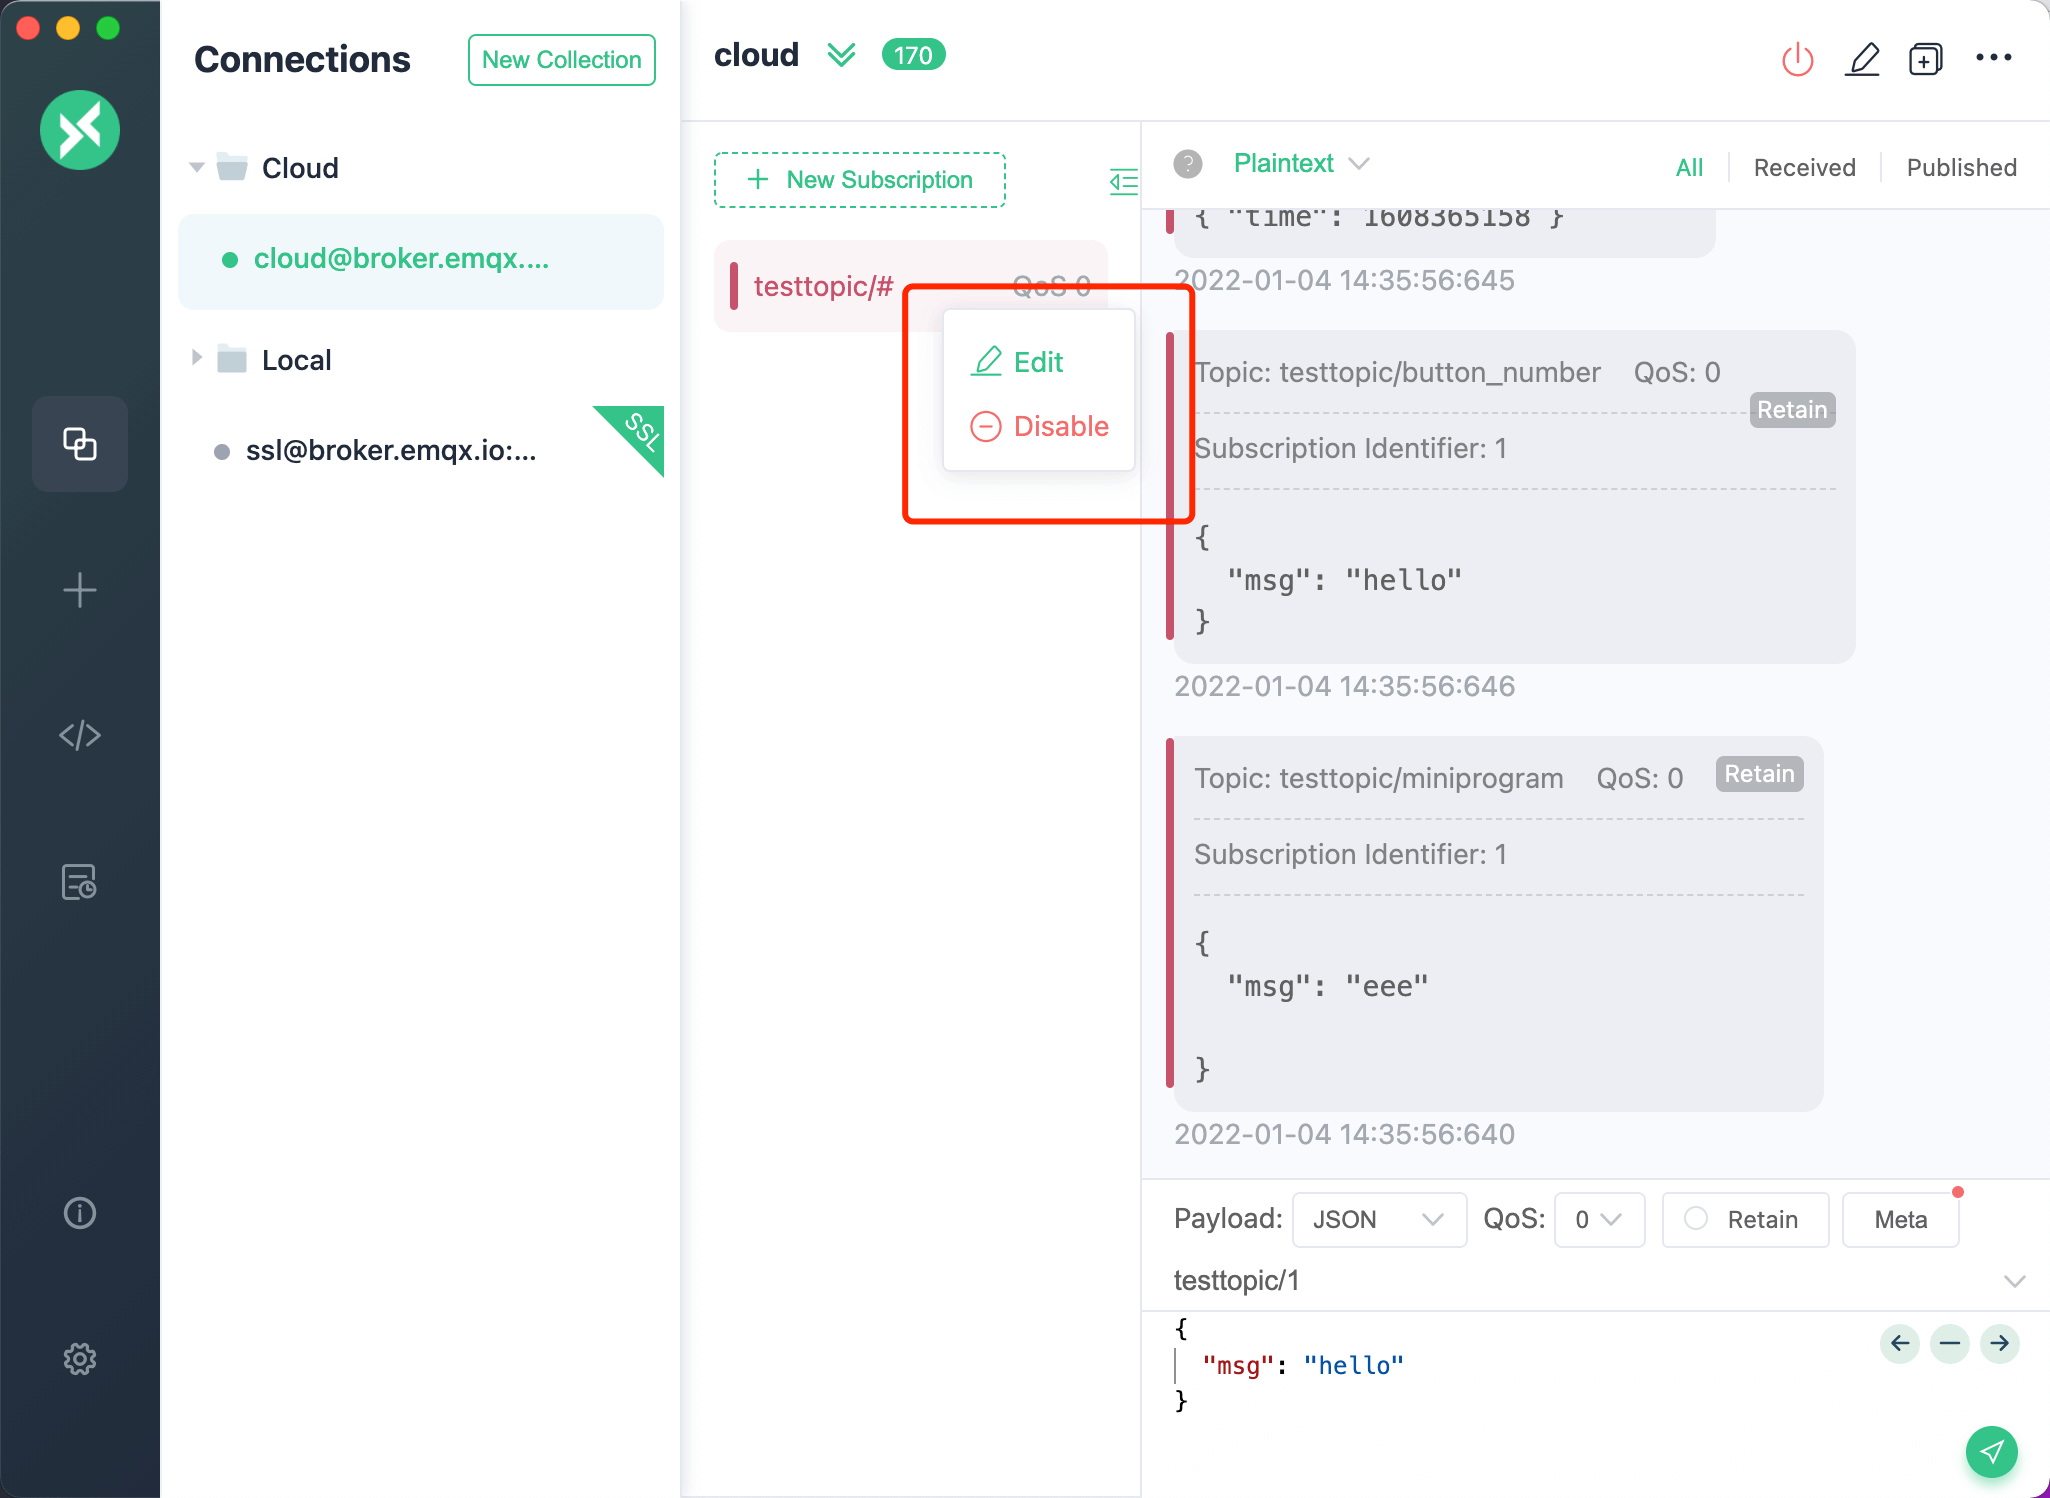
Subscribed Topics support Edit/Disable/Enable functions, right click on the subscribed Topic list item, in the context menu we can quickly choose to edit, disable or enable the operation. When subscribing to too many Topics, sometimes not all the Topic messages you want to receive, in order to avoid subscribing to the same Topic again, the disable function is provided, if you want to receive messages from the Topic again, just enable it again.
Publish and Receiving Messages
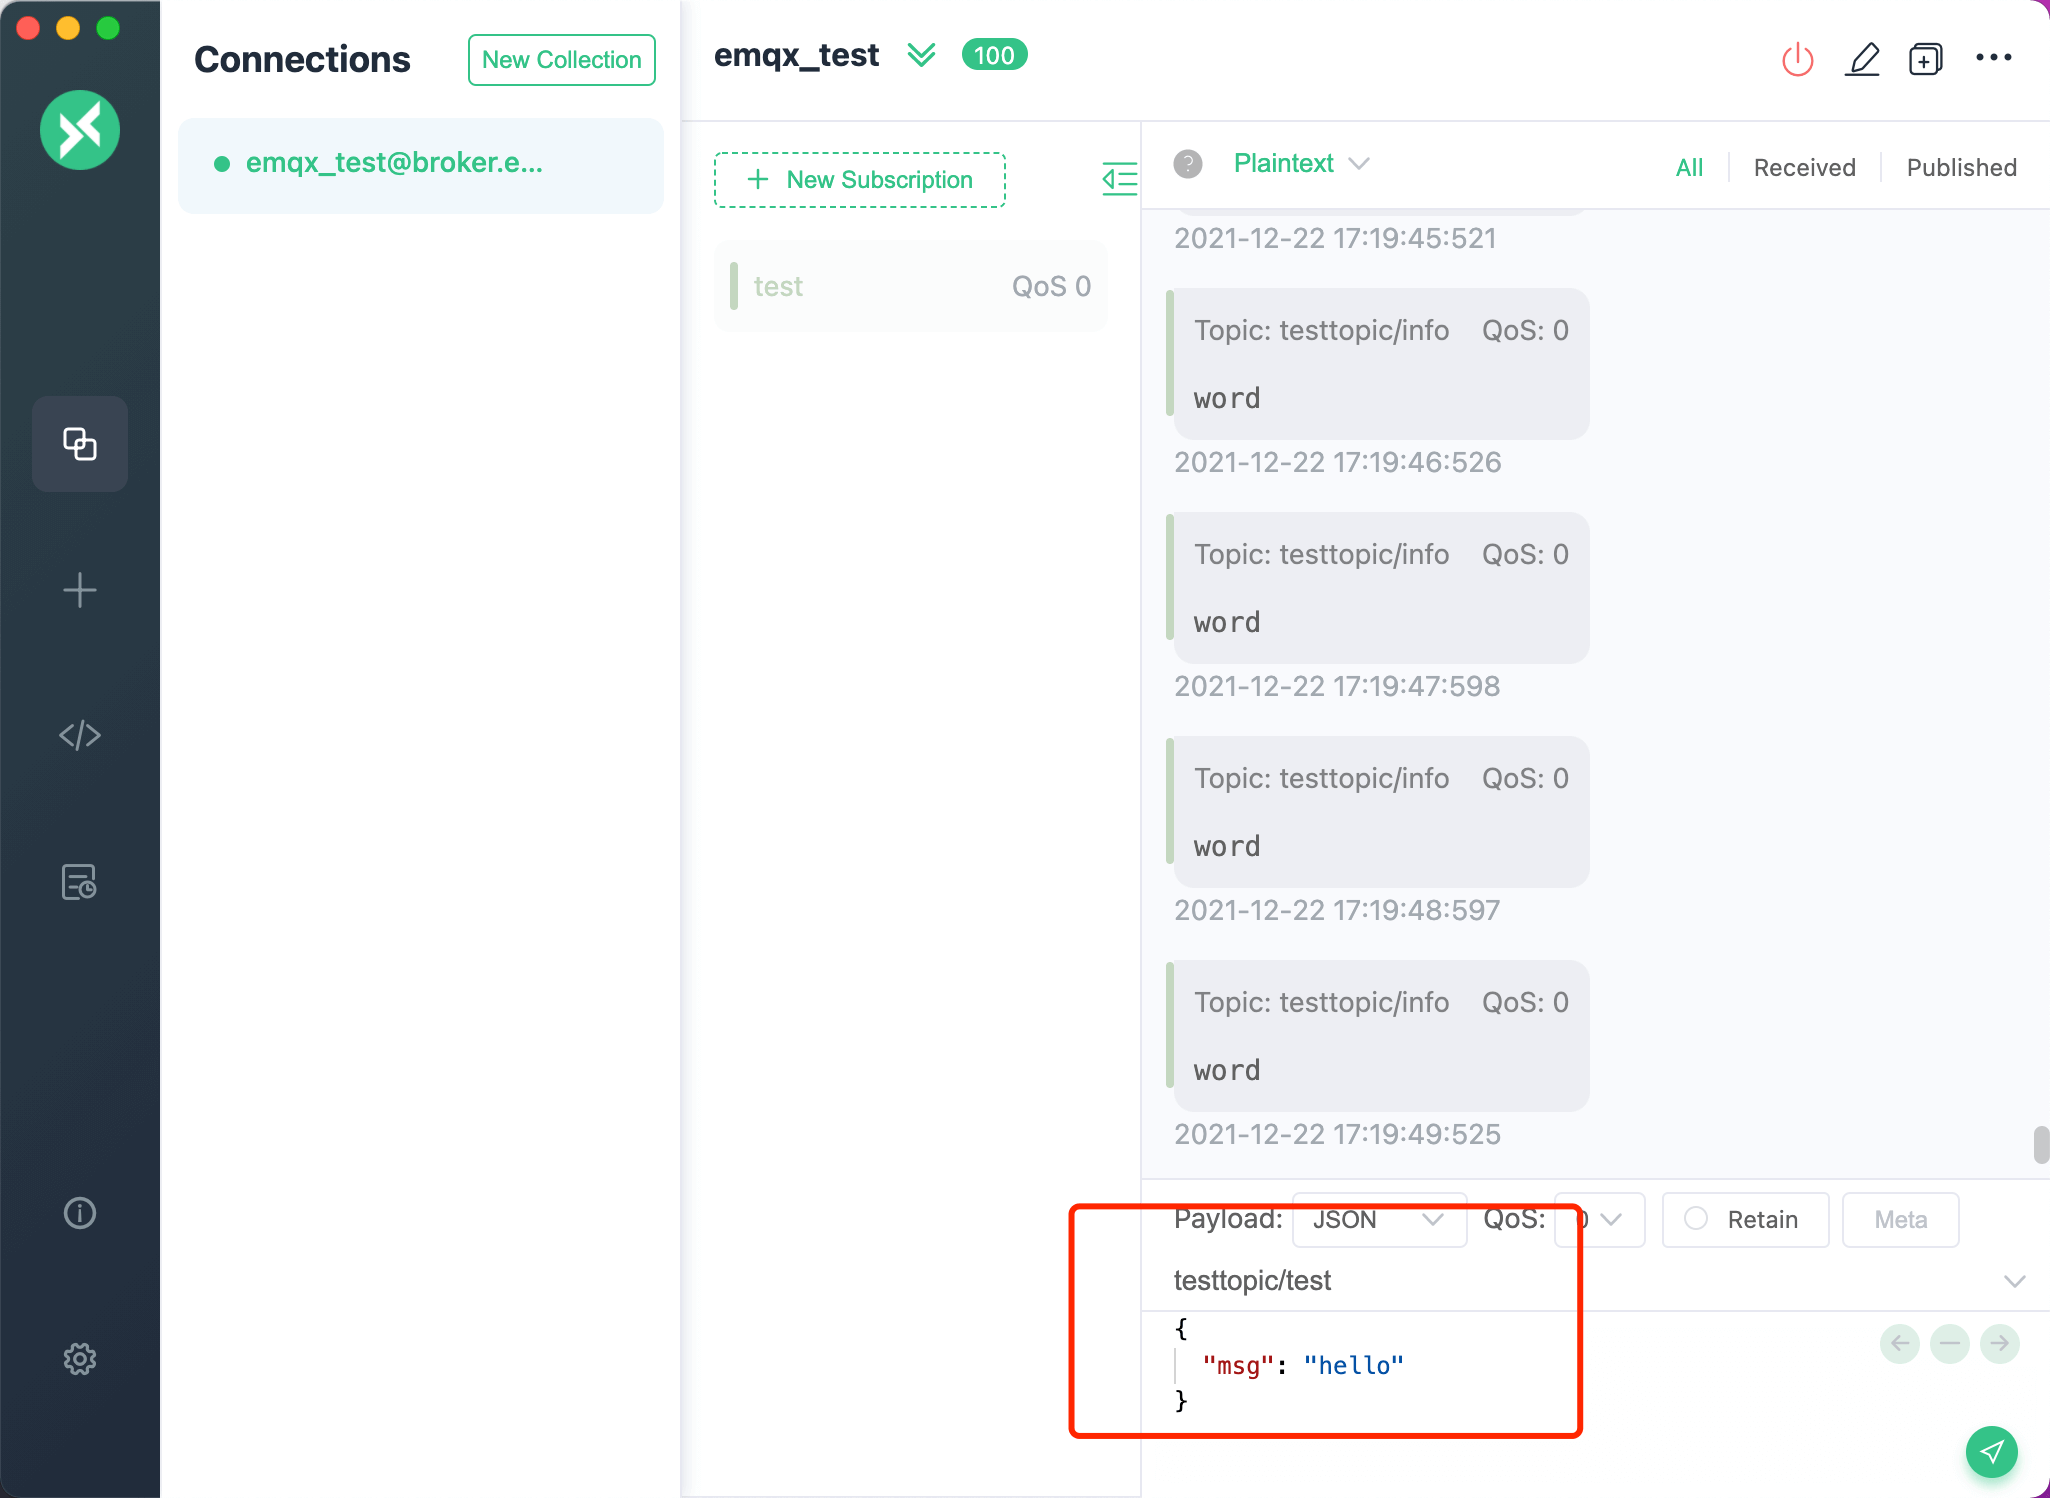
After the Topic is successfully subscribed, you can test the sending and receiving of messages. Fill in the Topic information you just subscribed to in the lower right corner of the page. You can select the values of QoS, Retain, input payload, and click the send button on the far right to send a message to the Topic you just subscribed. After sending successfully, you can immediately receive the message just sent. Note that in the message box, the right column is the sent message, and the left column is the received message. macOS users can use the command + enter shortcut to quickly send messages, and other users can use the control + enter shortcut to do that.
Messages can be quickly converted between Base64, Hex, JSON, Plaintext, CBOR, and MsgPack formats in the payload option. The same format can be used for decoding messages in the list above.
Note: CBOR and MsgPack are efficient binary formats, offering better compression than JSON for large data. These use JSON for input/output.
For advanced encoding/decoding, including Protobuf and Avro, use the Schema tab on the Script page.
So far, the testing of an MQTT message is completed.